01. Open the material on psp / duplicate (shift+d)
/ close the originals
02. Choose a color and write down its RGB.
N.T.: to see the RGB of a color, activate the Dropper Tool
and position the mouse over the color and note the values
that appear
03. Open a new transparent image measuring 900 x 600px
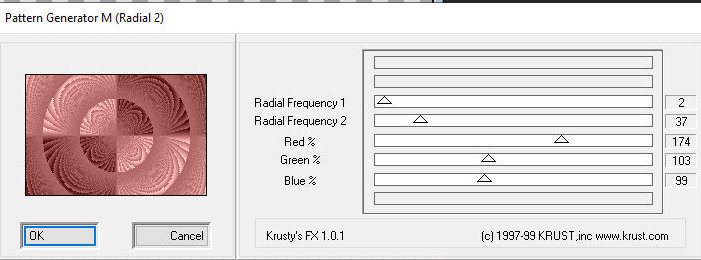
04. Effects / Plugins / Krusty's FX Vol. II 1.0 / Pattern
Generator M (Radial 2). Put the RGB values you wrote down
into Red , Green and Blue
05. Layers/Duplicate
06. Image/resize: 80% - all layers unchecked
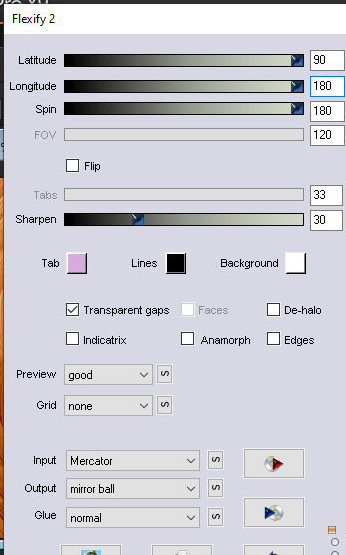
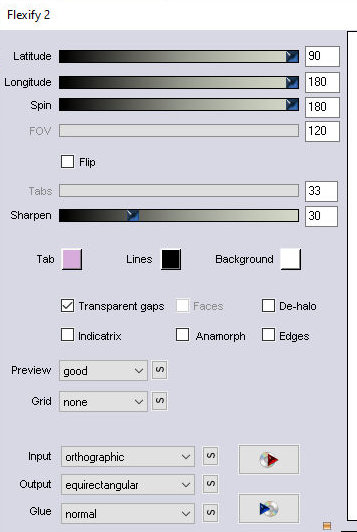
07. Effects / Plugins / Flaming Pear / flexify2
08. Layers / duplicate
09. Image / Mirror / Mirror Vertical
10. Merge down
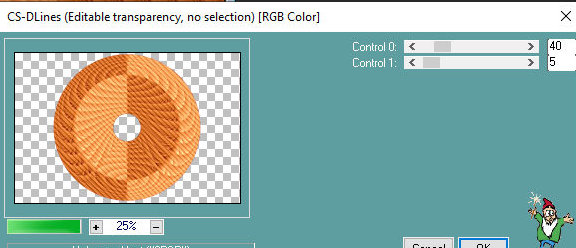
11. Effects / Plugins / Carolaine and sensitivity /
CS_DLines
12. Drop shadow:5 5 100 30 black
Repeat with negative V and H
13. Activate the Raster 1 layer
14. Layers/duplicate
15. Effects / Plugins / Flaming pear / flexify 2
16. Layers/Duplicate
17. Image / Mirror / Mirror Vertical
18. Merge down
19. Image / Mirror / Mirror Horizontal
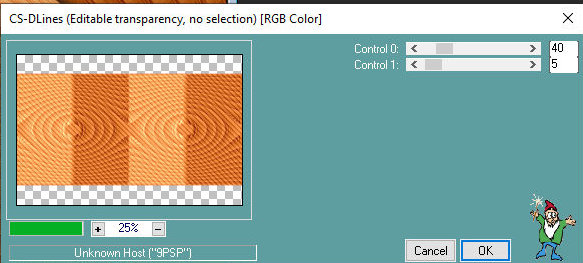
20. Effects / Plugins; Carolaine and sensitivity / CS_DLines
igual ao anterior
21. Drop Shadow: 5 5 100 30 black
Repeat with negative V and H
22. Activate the Raster 1 layer
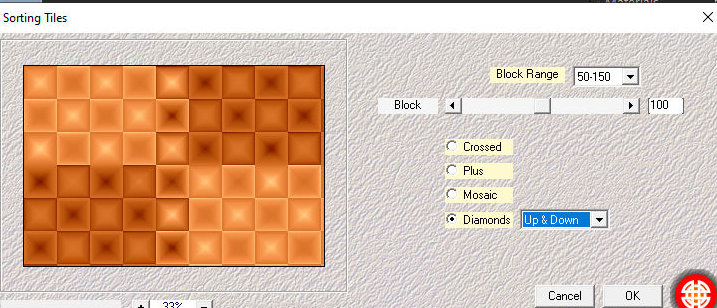
23. Effects / Plugins / Mehdi / sorting tiles
24. Layers/duplicate
25. Activate the Copy of Raster 1 layer
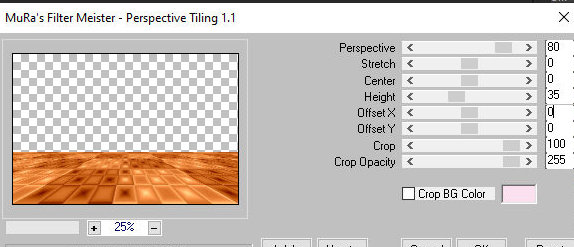
26. Effects / Plugins / Mura's Meister / Perspective Tiling
27. Layers/duplicate
28. Image / Mirror / Mirror Vertical
29. Image / Mirror / Mirror Horizontal
30. Image / add borders / symmetric marked / 2px / black
31. Copy (the image will remain in memory)
32. Selections / select All
33. Image / add borders / symmetric marked / 50px / black
34. Selections/Invert
35. Paste the previously copied image into the selection
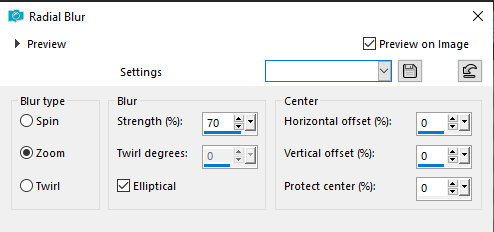
36.Adjust/blur/Radial Blur
37. Select none
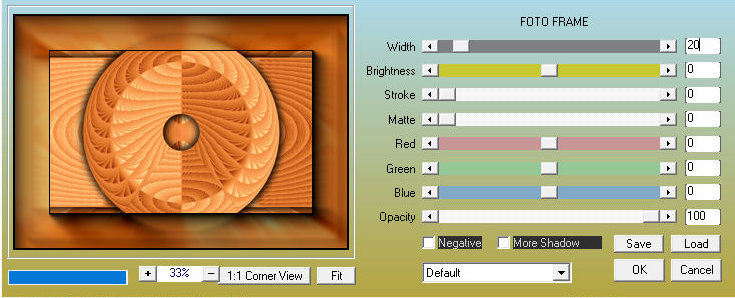
38. Effects / Plugins / AAA Frame / Photo Frame
39. Effects / Plugins / AAA frames / Photo Frame
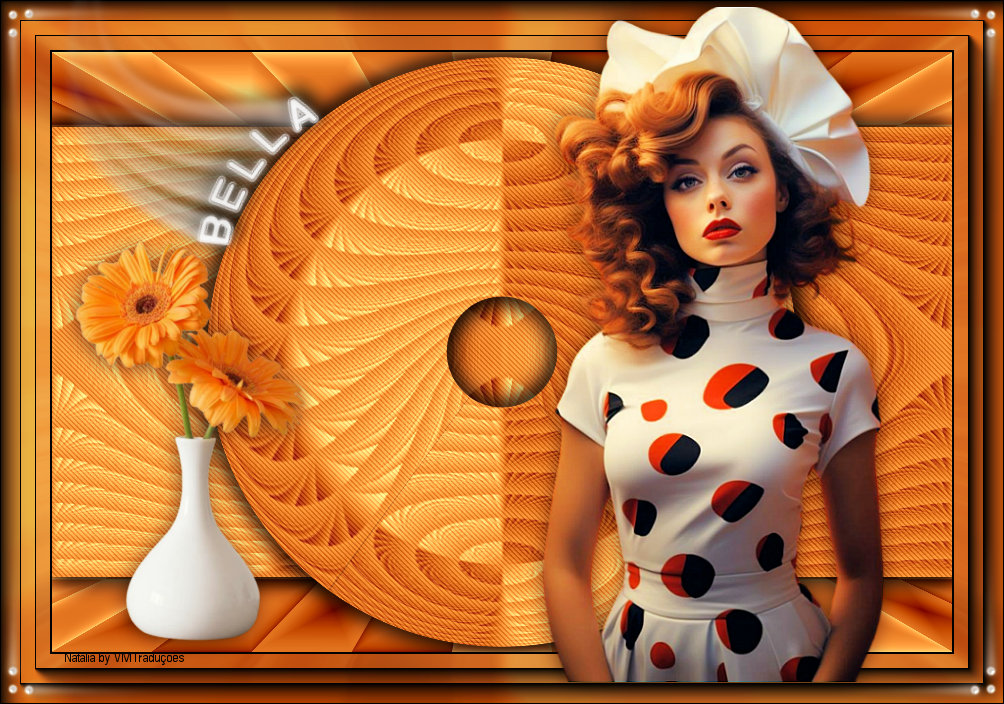
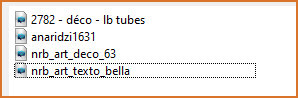
40. Copy the tube character and paste it as a new layer
41. Make the necessary adjustments (resize, Drop shadow,
position)
42. Copy the decorative tube and paste as a new layer
43. Make the necessary adjustments (resize, Drop shadow,
position)
44. Copy the tube deco [nrb_art_deco_63] and paste as a new
layer
45. Position in the upper left corner according to the model
46. Layers/duplicate
47. image / Mirror / Mirror Horizontal
48. Merge down
49. Image / Mirror / Mirror Vertical
50. Merge All
51. Image / Resize: width=950px - all layers checked
52.Adjust/sharpness/Sharpen
53. Copy the tube text and paste it as a new layer
54. Position on the right side according to the model
55. Merge all
56. Put your signature
57. Save as jpeg
*