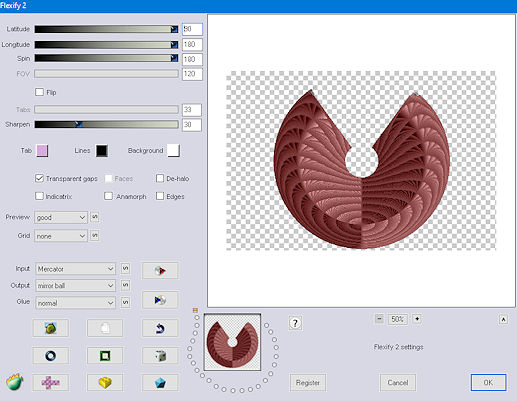
9 -
Effects/ Plugins/ Flaming Pear/ Flexify 2/ 90/ 180/
180/ 120/ 33/ 30/ Orthographic/ Equirectangular/
Normal
10 - Layers/
duplicate
11 -
Image/ Mirror Vertical
Layers/ Merge/ Merge Down
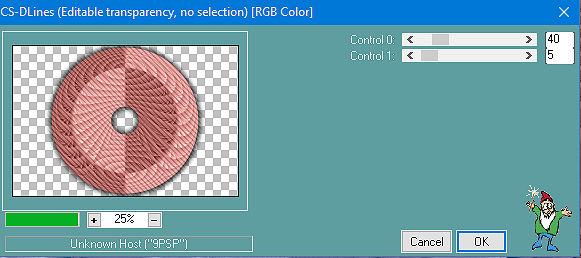
12 -
Image/ Mirror/ Mirror Horizontal
Effects/ Plugins/ Caroline And Sensibility/
CS-DLines/ 40/ 5
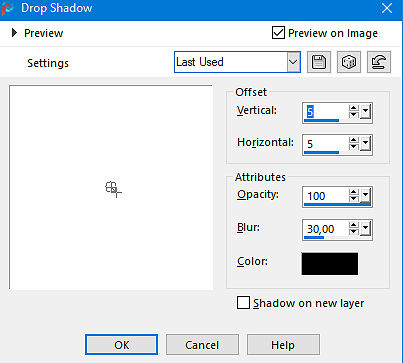
13 -
Effects/ 3D Effects/ Drop Shadow/ 5/ 5/ 100/ 30,00/
Preto. Repita com os valores H e V negativos
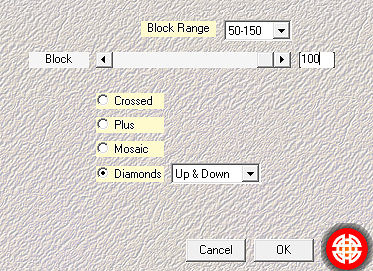
14 -
Volte à Raster 1
Effects/ Plugins/ Mehdi/ Sorting Tiles/
50-150/ Block/ 100/ Diamonds/ Up & Down
15 -
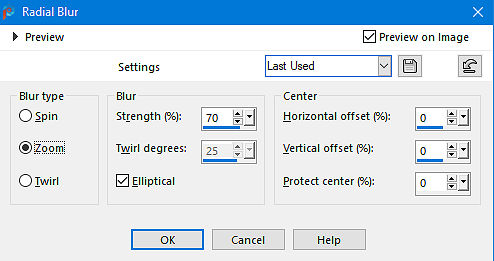
Layers/ Duplicate
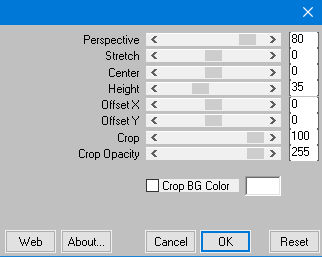
16 - Na layer Copy of Raster1: Plugins/ MuRa's
Meister/ Perspective Tiling/ 80/ 0/ 0/ 35/ 0/ 0/
100/ 255
17 -
Layers/ Duplicate
Image/ Mirror/ Mirror Vertical. Image/ Mirror/
Mirror Horizontal
18 -
Image/ Add Borders/ Symmetric marcado/ 2/ Preto
Edit/ Copy
19 -
Selections/ Select All
Image/ Add Borders/ Symmetric marcado/ 50/
Preto
20 -
Selections/ Invert
Edit/ Paste into Selection
21 -
Adjust/ Blur/ Radial Blur/ Zoom/ 70/ Elliptycal
marcado/ 0/ 0/ 0
22 -Selections/ Select None
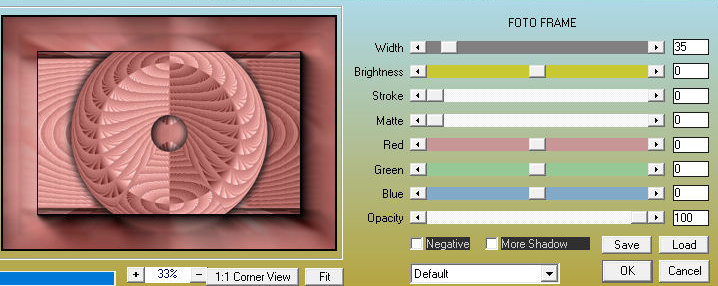
23 -
Effects/ Plugins/ AAA Frames/ Foto Frame/ 35/ 0/ 0/
0/ 0/ 0/ 0/ 100/ Default
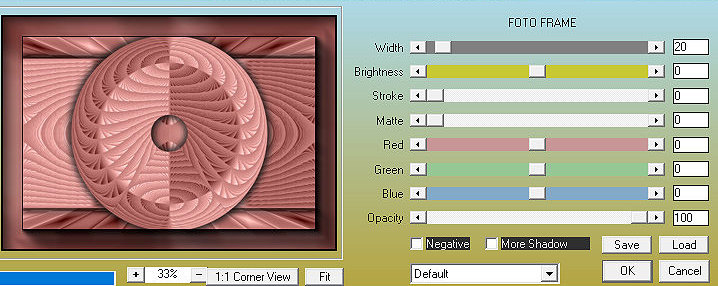
24 -
Effects/ Plugins/ AAA Frames/ Foto Frame/ 20/ 0/ 0/
0/ 0/ 0/ 0/ 100/ Default
25 -
Edit/ Copy no tube
Edit/ Paste as New Layer
26 -
Redimencione, se necessário
Posicione e aplique uma sombra a gosto
27 -
Edit/ Copy no tube decorativo
Edit/ Paste as New Layer
28 -
Redimencione, se necessário
Posicione e aplique uma sombra a gosto
29 -
Edit/ Copy no deco
Edit/ Paste as New Layer
30 -
Posicione no canto superior esquerdo, como no modelo
31 -
Layers/ Duplicate. Image/ Mirror/ Mirror Horizontal
Layers/ Duplicate. Image/ Mirror/ Mirror
Vertical
Layers/ Duplicate. Image/ Mirror/ Mirror
Horizontal
32 - Layers/ Merge/ Merge All (Flatten)
33 -
Redimencione, alterando width para 950 pixels
34 -
Adjust/ Sharpness/ Sharpen
35 -
Edit/ Copy no texto
Edit/ Paste as New Layer
36 -
Posicione do lado direito, como no modelo
Layers/ Merge/ Merge All (Flatten)
37 -
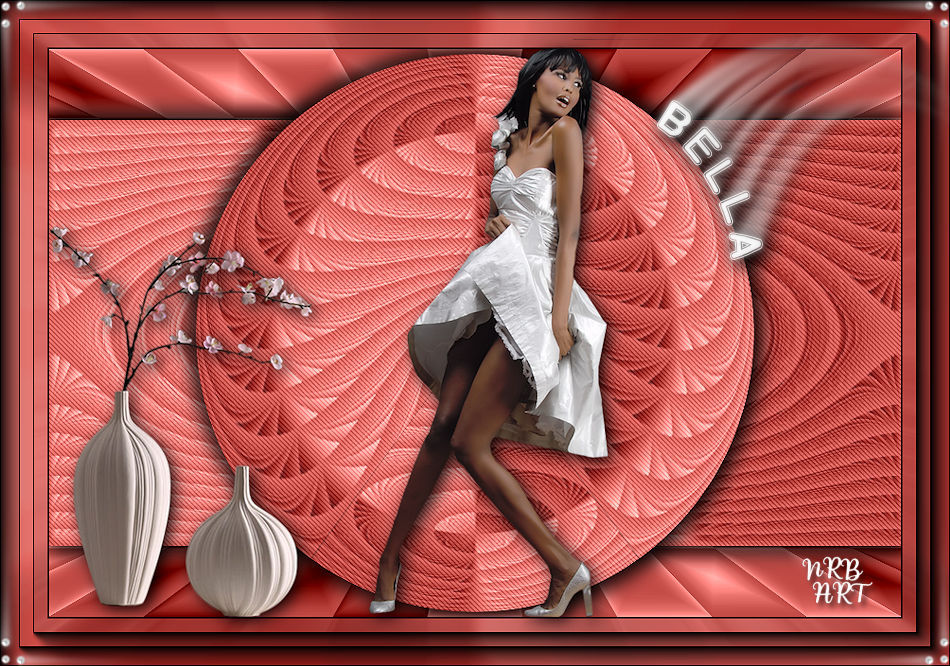
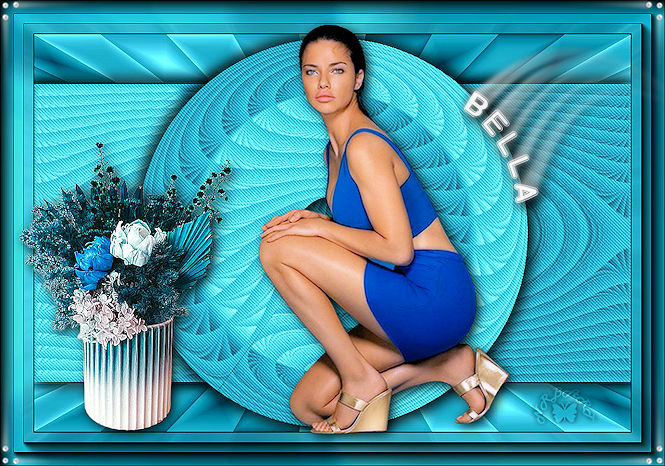
Assine e salve em jpeg
Outro modelo:
Créditos:
Tube feminino1: Ana Ridzi
Tube
decorativo1: LB Tubes
Tube feminino2:
Calligraphic
Tube decorativo2: Calligraphic
NRB_Art_Deco_63
NRB_Art_Texto_Bella
Tutorial: Natália Raposo / 11 / 2023