|
Tutorial de Alessandra
Link tutorial original:
UnPlugged Meister
|
| Tubes Principais:
VM Tubes
|
| Link material:

 |
| Plugins: UnPlugged Tools / REM
Lotus
UnPlugged Tools / Wavemaker
Mura's Meister / Perspective Tiling 1.1
|
SCRIPT
01. Open the material / Duplicate (shift+d) / close the
originals
02. Choose a color from your tube and place it in the foreground
and place black in the background
03. Open a new transparent image measuring 900 x 600px
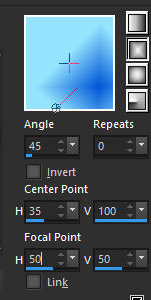
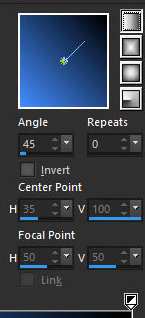
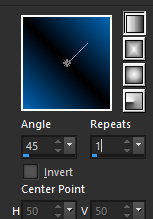
04. Paint the image with this Rectangular gradient
angle=45 / repeats=0 / invert unchecked / center point-35/100 /
focal point=50/50
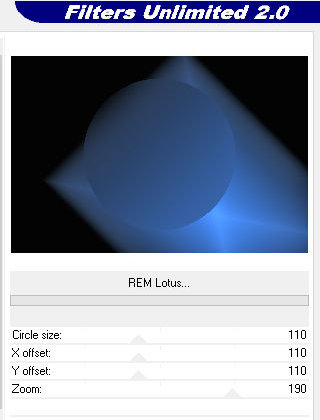
05. Effects / Plugins / Unlimited 2/ UnPlugged Tools / REM Lotus
110 / 110 / 110 /190
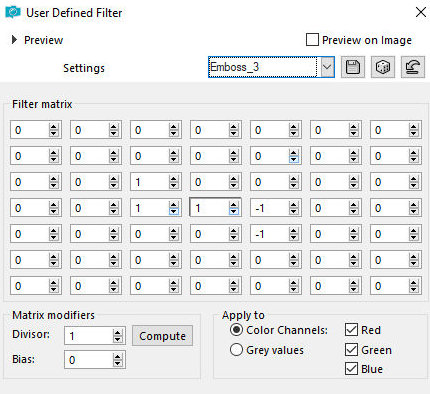
06. Effects / User Defined Filters / Emboss 3
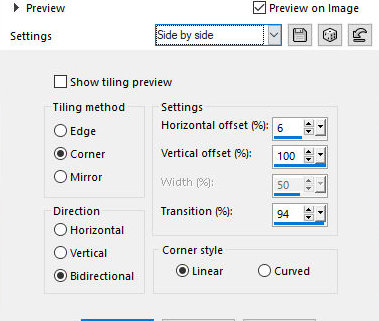
07. Effects / Image Effects / Seamless Tiling - preset: side by
side
08. Layers / New Raster layer
09. paint with the foreground color
10. Layers / New mask Layer / From Image / Mask
[leteia_001_2020]
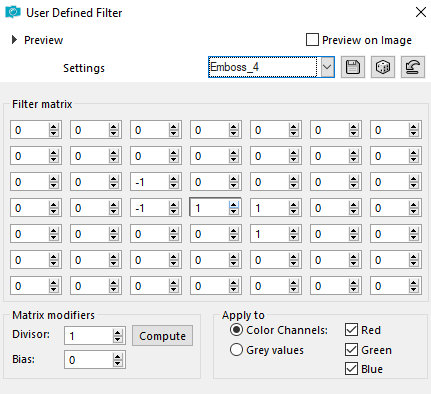
11. Effects / User Defined Filters / emboss 4
12. Merge Group
13. Layers / New Raster Layer
14. Paint with this Linear gradient
angle=45 / repeats=0 / invert unchecked
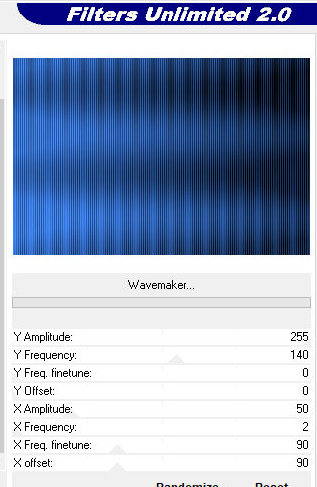
15. Effects / Plugins / Unlimited 2 / UnPlugged Tools /
Wavemaker
255 140 0 0 50 2 90 90
16. Layers / Duplicate - apply 2 times (3 layers in total)
17. Rename these layers to Raster 2, Raster 3 and Raster 4
18. Remove the visibility of layers 3 and 4 by clicking on the
eye
19. Activate the Raster 2 layer
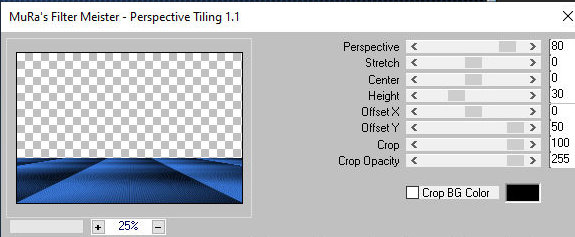
20. Effects / Plugins / Mura's Meister / Perspective Tiling
80 0 0 30 0 50 100 255
21. Drop shadow: -10 0 85 25 black
22. Remove the visibility of Raster layers 2 and 4
23. Activate and return the visibility of the Raster 3 layer
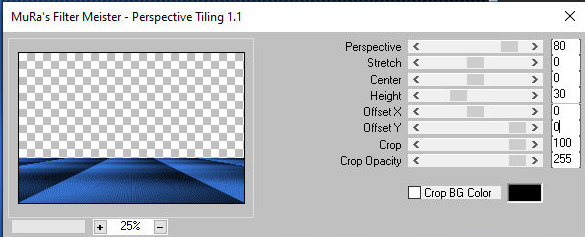
24. Effects / Plugins / Mura's meister / Perspective Tiling
80 0 0 30 0 0 100 255
25. Drop shadow: -10 0 85 25 black
26. Remove the visibility of Raster layers 2 and 3
27. Activate and return the visibility of the Raster 4 layer
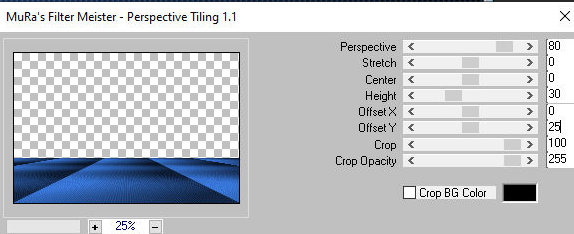
28. Effects / Plugins / Mura's Meister / Perspective Tiling
80 0 0 30 0 25 100 255
29. Drop shadow: -10 0 85 25 black
30. Copy the tube character and paste it as a new layer
31. Make necessary adjustments: Resize/Sharpen/position
32. Drop shadow: 0 15 50 25 black
33. Select the background layer - Raster 1
34. Selections / Select All
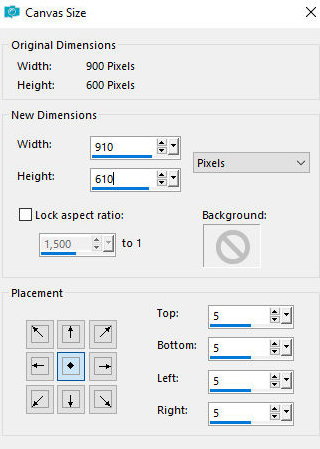
35. Image / Canvas size - 910 x 610 5 5 5 5
36. Selections/Invert
37. Paint it black
38. Select none
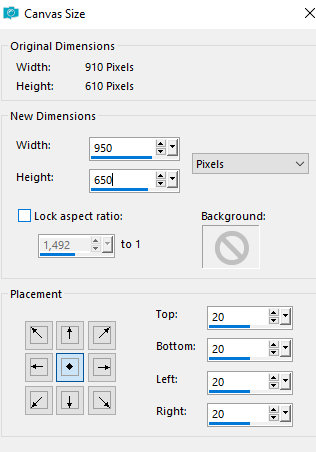
39. Selections / select All
40. Image / Canvas size: 950 x 650 20 20 20 20
41. Selections / Invert
42. Paint with this Linear gradient
angle=45 / repats=1 / invert checked
43. Select none
44. Put your signature
45. Layers / Arrange / Bring to top
46. Image / Resize: width=900px - all layers checked
ANIMATION SHOP
47. On PSP: remove the visibility of Raster layers 3 and 4 and
return the visibility of Layer Raster 2
48. Edit / Copy / Copy Special / Copy Merged
49. On Animation Shop: Edit/Paste as New Animation
50. On PSP: Return the visibility of the Raster 3 layer
51. Remove the visibility of Raster layers 2 and 4
52. Edit / Copy special / Copy Merged
53. On Animation: Edit / Paste / After Current Frame
54. On PSP: Return Layer Raster 4 visibility
55. Remove the visibility of Raster layers 2 and 3
56. Edit / Copy Special / Copy Merged
57. On Animation: Edit / paste / After Current Frame
58. Save as GIF