01- Abra o PSP e o tube
02- Edit / Copy. Feche os originais
03- Edit / Paste / As New Image
04- Escolha uma cor do tube
Coloque essa cor no foreground e preto no background
05- Abra uma image de 900 x 600 e pinte com um gradiente:
Rectangular / Angle: 45 / Repeats: 0 / Invert desmarcado
Center Point: 35 / 100
Focal Point: 50 / 50
06- Effects / Plug-ins / UnPlugged Tools / REM Lotus:
110 / 110 / 110 / 190
07- Effects / User Defined Filters: Emboss_3
08- Effects / Image Effects / Seamless Tiling: Side by Side
09- Adicione nova Layer e pinte com a cor do tube(foreground)
10- Layers / New Mask Layer / From Image: leteia_001_2020
11- Effects / User Defined Filters: Emboss_4
12- Layers / Merge / Merge group
13- Adicione nova Layer
14- Pinte com um gradiente:
Linear / Angle: 45 / Repeats: 0 / Invert desmarcado
15- Effects / Plug-ins / UnPlugged Tools / Wavemaker:
255/ 140 / 0 / 0 / 50 / 2 / 90 / 90
16- Layers / Duplicate 2 vezes (total de 3 Layers)
17- Renomeie para Raster 2 / Raster 3 / Raster 4
18- Tire a visibilidade das Layers 3 e 4
19- Na Raster 2:
Effects / Plug-ins / MuRa’s Meister / Perspective Tiling 1.1:
80 / 0 / 0 / 30 / 0 / 50 / 100 / 255
20- Effects / 3D Effects / Drop Shadow:
-10 / 0 / 85 / 25 / #000000
21- Tire a visibilidade das Layers 2 e 4
22- Na Raster 3:
Effects / Plug-ins / MuRa’s Meister / Perspective Tiling 1.1:
80 / 0 / 0 / 30 / 0 / 0 / 100 / 255
23- Effects / 3D Effects / Drop Shadow:
-10 / 0 / 85 / 25 / #000000
24- Tire a visibilidade das Layers 2 e 3
25- Na Raster 4:
Effects / Plug-ins / MuRa’s Meister / Perspective Tiling 1.1:
80 / 0 / 0 / 30 / 0 / 25 / 100 / 255
26- Effects / 3D Effects / Drop Shadow:
-10 / 0 / 85 / 25 / #000000
27- Edit / Copy no tube principal
28- Edit / Paste as New Layer
Resize e Sharpen se necessário
29- Effects / 3D Effects / Drop Shadow:
0 / 15 / 50 / 25 / #000000
30- Selecione a Layer de fundo (Raster 1)
31- Selections / Select All
32- Image / Canvas Size:
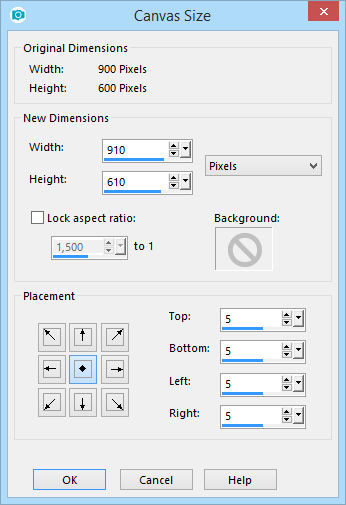
33- Selections / Invert. Pinte com #000000
34- Selections / Select none
35- Selections / Select All
36- Image / Canvas Size:

37- Selections / Invert. Pinte com um gradiente:
Linear / Angle: 45 / Repeats: 1 / Invert marcado
Selections / Select none
38- Adicionar nova Layer e assinar seu trabalho
39- Layer / Arrange / Bring to top
40- Image / Resize: Width: 900 / Lock aspect ratio marcado / Resize
all Layers marcado
Agora vamos para o Animation Shop
01- Ainda no PSP, deixe as Raster 3 e 4 fechadas
02- Edit / Copy Special / Copy Merged
03- Va para o Animation Shop
04- Paste as New Animation
05- Volte ao PSP
06- Volte a visibilidade da Raster 3
Feche as Raster 2 e 4
07- Edit / Copy Special / Copy Merged
08- Va para o Animation Shop
09- Edit / Paste / After Current Frame
10- Volte ao PSP
11- Volte a visibilidade da Raster 4
Feche as Raster 2 e 3
12- Edit / Copy Special / Copy Merged
13- Va para o Animation Shop
14- Edit / Paste / After Current Frame
15- Salve como gif
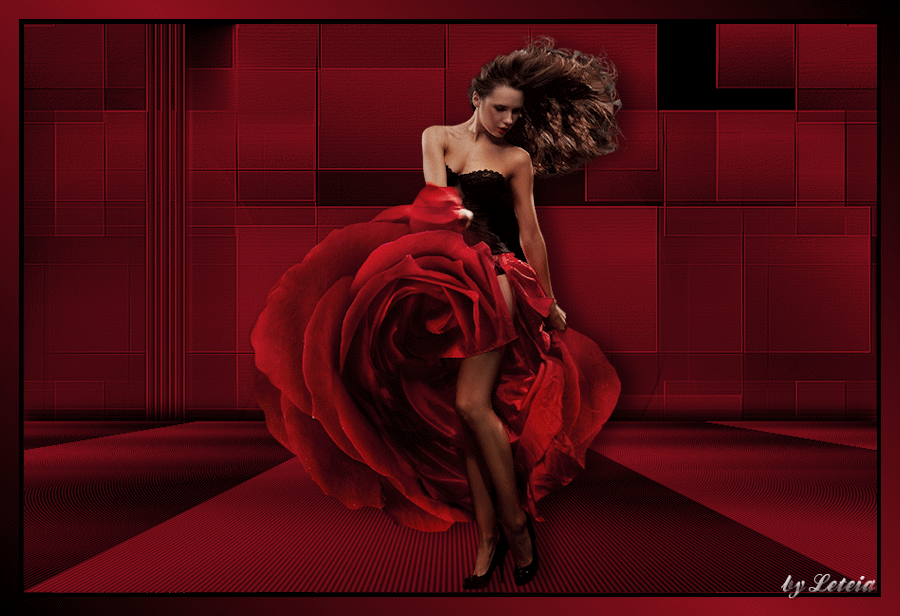
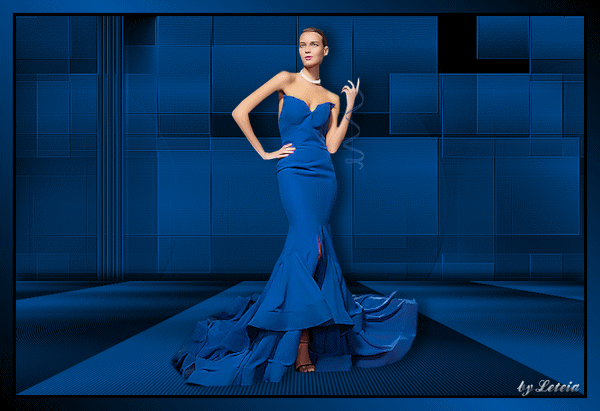
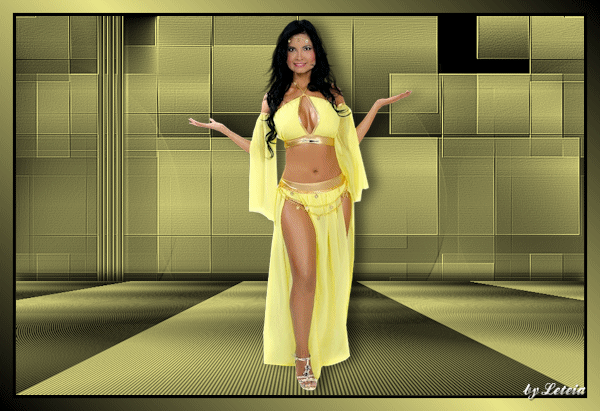
Outros exemplos: