|
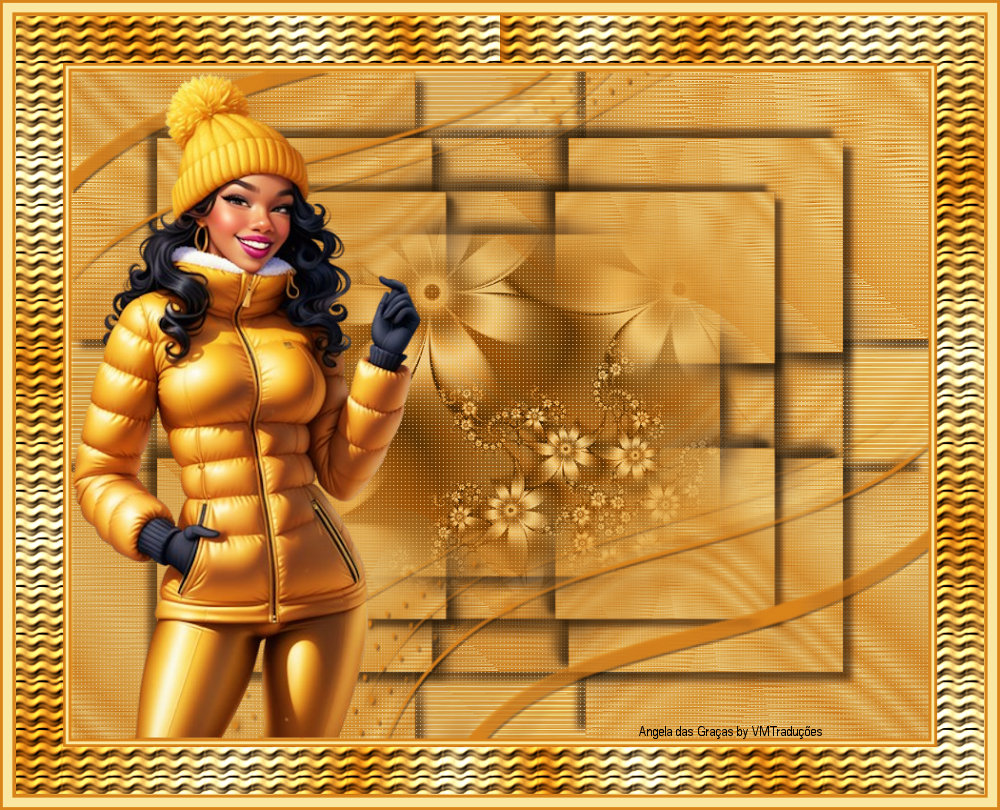

This tutorial is by Angela das Graças.
Thank you very much Angela for this beautiful tribute, it made me
very happy
*
Original - Here
*
Material:

> Save the texture in the Textures folder on the PSP
>You will need:
1 tube character
*
Plugins:
No Plugins. PSP effects only
*
SCRIPT
01. Open the material on psp / Duplicate (shift+d) / close the
originals
02. Choose two colors from the Tube. Put the dark color in the
Foreground and the light color in the Background
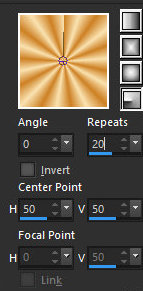
03. Prepare a Radial Gradient / Angle 0 / Repeat 20 / Center Point:
Horizontal and Vertical 50 / Invert unchecked
04. Open a new transparent image measuring 900X700px and paint with
the gradient.
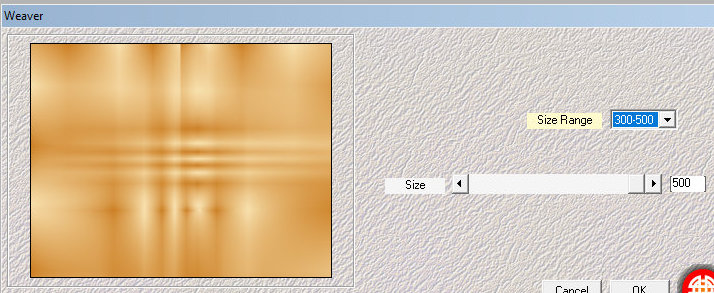
05. Effects / Plugins / Mehdi / Weaver
Size Ranger 300-500 / Size 500:
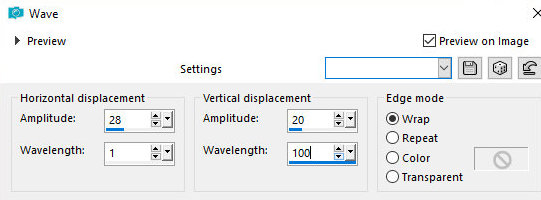
06. Effects / Distortion Effects / Wave
28 1 20 100 wrap
07. Layer Duplicate
08. Image/Resize: 80% - all Layers unchecked
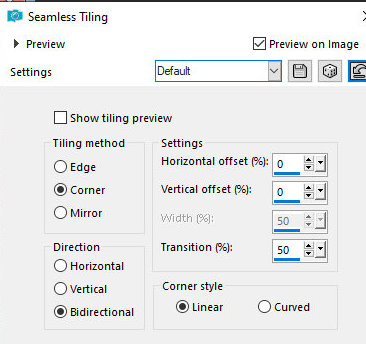
09. Effects / Image Effects / Seamless Tiling / Default
10. Drop Shadow / 10 / 10 / 60 / 10 Black Color
11. Repeat Drop shadow with negative V and H
12. Activate the Raster 1 layer
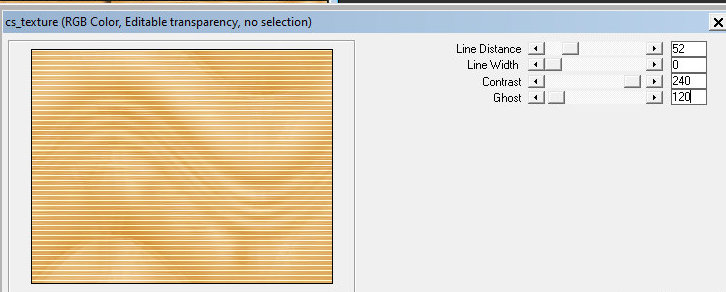
13. Effects / Plug-in / Carolaine and Sensibility / CS_Texture
52/0/240/120:
14. Activate the Copy of Raster 1 layer
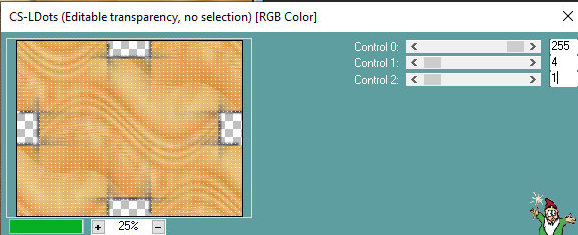
15. Effects / Plug-in / Carolaine and Sensibility / CS-LDots
255/4/1:
16. Layers/Duplicate
17. Image / Resize: 80% - all layers unchecked
18. Drop Shadow: 10 / 10 / 60 / 10 Black Color
19. Repeat Drop shadow with negative V and H
20. Layers/Duplicate
21. Image/Resize: 80% - all Layers unchecked
22. Copy the fractal tube and paste it as a new layer
23. Layers / Properties / blend Mode: Multiply or as you see fit
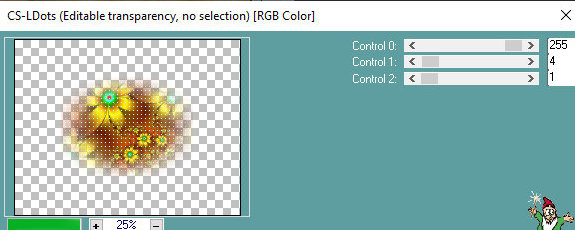
24. Effects / Plug-in / Carolaine and Sensibility / CS-LDots:
255/4/1
25. Layers / New Raster Layer
26. Paint with dark Gradient color
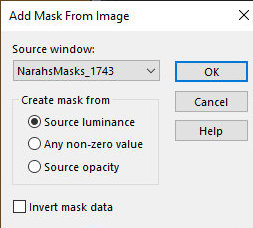
27. Layers / New mask layer / From Image / Mask [NarahsMasks_1743]
28. Merge/Group
29. Layers/Duplicate
30. Merge Down
31. Drop Shadow : 2 / 2 / 60 / 0 Black Color
32. Copy the tube character and paste it as a new layer
33. Position it on the right side and make any adjustments you deem
necessary
34. image / Add borders / Symmetric checked:
3px / dark color
3px / light color
3px / dark color
50px / a different color
30. Select this 50px border with the Magic Wand
31. Paint with the gradient
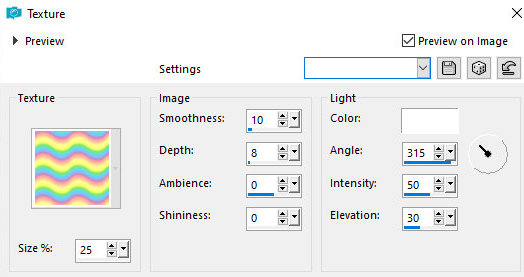
32. Effects / Texture Effects / Texture: Multi245 (in material)
Size 25 / 10 / 8 / 0 / 0 / 315 / 50 / 30 / Color White
33. Image / Add borders /symmetric marked
3px / dark color
10px / light color
3px / dark color
34. select none
35.Image / Resize: width=1000px - all layers checked (optional)
36. Put your signature
37. Merge All
38. Save as jpeg
*
|
Value the translator’s work. In
addition to the link to the original work, also include
the translation link. Thank you very much!
Valorar el trabajo del traductor.
Además del enlace a la obra original, incluya también el
enlace a la traducción. ¡Muchas gracias! |
Tutorial traduzido em
09/12/23
*
 |