|


|
Tutorial de Gilda Ribeiro
Link tutorial original:
textures
|
| Tubes Principais:
VM Tubes
|
| Link material:

You need a woman tube and a landscape misted
|
| Plugins: Plug-in / Filter
Factory A / Wood Grain
Plug-in / FM Tile Tools / Blend Emboss
Plug-in / AAA Frames / Transparent Frame
|
SCRIPT
01. Open the tubes
Edit / Copy
Paste as new image
Close the originals
02. Choose two colors from the mixed landscape tube: a dark color
for the foreground and a light color for the background
Make a Sunburst gradient:
Angle: 0 / Repeats: 3 - Invert unchecked
Center and Focal Point H 50 / V 50
03. Open a new transparent image measuring 900 x 600px
Paint with the gradient
04. Effects / Image Effects / Seamless Tiling
color - bid 20 0 50
05. Adjust/Blur/Gaussian Blur: 30
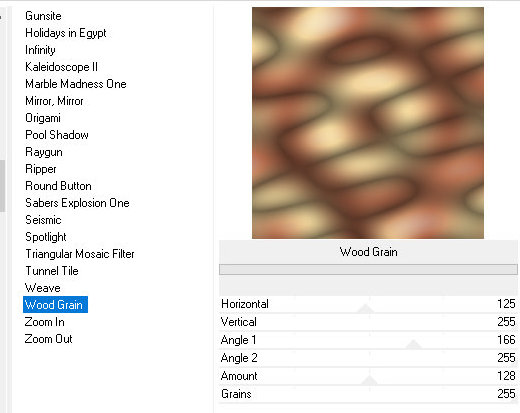
06. Effects / Plugins / FF Gallery A / Wood Grain
125 255 166 255 128 255
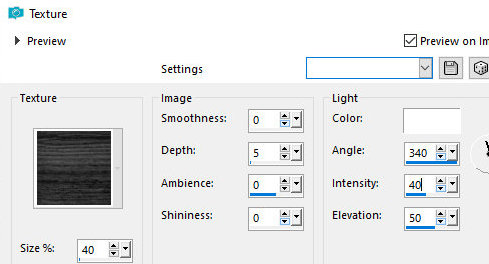
07. Effects / Texture Effects / Texture [Brown042]
40 0 5 0 0 white 340 40 50
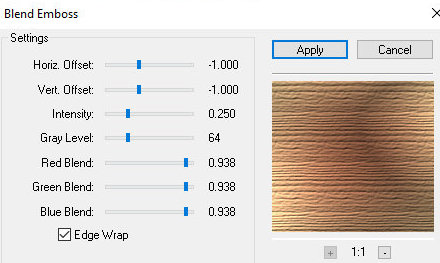
08. Effects / Plugins / FM Tile Tools / blend emboss - default
09. Layers / New Raster Layer
Selections / Select All
10.Open [back025]
Copy and paste into selection
Select none
11. Layers/Duplicate
12. Remove the visibility of the layer [copy of raster 2] by
clicking on the eye
Activate the layer [raster 2]
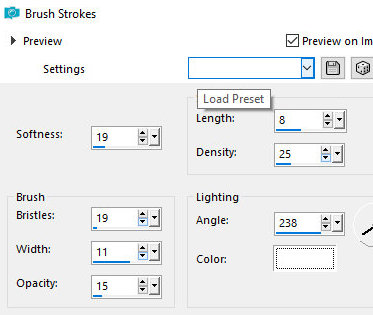
13. Effects / Art Media Effects / Brush Stroke
19 19 11 15 8 25 238 white
14. Layers / Properties / blend Mode: Lighten / Opacity: 70%
15. Return the visibility of the layer [copy of raster 2] e ative
16. Adjust / Hue and Saturation / Colorize [light gradient color]
17. Layers / Properties / blend Mode: Darken / Opacity: 40%
18. Merge visible
19.Adjust/sharpness/Sharpen
20. Layers / New Raster Layer
Paint it white [ffffff]
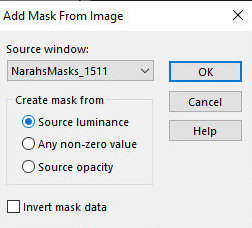
21. Layers / New Mask Layer / From image / Mask [narahsMask1511]
Merge Group
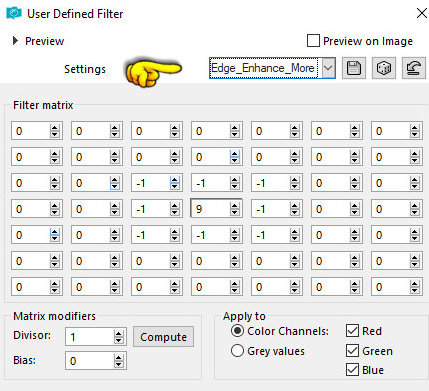
22. Effects / User Defined Filters / edge enhance more
23. Drop Shadow: 10 10 100 20 black
24. Effects / Plugins / FM Tile Tools / blend Emboss - default
25. Layers / New Raster Layer
Selections / Select All
26. Open tube misted landscape
Copy and paste into selection
Select none
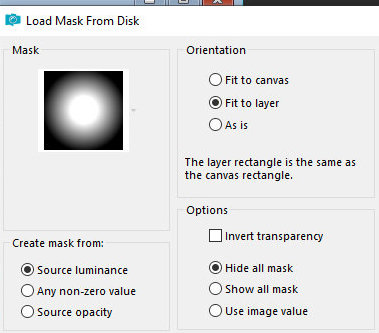
27. Layers / Load mask from disk / mask [nevoa]
Merge Group
28. Effects / Plugins / FM Tile Tools / Blend Emboss - default
29. Image / Add borders / symmetric marked / 5px / black
30. Selections / Select all
31. Image / Add Border / Symmetric marked / 50 pxs / Light Gradient
Color
32. Selections / Invert
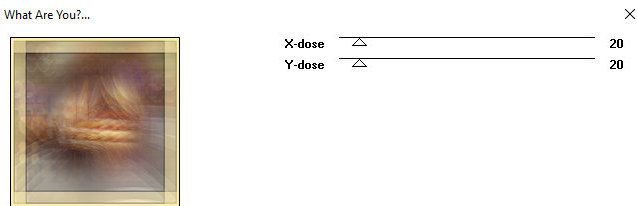
33. Effects / Plugins / toadies / What are you?
20/20
34. Adjust / Sharpness / Sharpen More
35. Drop shadow: 10 10 60 30 black
Repeat with negative H and V
36. Effects / plugins / AAA Frame / transparent Frame
10 220
37. Select none
38. Open the main tube
Copy and paste as new layer
Position according to the model or as desired
Drop Shadow of your choice
39. Merge All
40. Put your signature
Save as jpg
Tutorial traduzido em 14/10/2023 |