|


This tutorial is from VeBeau who I thank for
letting me translate his tutorials
*
Original -
Here
*
Material:

> Save the selection [angela_deco] in the Selections folder on the
psp
*
Plugins:
Unlimited / Bkg Designs sf10 II / Kaleidoscope 8 OR
Unlimited 2.0 / &<Bkg Kaleidoscope> / Kaleidoscope 8
SCRIPT
01. Open the material on the PSP / Duplicate (shift+d) / Close the
originals
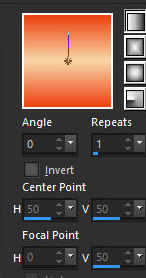
02. Choose two colors for your tube: a dark color for the foreground
and a light color for the background
03. Prepare a Linear gradient (0/1/invert unchecked)
04. Open a new transparent image measuring 800 x 600 px
05. Selections / Select All
06. Choose one of the papers provided in the material
Copy and paste into selection
07. Select none
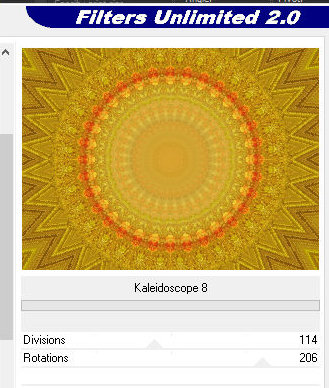
08. Effects / Plugin / Unlimited 2.0 / Bkg Designs sf 10 II /
Kaleidoscope 8
114/206
Note: You can also find this effect in this other plugin:
&<Bkg Kaleidoscope> / Kaleidoscope 8
09.Adjust/Hue and Saturation/Colorize
Write down the H and S of one of the colors chosen at the beginning
10. Layers/New Raster Layer
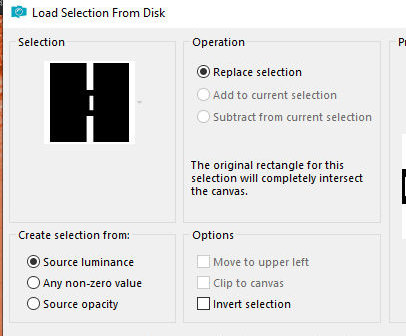
11. Selections / Load / Save Selection / Load Selection From Disk /
Selectio [angela_deco]
12. Paint the selection with Gradient
13. Drop Shadow: 4 / 4 / 80 / 10 / Color: 000000
14. Repeat Drop shadow with negative V and H
15. Select None
16. Layers/Duplicate
17. Image / Mirror / Mirror Horizontal
18. Merge Down
19. Merge Visible
20. Image / Add Borders / Symmetric checked
5px / background color
3px / Foreground color
5px / Background color
21. Copy the tube character and paste it as a new layer
22. Make the necessary adjustments (resize, sharpen, drop shadow,
position)
23. Image / Add borders / symmetric marked / 5px / foreground color
24. Put your signature
25. Merge all
26. Save as jpeg
*
|
Value the translator’s work. In
addition to the link to the original work, also include
the translation link. Thank you very much!
Valorar el trabajo del traductor.
Además del enlace a la obra original, incluya también el
enlace a la traducción. ¡Muchas gracias! |
Tutorial traduzido em
07/12/2023
*
 |