|

|
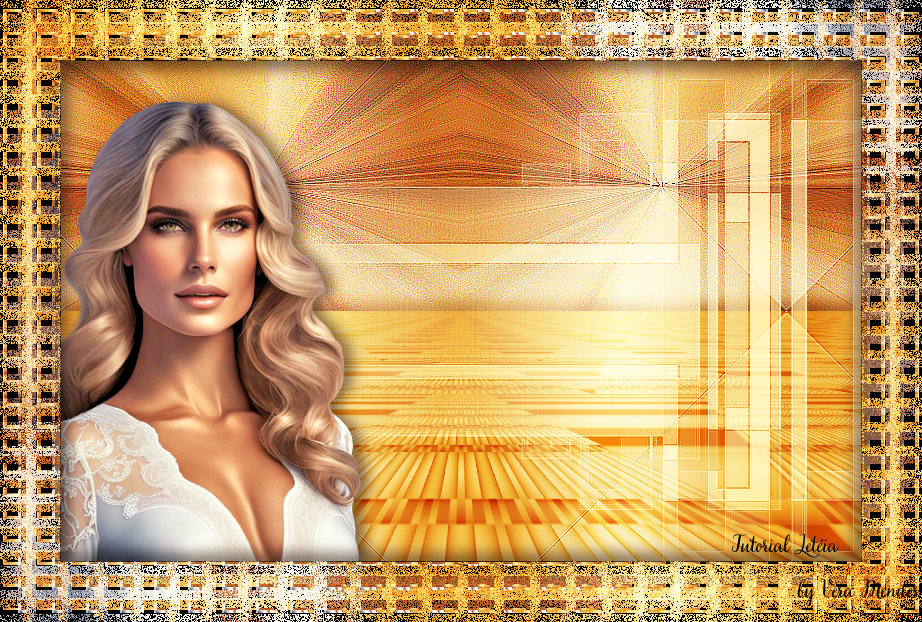
Tutorial de Alessandra
Link tutorial original:
Side Focal
|
| Tubes Principais:
VM Tubes
|
| Link material:


|
| Plugins: Unlimited 2.0 / Tile &
Mirror / Mirrored & Scaled
Mura’s Meister / Perspective Tiling 1.1
Simple / Diamonds
Simple / 4 Way Average
|
SCRIPT
01- Open the PSP and the tube
02- Edit/ Copy on the tube.
Close the original
03- Edit/Paste As New Image
04- Choose 1 very light color from the tube
Put the black color in the Foreground and the light color in the
background
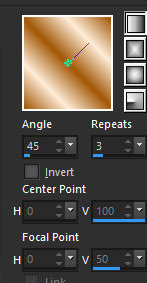
05 - Make a gradient: Style: Linear /Angle: 45/ Repeats: 3/ Invert
unchecked
06- Open a new transparent image with 800x500 pxl
07- Paint with the gradient
08- selections / select all
09- Copy the tube character
10- Paste in the selection
11- Select none
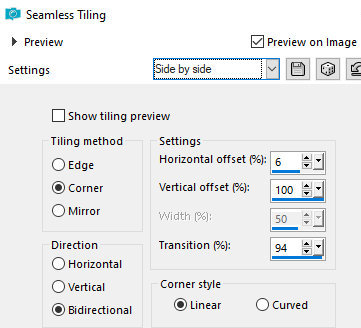
12- Effects / Image Effects / Seamless Tiling: Side by Side
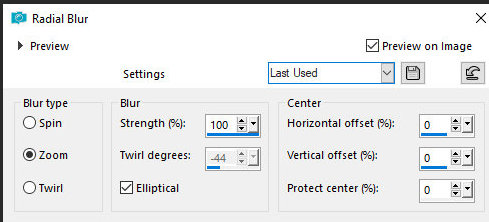
13- Adjust / Blur / Radial Blur
14- Effects / Edge Effects / Enhance More
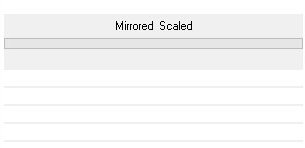
15- Effects / Plugins / Filters Unlimited 2.0 / Tile & Mirror /
Mirrored & Scaled
16- Effects / Edge Effects / Enhance More
17- Add new Layer
Paint with light color
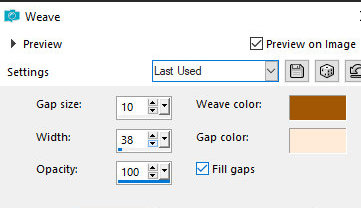
17- Effects / Texture Effects / Weave
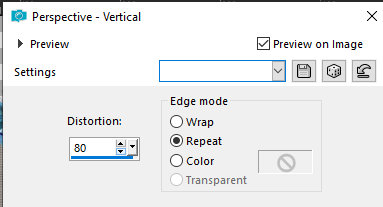
18- Effects / Geometric Effects / Perspective
-Vertical:
80/Repeat
19- Layers / Duplicate.
Image / Mirror / Mirror Horizontal
Layers / Properties / Blend Mode: Multiply
20- Merge down
21- Image /Mirror / Mirror Vertical(Flip)
22- Effects / Plugins / Mura’s Meister / Perspective Tiling 1.1
23- Drop Shadow: -10 / 0 / 50 / 20 / #000000
24- Layers / New Raster Layer
Paint with the gradient
24- Effects / Plugins / Simple / Diamonds
25- Effects / Plugins / Simple / 4 Way Average
26- Effects / Edge Effects / Enhance More
27- Layers / Properties / Blend Mode: Overlay
28- Layers / new Raster Layer
Paint with light color
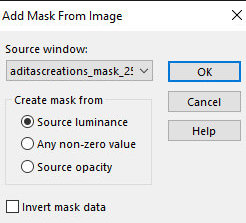
29- Layers / New Mask Layers / From image / Mask
[aditascreations_mask_25]
30- Effects / Edge Effects / Enhance More
31- Merge group
32- Copy the tube character
33- Paste as new layer
34- Drop Shadow: 0 / 10 / 50 / 20 / #000000
35- Image / Add Borders: 1 pxl / Symmetric / #000000
36- Copy this image (it will remain in memory)
37- Image / Add Borders: 60 pxl / Symmetric / light color
38- Select this edge with the Magic Wand(Tolerance/Feather=0)
39- Paste the image copied above into the selection
40- Selections / Promote Selection to layer
41- Activate the background layer
Layers / Promote Background to layer
42- Activate the top Layer (Promoted Selection)
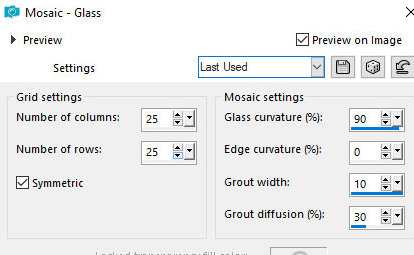
43- Effects / Texture Effects / Mosaic-Glass
39- Select none
40- Layers/ Duplicate
41- Image / Mirror / Mirror Horizontal
Image / Mirror / Mirror Vertical (Flip)
40- Layers / Properties / Blend Mode: Screen
41- Merge down
42- Drop Shadow: 10 / 10 / 50 / 20 / #000000
Repeat Drop Shadow with negative H and V
43- Merge down
44- Add your signature
and save as jpeg
Tutorial traduzido em 23/10/2023
*
 |