|

|
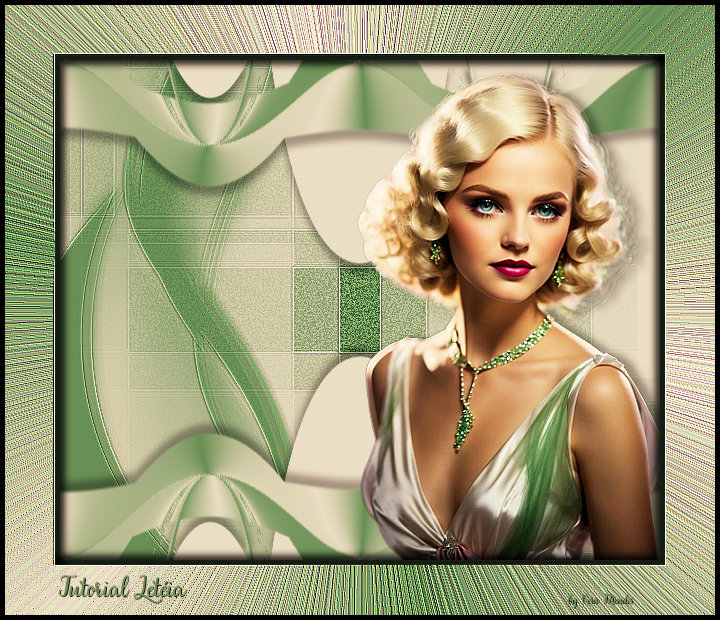
Tutorial de Alessandra
Link tutorial original:
Shine
|
| Tubes Principais:
VM Tubes
|
| Link material:

|
| Plugins: No plugins
|
SCRIPT
01- Open the tube on the PSP
02- Copy and close the original
03- Paste as new image
04- Choose 2 colors from the tube. A dark color for the foreground
and a light color for the background.
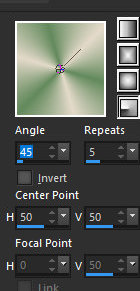
05- Make a gradient: Style: Radial / Angle: 45 / Repeats: 5 / Invert
unchecked.
Center Point: H: 50 /V: 50.
06- Open the Alpha Chanel Letéia_ac_rox selection.
Duplicate and close the original.
Delete Raster 3 (the one in the credits)
07- Activate the Raster 2 layer
Paint with the gradient
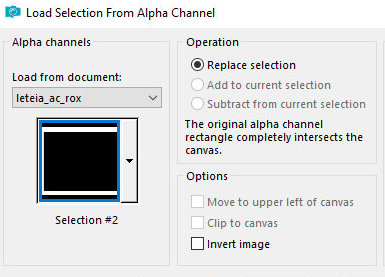
08- Selections / Load selection from disk / Selection [Selection #2]
09- Selections / Invert.
Press Delete on the keyboard
Select none
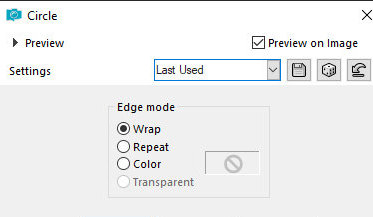
10- Effects / Geometric Effects / Circle: Wrap
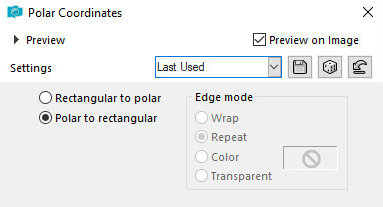
11- Effects / Distortion Effects / Polar
Coordinates: Polar to Rectangular.
12-Drop Shadow: -10/0/35/10/black.
Layer/Duplicate.
Image / Mirror / Mirror Vertial (Flip)
Merge down.
13- Activate the Raster 1 layer
Paint with light color
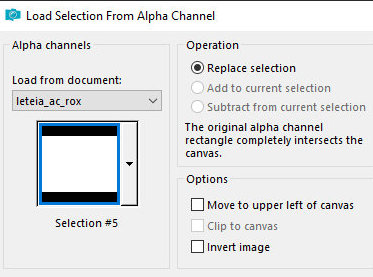
14- Selections / Load selection from disk / Selection [#5]
Press Delete on the keyboard
Select none
15- Effects / Distortion Effects / Polar Coordinates: Polar to
Rectangular.
16-Drop Shadow: -10 / 0 / 35 / 10 / black
17- Layers / Duplicate.
Image / Mirror / Mirror Vertical (Flip)
Merge down.
18- Layers / New Raster Layer
19- Layers / Arrange / Move down.
Paint with dark color
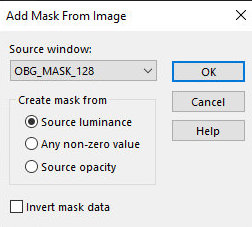
20- Layers / New Mask Layer / From image/ Mask[ OBG_MASK_128]
Merge group.
Effects / Edge Effects / Enhance more.
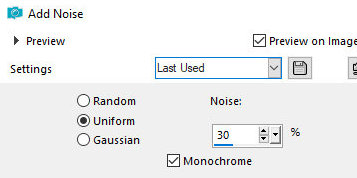
21- Adjust / Add / Remove Noise /Add Noise: Uniform:30 /Monochrome
marked.
Adjust / Sharpness / Sharpen more
22- Layers / New Raster Layer
Layers / Arrange / Move down.
Paint with dark color.
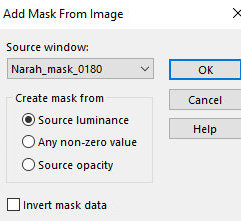
23- Layers / New Mask Layer / From image / Mask [Narah_mask_0180]
Merge group.
24- Drop Shadow: 0 / 10 / 100 / 0 / dark color.
Effects / Edge Effects / Enhance more.
Drop Shadow: 0 / 10 / 35 / 10 / black
25- Layers / New Raster Layer
Layers / Arrange / Move down.
Paint with light color
26- Copy the main tube
Paste as new layer
Layers / Arrange / Bring to top
Resize and Sharpness if necessary.
Position to taste.
Drop Shadow: 0 / 10 / 35 / 10 / black.
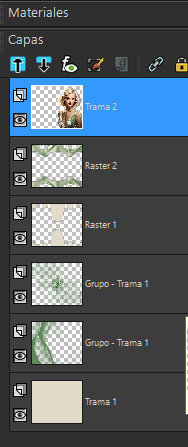
27- The layout of the Layers should look like this:
28- Image /Add Borders/ symmetric marked / 5px /Dark
color
29- - Image /Add Borders / symmetric marked / 50px / White color
Select this border with the Magic Wand (tolerance and feather=0)
Paint with the gradient
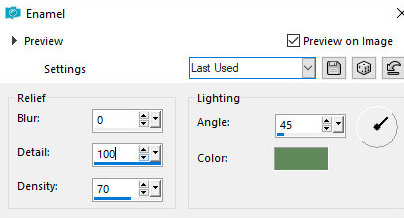
30- Effects /Artistic Effects / Enamel:
0 / 100 / 70 / 45 / Dark color.
Effects / Edge Effects / Enhance more.
Drop Shadow: 10 / 10 / 80 / 10 / Black color
Repeat with negative H and V.
Select None
31- Image /Add Borders/ symmetric marked / 5px / Black color
resize if desired
32- Add your signature
Save as jpeg
Tutorial traduzido em 23/10/2023
*
 |