|

|
Tutorial de Myriam Cedro
Link tutorial original:
Nasce uma Flor
|
| Tubes Principais:
VM Tubes
|
| Link material:


|
| Plugins: Mehdi / Wave Laby
1.1
MuRa's Meister / Perspective Tiling
Joahann's Filters / Chaos Dissolve
Unlimited 2.0 / Buttons & Frames / Round Button
Nik Software / Color Efex 3.0 Complete / Glamour Glow
AAA Frames / Texture Frame
|
SCRIPT
01. Open the material on the PSP / Duplicate (shift+d)
/ close the originals
02. Choose two colors to work with. Ideally, it should be the same
color, but with very contrasting tones: a darker one for the
foreground and a much lighter one for the background.
03. Colors used in the original model:
Foreground #c90b0c
Background: #f0cfcd
04. Open a new transparent image measuring 900 x 600px
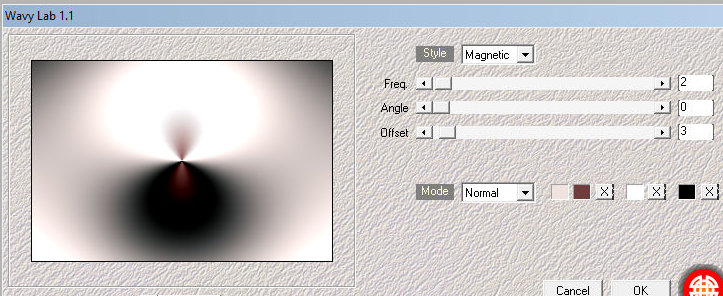
05. Effects / Plugins / Mehdi / Wavy Lab 1.1
colors used: #c90b0c / #f0cfcd / #ffffff / #000000
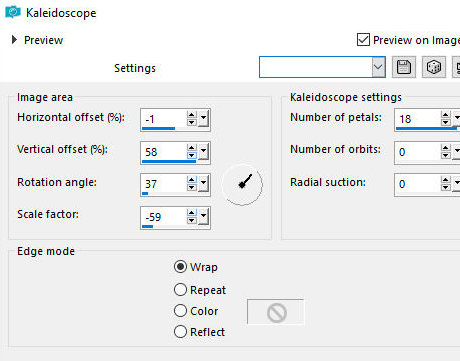
06. Effects / reflection Effects / Kaleidoscope
07. Layers / duplicate
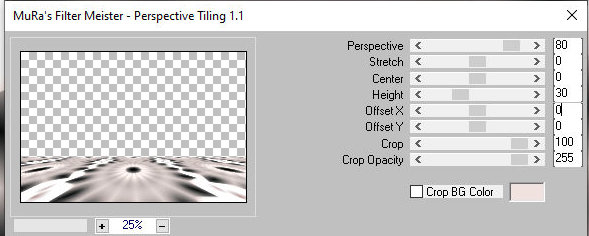
08. Effects / Plugins / Mura's Meister / perspective Tiling
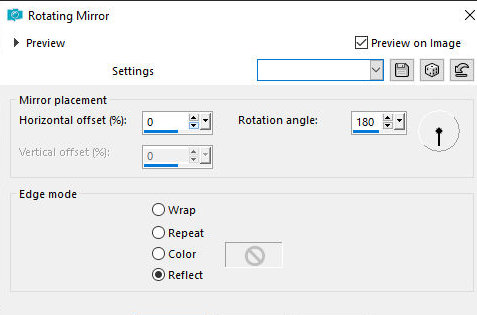
09. Effects / Reflection Effects / rotating Mirror
10. Remove the visibility of the background layer by clicking on the
eye
11. Activate the top layer
12. Activate the Magic Wand (tolerance=0/ Feather=20)
13. click on the transparent part to select
14. Press the Delete key 5 times
15. Select none
16. Return the visibility of the background layer by clicking on the
eye and activate this layer
17. Layers/duplicate
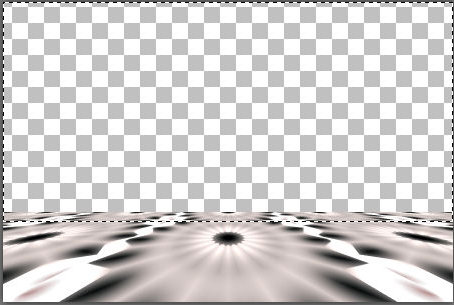
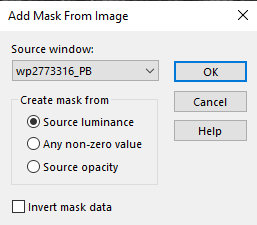
18. Layers / New Mask Layer / From image / Mask [wp2773316.jpg]
N.T.: the effect of the mask cannot be seen, only when you apply the
Drop shadow it appears
19. merge Group
20. Drop shadow: 10 4 100 71 white
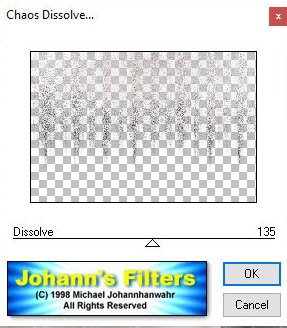
21. Effects / Plugins / Johann's Filters 2.0 / Chaos Dissolve
22. Effects / edge Effects / enhance
23. Copy the tube character and paste it as a new layer
24. Resize (Image/Resize)
25. Align the tube so that it looks like it is "protruding" from the
ground.
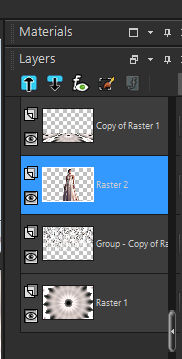
26. The layers will look like this:
27. Author's Note: I wanted to leave the Tube Layer in this position
in the screenshot above, but if you want to place it at the top,
it's up to you.
28. Layers/Duplicate
29. Activate the original tube layer
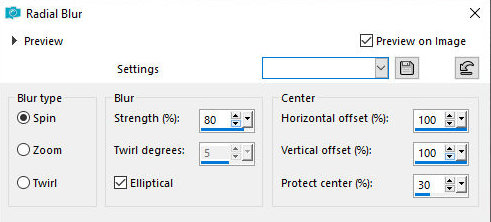
30. Adjust / blur / Radial Blur - Apply 2 times
31. Merge All
32. Layers/Duplicate
33. Image / resize: 90% - all layers unchecked
34. Activate the background layer
35.Adjust/blur/Radial Blur
36. Layers/Duplicate
37. Image / Mirror / Mirror Horizontal
38. Layers / Properties / Opacity: 50%
39. Merge Down
40. Effects / Edge Effects / enhance More
41. Activate the layer above
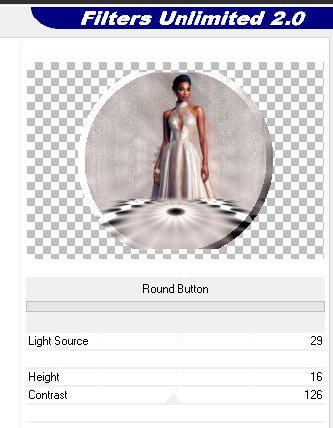
42. Effects / Plugins / Unlimited 2 / Buttons&Frames / Round Button
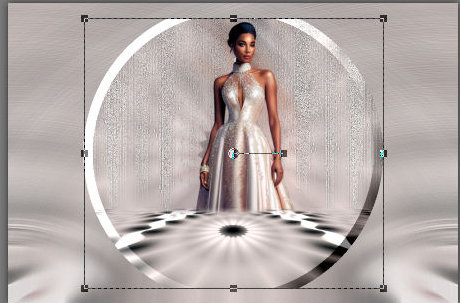
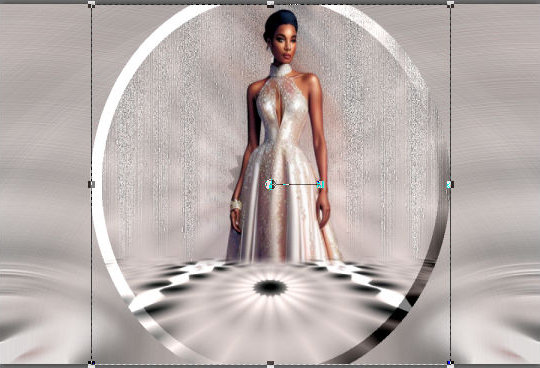
43. Activate the Pick Tool and adjust the image so that the top and
bottom edges of this layer coincide with the top and bottom edges of
the layer below. Look at the prints.
44. Center the tube layer if it has moved out of place.
45. Merge all
46. Layers/duplicate
47. Image / Resize: 90% - all layers unchecked
48. Drop shadow: 0 0 100 40 black
49. Activate the layer below
50. Effects / Reflection Effects / Rotating Mirror
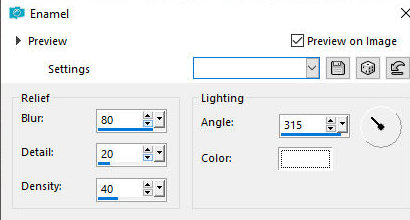
51. Effects / Artistic Effects / Enamel - Color: #FFFFFF
Note: This effect will be slightly different from the original
depending on the image and colors used
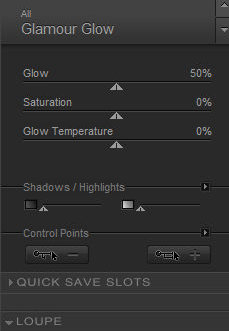
52. Effects / Plugins / Nik Software / Color Efex 3.0 Complete /
Glamor Glow
53. Merge All
54. Selections / Select All
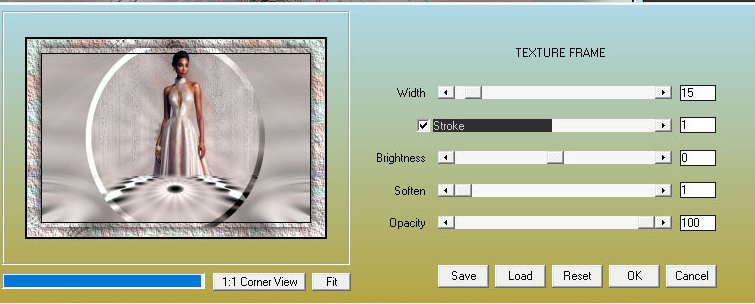
55. Effects / Plugins / AAA Frames / Texture Frame
56. Select none
57. Image / Add borders / symmetric marked / 1px / black
58. Image / Resize: width=900px - all layers checked
59.Adjust/Sharpness/Sharpen
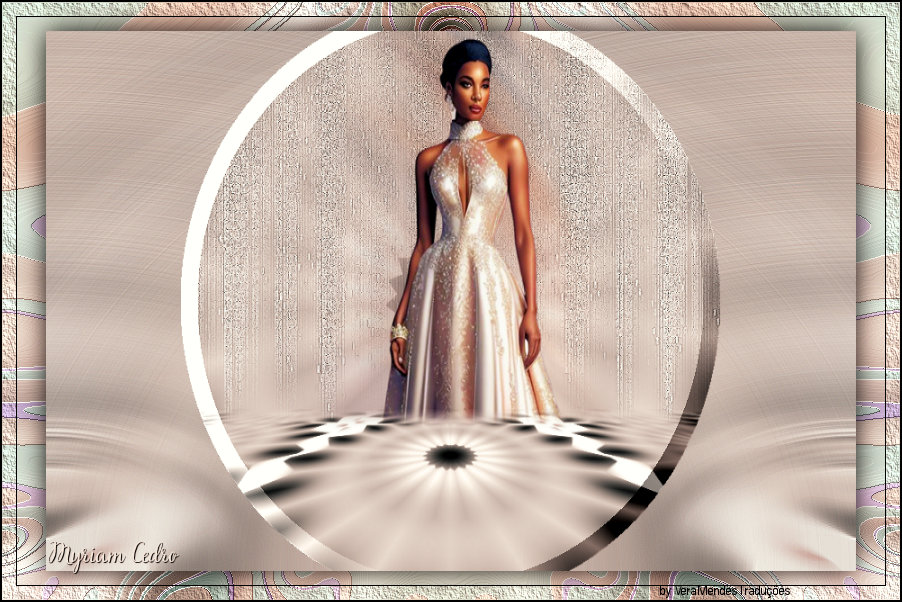
60. Put your signature
61. Save as jpeg
Tutorial traduzido em
*
 |