|
This tutorial is from Angela das Graças who I thank for letting me translate her tutorials * Original aqui
* Tubes:
* Material
* Plugins Mura's Meister / Tone
SCRIPT
1. Open the material on the PSP / Duplicate (shift+d)
/ Close the originals
4. Open a new transparent image measuring 1000 x 700px
5. Paint the image with this gradient 6. Effects / plugins / Mura's Meister / Tone
7. Layers / duplicate 8. Image / Resize: 20% - all layers unchecked
10. Drop shadow: 5 5 60 5 black
11. I repeat the Drop shadow with negative V and H 12. Layers/duplicate 13. Image/Mirror/Mirror Horizontal 14. Merge down 15. Layers/duplicate 16. Image / Mirror / Mirror Vertical 17. Merge down 18. Effects / Plugins/ Mura's meister / Pole Transform Note: Double-click on Fill background
19. Erase the effect in the center of the image
20. Layers/Duplicate
21. Image / Mirror / Mirror Horizontal 22. Merge down 23. Layers/Duplicate 24. Image/Resize: 80% - all layers unchecked 25. Layers/Arrange/Mode Down 26. Layers/Duplicate 27. Image / Resize: 80% - all layers unchecked 28. Layers / Arrange / Move Down 29. Copy the mixed landscape tube and paste it as a new layer 30. Layers / Arrange / Move down 31. Activate the top layer 32. Add a new layer 33. Paint this layer with dark color 34. Layers / New mask Layer / From Image/ Mask [1250181785_nikita_masques]
35. Merge Group 36. Effects / Image Effects / Offset ((-300)/0)
37. Effects / Texture Effects / Weave - cores: background/foreground
38. Drop Shadow: 2 2 60 2 black
39. Layers/Duplicate 40. Image / Mirror / Mirror Horizontal 41. Merge Down 42. Effects / User Defined Filter / Emboss 3
43. Layers / Properties / blend Mode: burn or other of your
choice
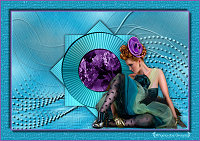
44. Copy the tube character and paste it as a new layer 45. Position according to the model or as you prefer 46. Drop Shadow of your choice 47. Copy the floral tube and paste as a new layer 48. Position according to the model or as you prefer 49. Image / Add Borders / Symmetric marked: 4px / light color 40px / a different color 50. Select this 40px border with the Magic Wand (tolerance/feather=0) 51. paint with the gradient from the beginning 52. Effects / Texture Effects / Weave - same as above
53. Effects / 3D Effects / Chisel
54. Select none * Tutorial traduzido em 10/032024
*
|