|

|
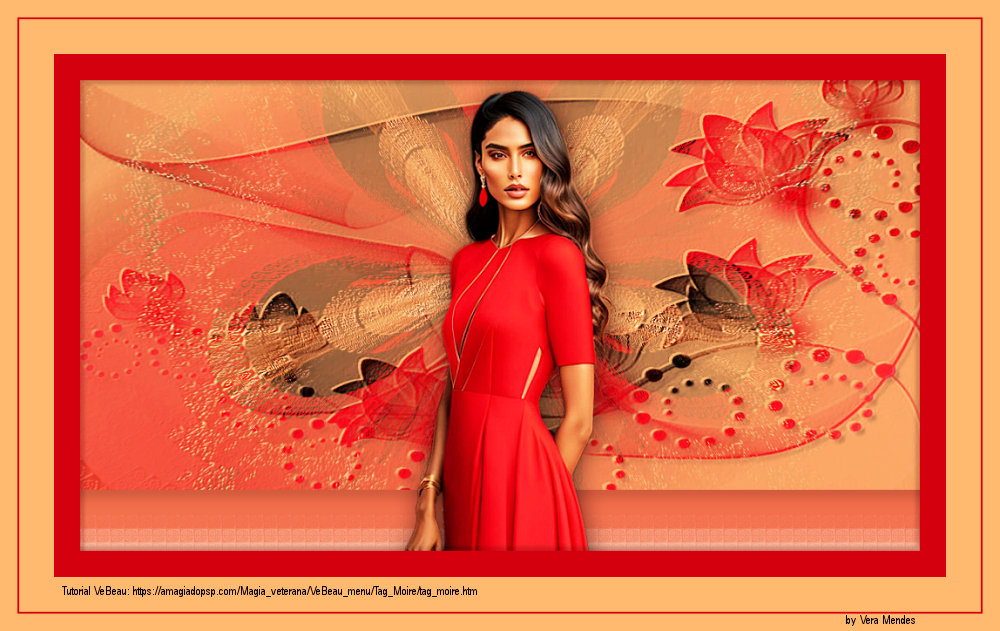
Tutorial de VeBeau
Link tutorial original:
moire
|
| Tubes Principais:
VM Tubes
|
| Link material:

|
| Plugins: Plugin / Filters /
Unlimited 2 / & Bkg Designer Sf 10 II / Moiré Blocks
|
SCRIPT
01. Open the tube and mask on the psp
Copy and paste as new image
Close the originals. Work with copies
Save the mask [noname(2)] in the Masks tab on the PSP
02. Open a new transparent image measuring 1024 x 500px
Choose two colors from your tube
Put the Dark in the foreground
and the light color in the background
03. Paint the image with the foreground color
04. Selections / Select All
Copy the main tube and paste it into the selection
Select none
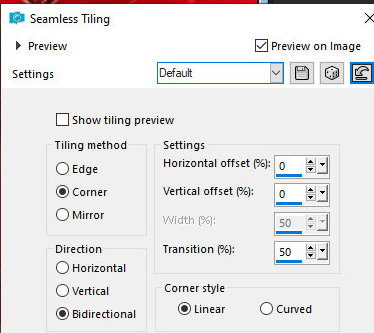
05. Effects / Image Effects / Seamless Tiling / Default
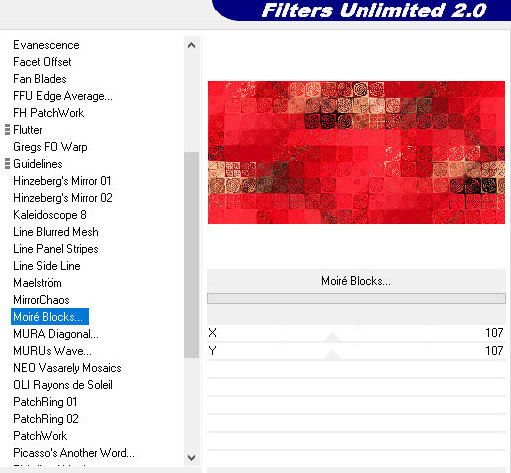
06. Effects / Plugins / Unlimited 2 / BKG Designer sf10 II / Moire
blocks
107 107
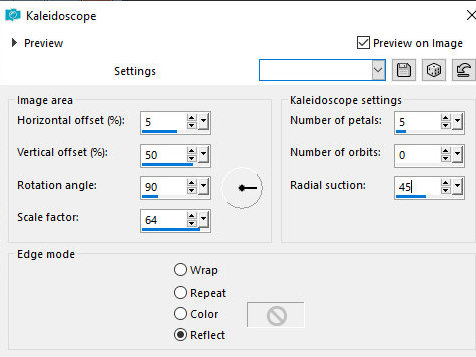
07. Effects / Reflection Effects / Kaleidoscope
5 50 90 64 5 0 45 reflect
08. Layers / Load Mask from disk / Mask [noname(2)]
Merge Group
09. Drop shadow: 5 5 20 5 black
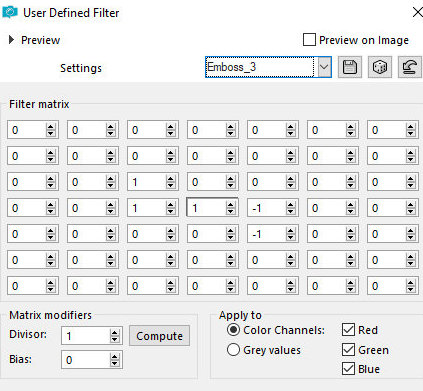
Effects / User Defined Filter / Emboss 3
10. Layers/New Raster Layer
Paint with the light color or another color of your choice
Layers / Arrange / Send to Bottom
11. Merge visible
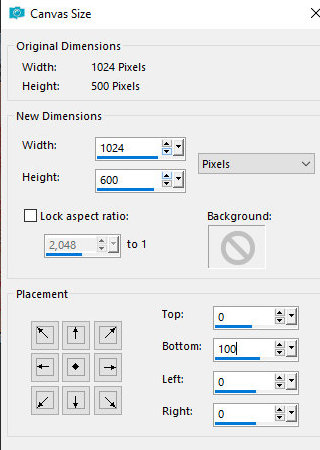
12. Image / Canvas size 1024 x 600 Bottom=100
Drop Shadow: 10 10 20 20 black
13. Layers / New Raster Layer
Paint with a color that matches (the foreground or background)
Layers / Arrange / Send to Bottom
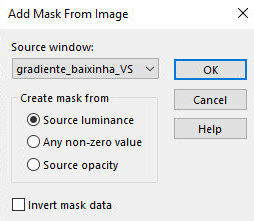
14. Layers / New Mask Layer / From Image / Mask [gradiente_baixinha_VS]
Merge Group
15. Layers / New Raster Layer
Paint with a different one than the one used in item 13
Layers / Arrange / Send to Bottom
16. activate the Group Raster 1 layer
Merge Down
17. Continue on the Raster 1 layer
Effects / Plugins / Unlimited 2 / BKG Designer sf10 II / Moire
blocks
107 107
18. Copy the main tube and paste it as a new layer
Layers / Arrange / Bring to top
Resize if necessary
Adjust / sharpness / sharpen
Position where you see fit
Drop shadow of your choice
Merge visible
19. Selections / Select all
Selections/Modify/Contract: 30
Selections/Invert
Layers/New Raster Layer
Paint with the foreground or background color
20. Drop shadow: 5 5 20 5 black
Repeat Drop shadow with negative V and H
Select none
21. Image / Add Borders / 40px / Symmetric marked / foreground color
22. Image / Add Borders / 2px / Symmetric checked / background color
23. Image / Add Borders / 20px / Symmetric marked / foreground color
24 - Image / Resize: 1000px width
25 - Put your signature
Merge All
Save as JPG
Tutorial traduzido em
*
 |