|
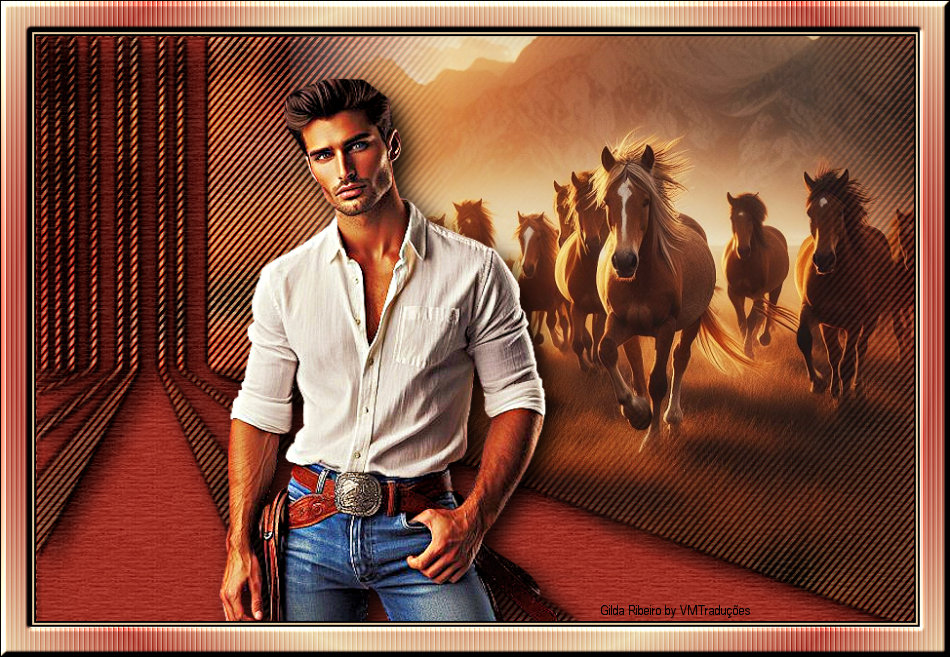

This tutorial is by Gilda Ribeiro, who I thank for
letting me translate her tutorials
*
Original -
here
*
Material


> Open the mask on the psp and minimize
> You will need 1 tube character and 1 misted landscape
*
Plugins:
VM Natural / Lightsplash
Eye Candy 5 / Impact / Perspective Shadow / Blurry
Unlimited / Paper Texture / Hemp Paper 1
SCRIPT
01. Open a new transparent image with 900x600 pixels
02. Selections / Select All
03. Copy tube landscape and paste into selection
04. Select None
05. Layers / New Raster Layer
06. Paint the layer with a color that matches the Tube Landscape
07. Layers / Arrange / Move Down
07a. Activate the top layer
08. Merge/Merge Down
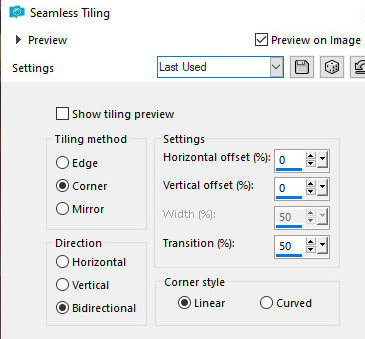
09. Effects / Image Effects /Seamless Tiling - Default
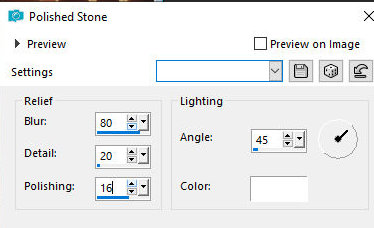
10. Effects / Texture Effects / Polished Stone
11. Effects / Plugins / VM Natural / Lightsplash

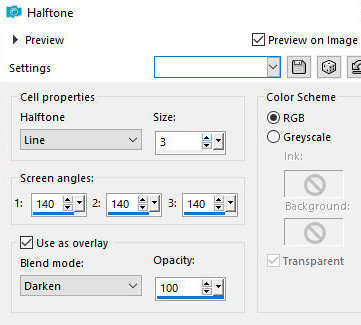
12. Effects / Artistic Effects / Halftone
13. Layers / New Mask Layer / From Image / Mask [cas_0415_20]
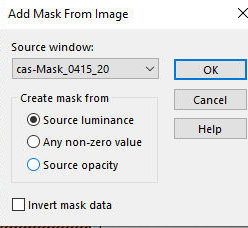
14. Merge Group
15. Adjust / Sharpness / Sharpen More
16. Drop Shadow: 3 3 100 3 black
17. Repeat Drop shadow with negative V and h
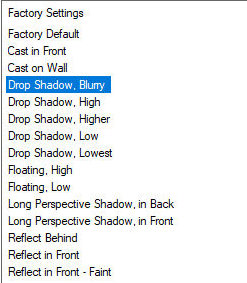
18. Effects / Plugins / Eye Candy 5: Impact / Perspective Shadow -
Preset: Drop Shadow, Blurry
19. Layers / New Raster Layer
20. Paint it in a color that matches your image
21. Layers / Arrange / Move Down
21a. Activate the top layer
22. Merge down
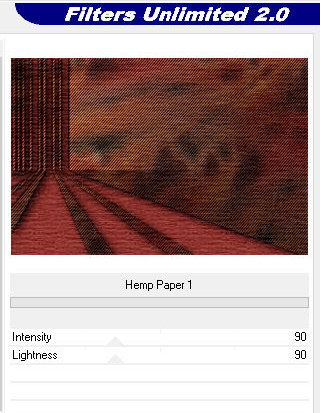
23. Effects / Plugins / Unlimited 2 / Paper Textures / Hemp Paper 1
24. Copy the mixed landscape tube and paste it as a new layer
25. Resize if necessary
26. Position on the right
27.Adjust/Sharpness/Sharpen
28. Copy the tube character and paste it as a new layer
29. Position as you see fit
30. Resize if needed
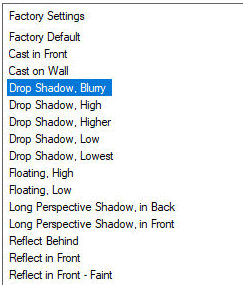
31. Effects / Plugins /Eye Candy 5: Impact / Perspective Shadow -
Preset: Drop shadow, Blurry
32. Merge/Merge All
33. Image / add borders / Symmetric marked:
2px / black
2px / light color #e2cdb2
2px / black
30px / different color
34. Select this 30px border with the Magic Wand
35. Choose two colors: a dark one for the foreground and a light one
for the background
36. Prepare a Sunburst Gradient
4 / invert unchecked/50-50/50-50
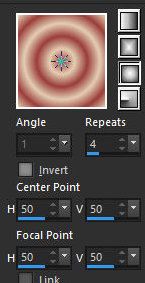
37. Paint the selection with this gradient
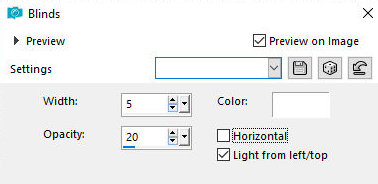
38. Effects / Texture Effects / blinds
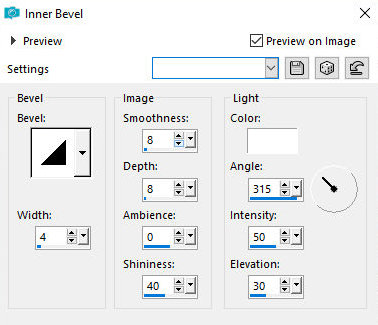
39. Effects / 3D Effects / Inner Bevel
30.Adjust/Sharpness/sharpen More
31. Image / Add borders / Symmetric marked / 2px / black
31a. Select none
32. Put your signature
Merge All
Save as jpeg
*
|
Value the translator’s work. In
addition to the link to the original work, also include
the translation link. Thank you very much!
Valorar el trabajo del traductor.
Además del enlace a la obra original, incluya también el
enlace a la traducción. ¡Muchas gracias! |
Tutorial traduzido em
28/12/23
*
 |