|

|
Tutorial de Silvana Gomes
Link tutorial original:
Encanto
|
| Tubes Principais:
VM Tubes
|
| Link material:

|
| Plugins:
dsb flux / Blast
dsb flux / Linear Transmission
MuRa's Meister / Perspective Tiling
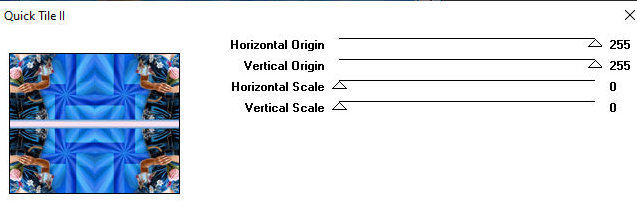
Graphic Plus / Quick Tile II
Simple / Blintz
Tramages / Acceleration Daisies
Mehdi / Kaleidoscope 2.1
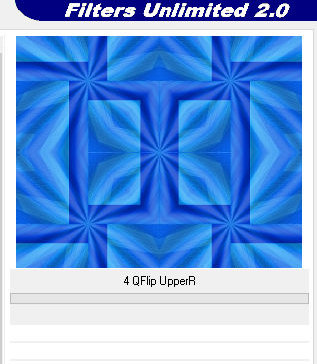
I.C.NET Software / Filters Unlimited 2.0 / &<Bkg
Kaleidoscope> / 4 QFlip UpperR
Graphic Plus / Cross Shadow
|
SCRIPT
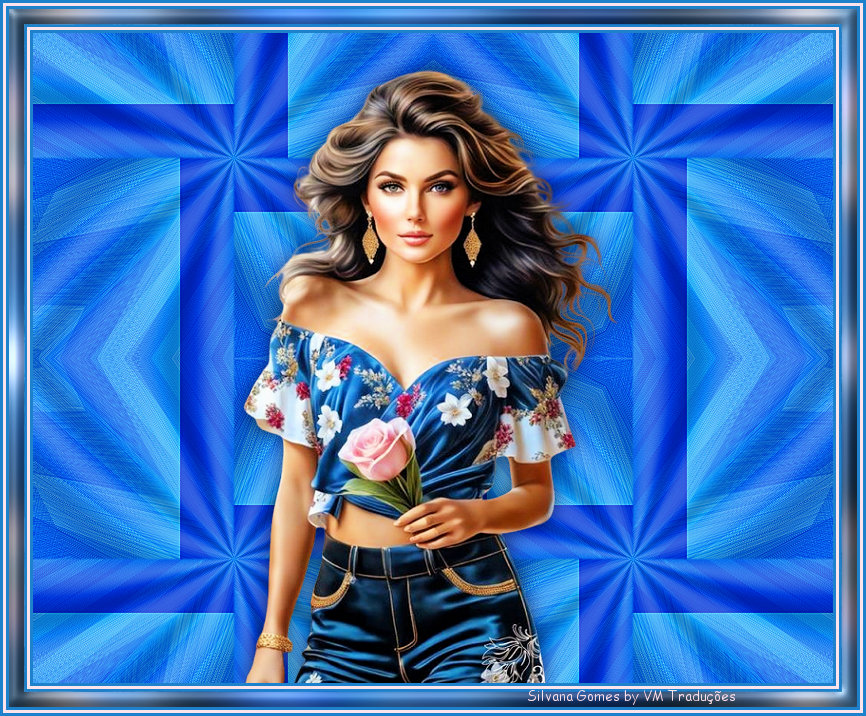
01. Open your tubes / Duplicate (shift+d) / close
the originals
02. Choose two colors from your tube. A dark color for the
foreground and a light color for the background
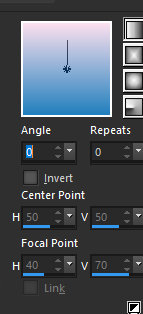
03. Prepare a Linear gradient
0/0/ invert marked
04. Open a new transparent image measuring 800 x
650px
05. Paint with the gradient
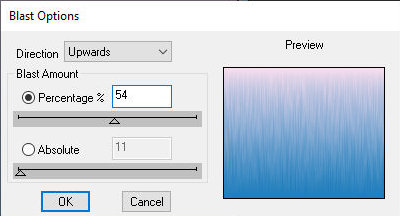
06. Effects / Plugins / DSB Flux / Blast
upwards / 54
07. Effects / Edge effects / enhance
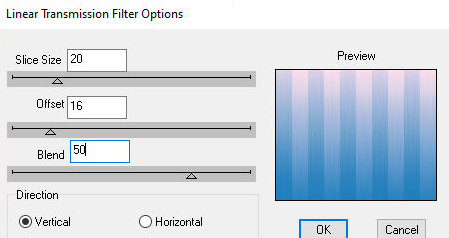
08. Effects / Plugins / DSB Flux / Linear Transmission
20 16 50 vertical
09. Effects / plugins / Mura's Meister / Perspective Tiling
70 0 0 50 0 0 100 255
10. Layers/Duplicate
11. Image / Mirror / Mirror Vertical
12. Merge Down
13. Layers/Duplicate
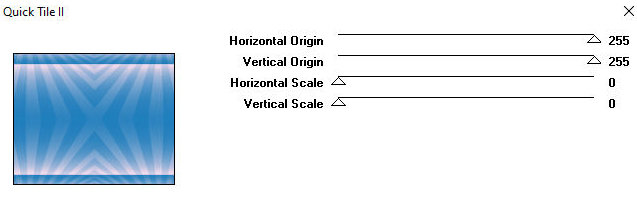
14. Effects / Plugins / Graphic Plus /Quick Tile II
255 255 0 0
15. Layers / Properties / blend Mode: Multiply
16. Merge Down
17. Effects / Plugins / Simple / Blintz
18. Layers/duplicate
19. Image / Mirror / Mirror Vertical
20. Layers / Properties / blend Mode: overlay
21. Merge down
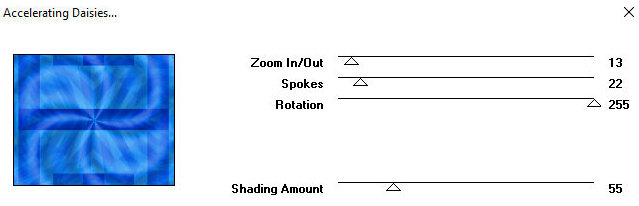
22. Effects / plugins / Tramages / Accelerating Daisies
13 22 255 55
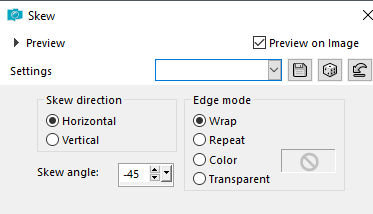
23. Effects / Geomtric Effects / Skew
horizontal -45 wrap
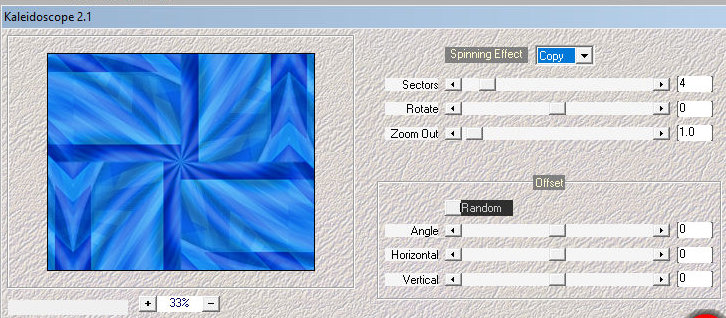
24. Effects / plugins / Mehdi / Kaleidoscope 2.1
copy 4 0 1 0 0 0
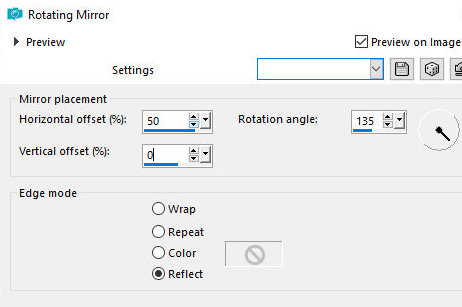
25. Effects / Reflection Effects / rotting Mirror
50 135 0 reflect
25. Effects / plugins / Unlimited 2 / BKG Kaleidoscope / 4 QFlip
UpperR
26. Copy the tube character and paste it as a new layer
27. Make any adjustments you deem necessary (resize, sharpen, drop
shadow, position)
28. Image / add borders / symmetric marked / 3px / dark color
29. Image / add borders / symmetric marked / 3px / light color
30. Image / add borders / symmetric marked / 3px / dark color
31. Image / add borders / symmetric marked / 15px / light color
32. Select this 15px border with the Magic Wand (tolerance/feather=0)
33. Effects / plugins / Graphic Plus / Quick tile II
255 255 0 0
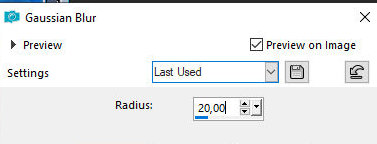
34.Adjust/Blur/Gaussian Blur: 20
35. Effects / Plugins / Graphic Plus / Cross shadow
50, 50...73, 104
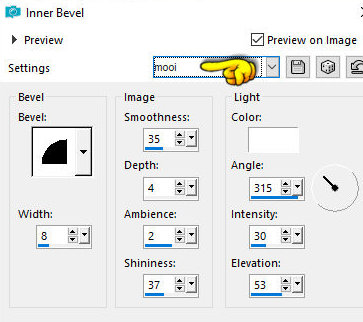
36. Effects / 3D Effects / Inner Bevel / Preset Mooi
37. Select none
38. Image / add borders / symmetric marked / 3px / dark color
39. Image / add borders / symmetric marked / 3px / light color
40. Image / add borders / symmetric marked / 3px / dark color
41. Put your signature
42. Merge all
43. Save as jpeg
*
|
Value the translator’s work. In
addition to the link to the original work, also include
the translation link. Thank you very much!
|
Tutorial traduzido em
18/11/23
*
 |