|


This tutorial is from Natália, who I thank for
letting me translate her tutorials
*
Original -
HERE
*
Material


> Open the mask on the psp and minimize
*
Plugins:
Len Klandksiteofwonders/ Lenk's Antonio
Unlimited 2.0/ &<Bkg Designers/ sf10 IV/ Easy Corner UpperLeft
Unlimited 2/ Kang 2/ Icecream Spiral
AP01[Innovations]/ Lines-SilverLining
SCRIPT
01. Open the material on psp / duplicate (shift+d) / close the
originals
02. Choose two predominant colors for your tube: a dark one for the
foreground and a light one for the background
03. Prepare a Linear gradient
0/10/invert unchecked
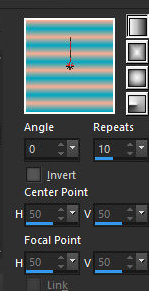
04. Open a new transparent image measuring 900 x 600px
05. Paint with the gradient
06. effects / plugins / L & K's / L & K's Antonio

07. Layers / duplicate
08. Image / Mirror / Mirror Horizontal
09. Image / Mirror / Mirror Vertical
10. Layers / Properties / blend Mode: darken
11. Merge down
12. Effects / Plugins / Unlimited 2 / BKG Designers sf10 IV / Easy
Corner UpperLeft

13. Effects / Edge Effects / Enhance More
14. Layers/Duplicate
15. Effects / Plugins / Unlimited 2 / Kang 2 / Icecream Spiral
Note: Note the RGB of the light color and replace it in the plugin
in the Red, Green, blue fields

16. Layers / Properties / blend Mode: Soft Light
17. Effects / Plugins / AP01 [Innovations] / Lines-SilverLining -preset
[breaks in Fence]

18. Effects / User Defined Filter / emboss 3
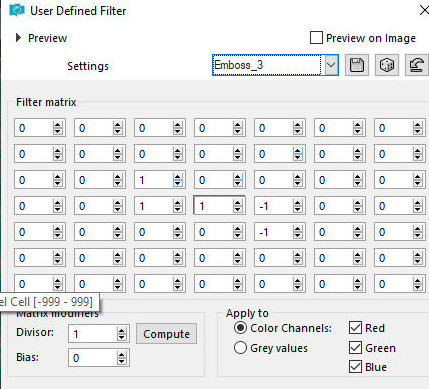
19. Activate the Raster 1 layer
20. Effects / Image Effects / Seamless tiling - preset[side by side
or equal to print]
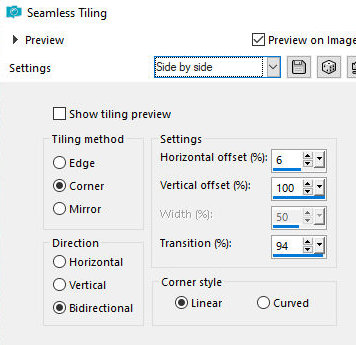
21. Effects / reflection Effects / rotating Mirror - default
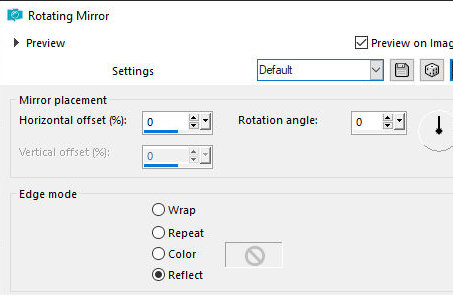
22. Add new layer
23. Paint it white
24. Layers / New Mask layer / From Image / mask
[Narah_mask_Abstract049]
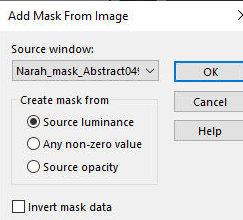
25. Merge Group
26. Layers / Properties / Blend Mode: Luminance (L)
27. Layers / Arrange / Bring to top
28. Copy the tube character and paste it as a new layer
29. Refinish if necessary
30. Position as you see fit
31. Drop shadow of your choice
32. Copy the floral tube and paste as a new layer
33. Resize if necessary, position and apply a Drop shadow of your
choice
34. Copy the text and paste as a new layer
35. Position as you see fit
36. Image / Add borders / symmetric marked
1px / black
50px/white
1px / black
20px / white
1px / black
37. Copy the tube deco [nrb_art_deco_48] and paste it as a new layer
38. Position to the left according to the model
39. Layers/duplicate
40. Image / Mirror / Mirror Horizontal
41. Image / Mirror / Mirror Vertical
42. Put your signature
Merge all
Adjust/Sharpness/Sharpen
Save as jpeg
*
|
Value the translator’s work. In
addition to the link to the original work, also include
the translation link. Thank you very much!
Valorar el trabajo del traductor.
Además del enlace a la obra original, incluya también el
enlace a la traducción. ¡Muchas gracias! |
Tutorial traduzido em
06/01/24
*
 |