|

|
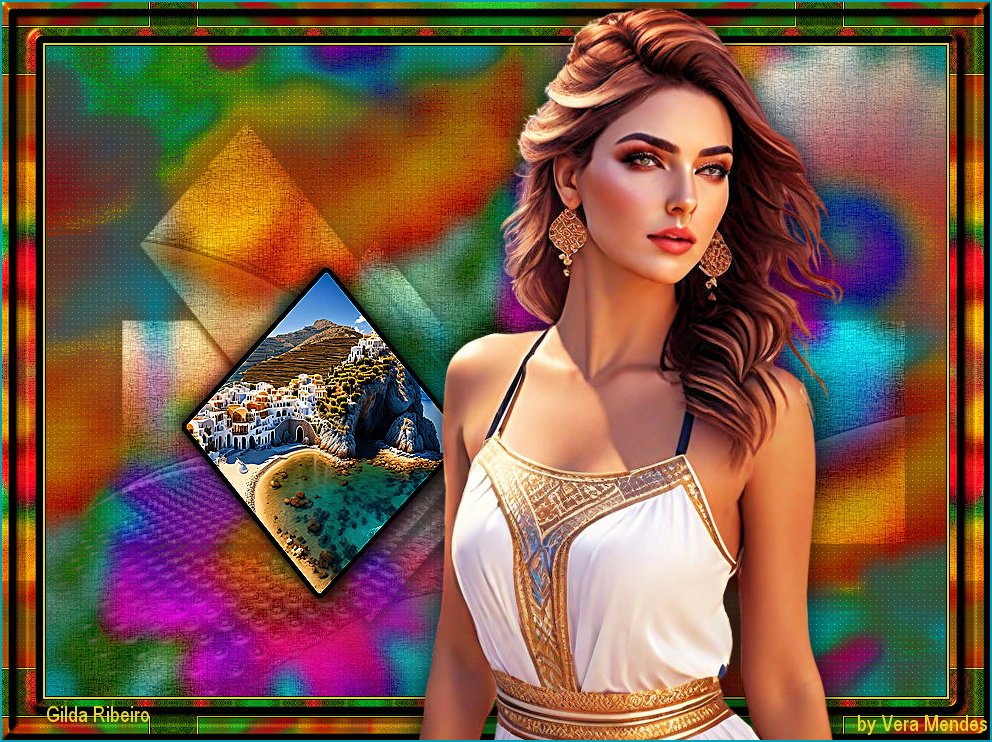
Tutorial de Gilda Ribeiro
Link tutorial original:
Bela |
| Tubes Principais:
VM Tubes
|
| Link material:

|
| Plugins: Plugin I.C.Net Software/
Filters Unlimited 2.0 / Textures Papers
Plugin Caroline Sensibilite / CS
|
| Orientações: Salve a seleção na
pasta Selections do PSP
Abra as masks e minimize
Será preciso um tube floral (para o fundo)
Uma imagem .jpg
Um tube principal
|
SCRIPT
01. Open the floral tube and choose two colors
from it: a dark one for the foreground and a light one for the
background
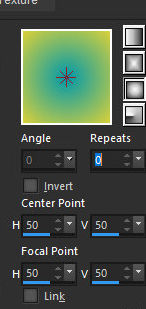
Prepare a Sunburst gradient:
02. Open a new image with 900 x 650px
Paint with the gradient
Selections / Select All
03. Copy the floral tube
Paste into selection
Select none
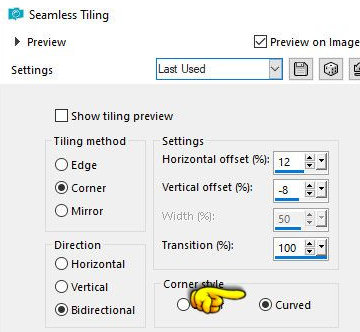
04. Effects / Image Effects / Seamless Tiling
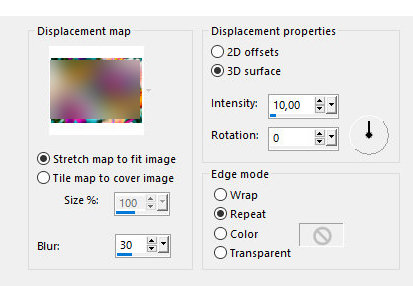
05. Effects / Distortion Effects / Displacement
Map
N.T.: If the full window does not appear as in the screenshot, click
Preview.
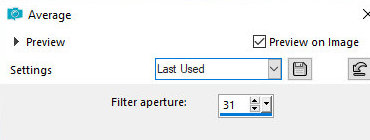
06. Adjust / Blur / Average / Filter aperture 31
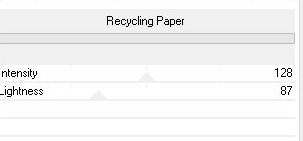
07. Effects / Plugin / Unlimited 2.0 / Paper
Textures /Recycling Paper
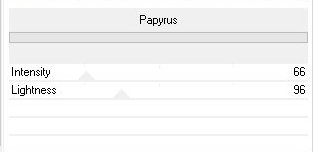
08. Effects / Plugin / Unlimited 2.0 / Paper
Textures / Papyrus
09.Adjust/Sharpness/Sharpen
10. Layers/New Raster Layer
Paint with dark color
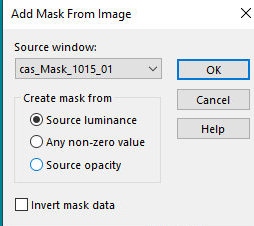
11. Layers / New Mask Layer / From Image / Mask [cas-Mask-1015-01]
Merge Group
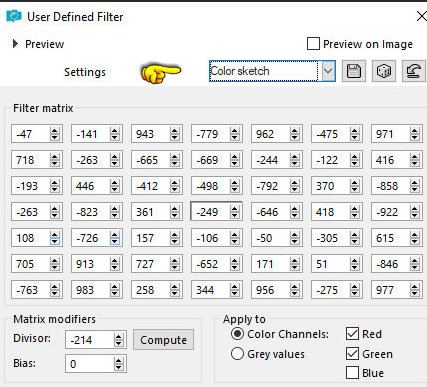
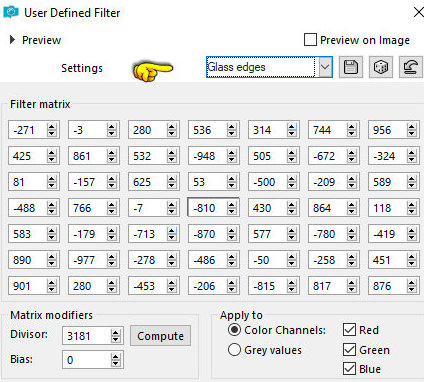
12. Effects / User Defined Filter / Color Sketch
13. Effects / User Defined Filter / Glass Edge
14. Drop Shadow: 0 0 80 0 black
15. Layers / Properties / blend Mode: Luminance (L)
16. Image / Mirror / Mirror Horizontal (Optional if you want to
change the position of the mask)
17. Layers / New Raster Layer
Paint with color #404040
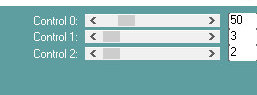
18. Effects / Plugins / Carolaine and Sensibility / CS_LDots
50 3 2
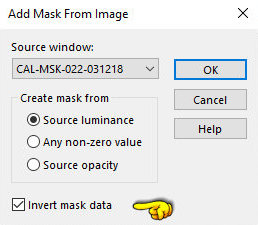
19. Layers / New Mask Layer / From Image / Mask [cas-Mask-022-03-218]
- INVERT MARKED
Merge Group
20. Layers / Properties / blend Mode: Luminance
21. Layers / New Raster Layer
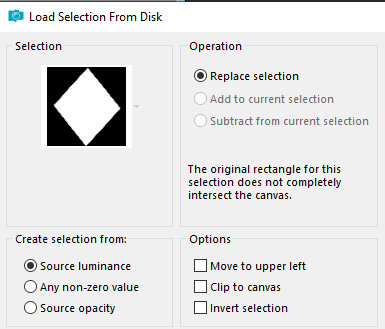
22. Selections / Load selection from disk / Selection [sel_
gimr_7_Bela]
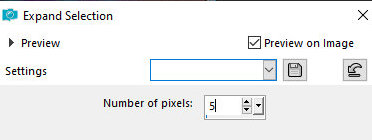
23. Selections / Modify / Expand: 5px
24. paint the selection with black color
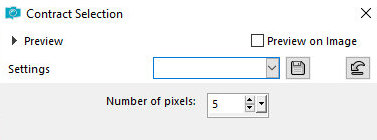
25. Selections / Modify / Contract: 5px
Press Delete on the keyboard
26. Copy the .jpg image (landscape)
Paste into selection
27. Effects / Edge Effect / Enhance
28. Select None
29. Drop shadow: 5 5 60 15 light color
Repeat with negative H and V
30. Image / Add Borders / Symmetric marked / 1px / Color #000000
31. Image / Add Borders / Symmetric marked / 2px / Light color
32. Image / Add Borders / Symmetric marked / 1px / Color #000000
33. Selections / Selection All
34. Image / Add Borders / Symmetric marked / 40px / Color #ffffff
35. Selections/Invert
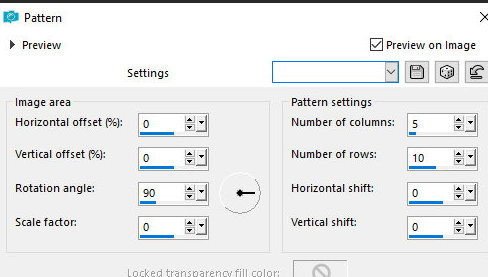
36. Effects / Reflection Effects / Pattern
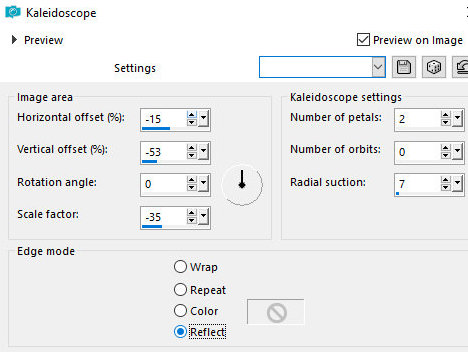
37. Effects / Reflection Effects / Kaleidoscope
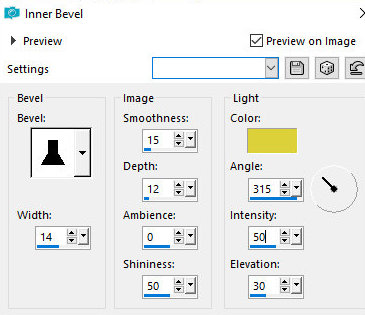
38. Effects / 3D Effect / Inner Bevel / Light
Color
39. Select None
40. Copy the main tube
Paste as new layer
41. Position as desired
Resize if necessary
Drop shadow of your choice
42. Image / Add Borders / Symmetric marked / 2px / Dark color
43. Image / Resize: width=900px - all layers checked
Put your signature
Save as jpeg
Tutorial traduzido em 25/10/2023
*
 |