Material:
 
Tube de personagem
NRB_Art_Deco_34 (anexo)
NRB_Art_Texto_06 (anexo)
Mask: creation.tine_masque334 (anexo)
Seleção: #selectionNRB04 (anexo)
Efeitos do PSP 2020
Plugin DSB Flux / Linear Transmission
Plugin Toadies / Plain Mosaic Blur
Plugin Tramages / Panel Stripes
Plugin Simple / Top Left Mirror e Left Right Wrap
Plugin Carolaine and Sensibility / CS-LDots


Roteiro:
1 - Abra o Tube de personagem, o Deco e a Mask no PSP
    Retire duas cores principais do tube. Coloque a mais escura no Foreground
  
 
2 - Coloque a seleção na pasta Corel PaintShop Pro / Selections
    Abra uma imagem transparente 800X550
   
3 - Faça um Gradiente Linear Angle 0 / Repeats 1/  Invert desmarcado e pinte a imagem
 
4 - Selections / Select All
    Edit / Copy no tube. Edit / Paste Into Selection
 
5 - Adjust / Blur / Radial Blur / Twirl / 100 / -30 / 0 / 0 / 0. Elliptical marcado
 
6 - Effects / Plugins / DSB Flux / Linear Transmission / 13 / 5 / 50 / Vertical

    Effects / Edge Effects / Enhance More
 
7 - Effects / Plugins /  Toadies / Plain Mosaic Blur /  29 / 37 / 18
 
8 - Effects / Plugins / Tramages / Panel Strips / 75 / 132 / 70
 
9 - Layers / Duplicate /  Image / Mirror / Mirror Horizontal
 
10 - Mude o "Blend Mode" para Overlay / Layers / Merge / Merge Down
 
11 - Effects / Plugins / Simple / Top Left Mirror
 
12 - Selections / Load/Save Selection / Load Selection From Disk
     Escolha a seleção #selectionNRB04
 
13 - Selections / Promote Selection to Layer
     Selections / Select None
 
14 - Effects / Plugins / Carolaine and Sensibility / CS-LDots / 255 / 3 / 2 

     Effects / 3D Effects / Drop Shadow / 0 / 0 / 80 / 30,00. Preto
 
15 - Layers / Duplicate /   Effects / Geometric Effects / Circle / Transparente
 
16 - Layers / Duplicate / Effects / Plugins / Simple / Left Right Wrap
 
17 - Layers / Merge / Merge Down
     Effects / 3D Effects / Drop Shadow / 0 / 0 / 80 / 30,00. Preto
 
18 - Selecione a Raster 1. Layers / New Raster Layer. Pinte de branco
     Aplique a Mask creation.tine_masque334 . Layers / Merge / Merge Group
 
19 - Edit/  Copy no Tube / Edit / Paste As New Layer
 
20 - Layers / Arrange / Bring to Top
  Resize, se necessário. Aplique uma sombra a gosto
 
21 - Image / Add Borders / 2 / Symmetric marcado / Preto

     22- Image / Add Borders / 3 / Symmetric marcado / Cor do Background

    23-  Image / Add Borders / 2 / Symmetric marcado / Preto
 
24 - Image / Add Borders / 30 / Symmetric marcado / cor contrastante
 
25 - Selecione a borda com a ferramenta Magic Wand e pinte com o mesmo Gradiente
 
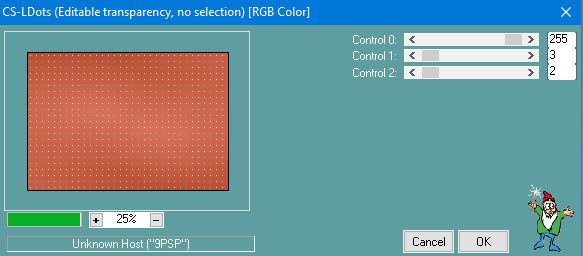
26 - Effects / Plugins / Carolaine and Sensibility / CS-LDots / 255 / 3 / 2
     Selections / Select None
 
27 - Image / Add Borders / 2 / Symmetric marcado / Preto
 
    28- Image / Add Borders / 3 / Symmetric marcado / Cor do Background

     29- Image / Add Borders / 2 / Symmetric marcado / Preto
 
30- Image / Add Borders / 50 / Symmetric marcado / cor contrastante
     Selecione essa borda com a ferramenta Magic Wand Tolerance e Feather 0 (zero) e pinte com o mesmo Gradiente, com Invert marcado
 
31 - Effects / Texture Effects / Texture. Escolha a Texture Polka Dot /  0 / 5 / 0 / 0 / 340 / 40/  50 / Size 40%/  Branco
 
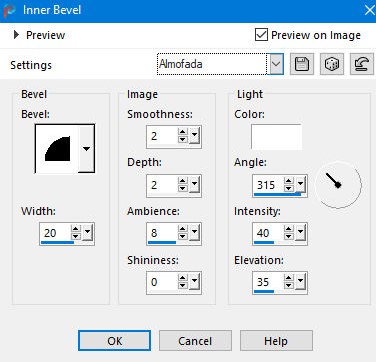
32 - Effects / 3D Effects / Inner Bevel / Preset Almofada / Bevel 2 / 20 / 2 / 2 / 8 / 0 / 315 / 40 / 35 / branco
 
33 - Selections / Select None / Image / Add Borders / 2 / Symmetric marcado / Preto
 
34 - Edit / Copy no Deco. 
     Edit / Paste As New Layer / Colorize de acordo com a sua imagem
 
35 - Com a ferramenta Pick, posicione: Position X / 122,00 / Position Y / 170,00

     36- Layers / Duplicate / Image / Mirror / Mirror Horizontal. Image / Mirror / Mirror / Vertical
 
37 - Edit / Copy no Texto. Posicione a gosto.
 
38 - Layers / Merg e/ Merge All

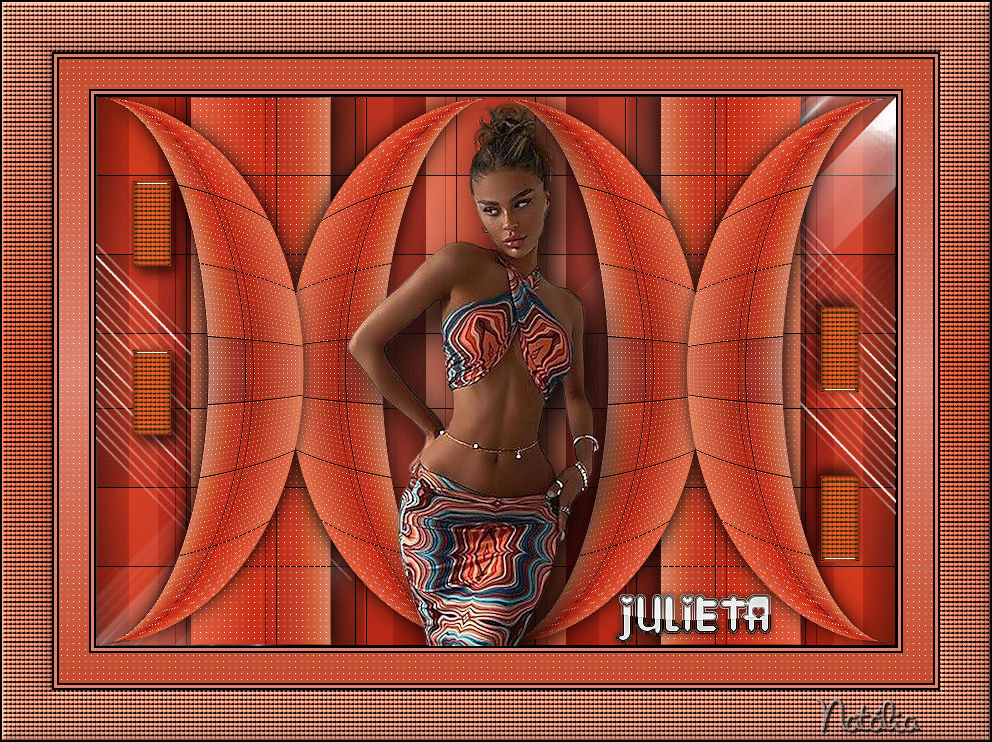
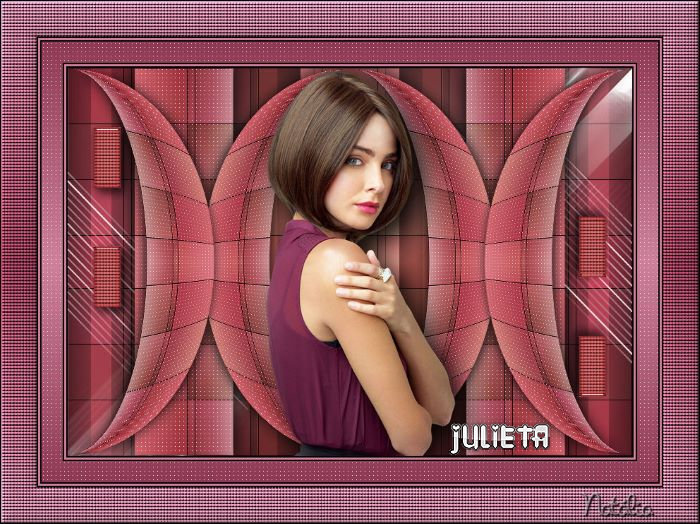
    39- Assine e salve em Jpeg
 
 
Outro Modelo:


Créditos:
Tutorial: Natália Raposo
Tube1: LB Tubes
Tube2: Pqna & Alice
Deco: NRB_Art_Deco_34
Texto: NRB_Art_Texto_06
Mask: creation.tine_masque334
Seleção: #selectionNRB04
 
Tutorial criado por Natália Braga em junho de 2023