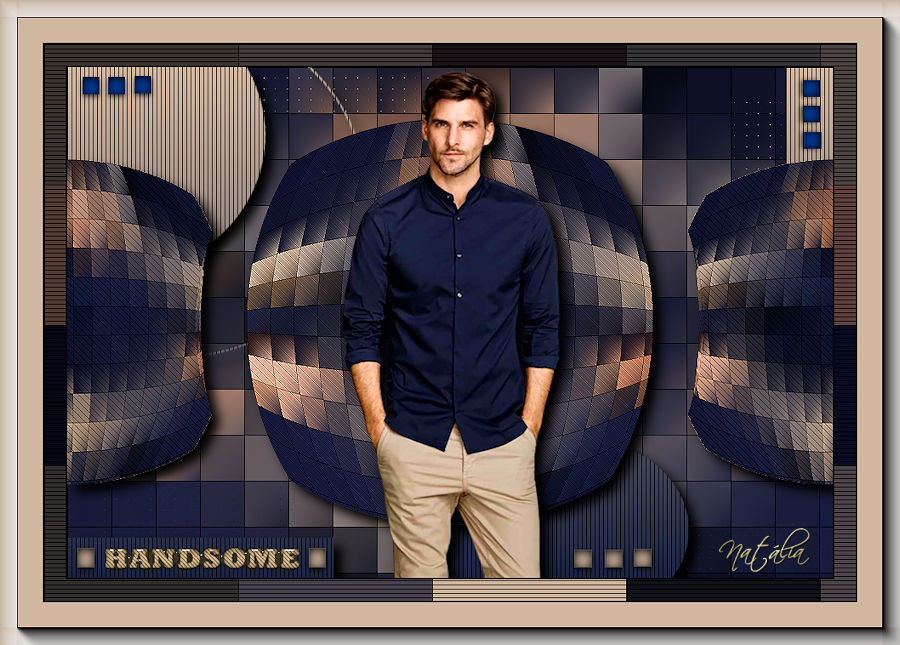
Material:
Tube de
personagem
Plugin Toadies/ Plan Mosaic Blur
Plugin AP01[Innovations]/ Lines-Silverlining
Plugin Simple/ Left Right Wrap
Plugin LenK's/ Jouri
NarahsMask_1738
NRB_Art_Deco_59
NRB_Art_Deco_60
NRB_Art_Deco_61
NRB_Art_Deco_62
NRB_Art_Texto_11
*Os decos e o
texto podem ser colorizados, de acordo com a imagem
usada
1 - Abra os
materiais no PSP e escolha duas cores
Coloque a cor mais escura no Foreground e a mais
clara no Background
2 - Abra uma
imagem transparente 900X600 e pinte com um gradiente
linear/ 0/ 0/ Invert desmarcado, feito com as cores
acima
3 -
Selections/ Select All
Edit/ Copy no tube
4 - Edit/
Paste into Selection
Selections/ Select None
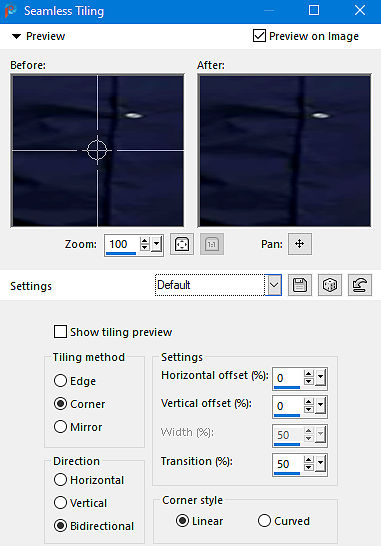
5 - Effects/
Image Effects/ Seamless Tiling/ Default
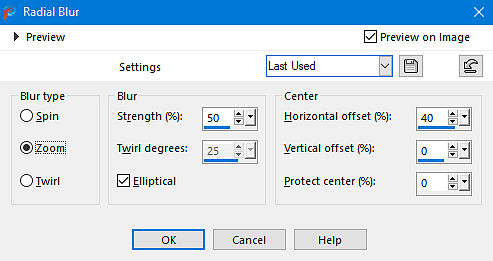
Adjust/ Blur/ Radial Blur/ Zoon/ Strength(%)/50/
Elliptical marcado/ 40/ 0/ 0/ 0
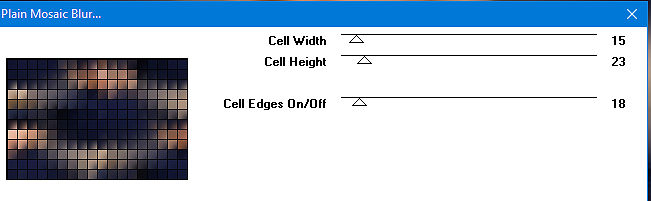
6 - Effects/
Plugins/ Toadies/ Plain Mosaic Blur/ 15/ 23/ 18
Layers/ Duplicate
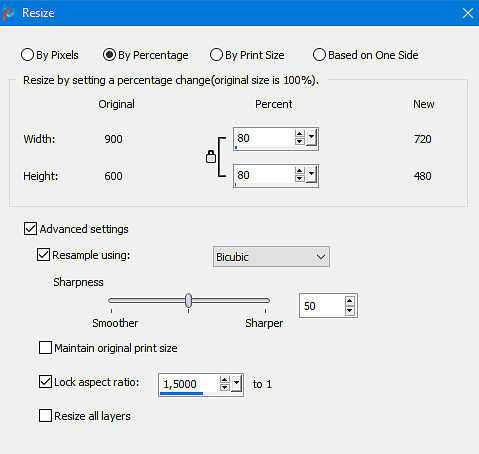
7 - Image/
Resize/ By Percentage marcado/ 80/ Percent/ Resize
All layers desmarcado
Effects/ Geometric Effects/ Circle/ Transparent
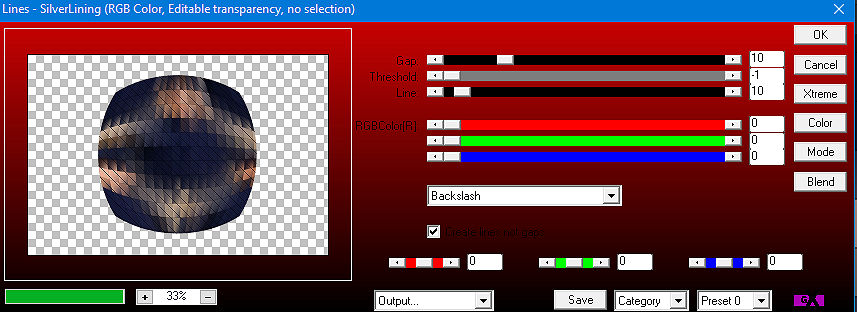
8 - Effects/
Plugins/ AP01[Innovations]/ Lines-Silverlining
Escolha a opção Backslash/ 10/ -1/ 10/ 0/ 0/ 0
9 - Adjust/
Sharpness/ Sharpen
10 - Layers/
Duplicate
Image/ Resize/ By Percentage marcado/ 80/
Percent/ Resize All layers desmarcado
11 - Effects/
Plugins/ Simple/ Left Right Wrap
Adjust/ Sharpness/ Sharpen
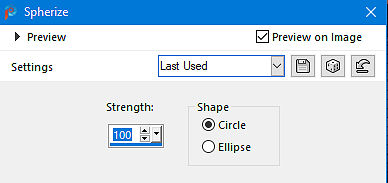
12- Effects/
Geometric Effects/ Spherize/ 100/ Circle
Layers/
Merge/ Merge Down
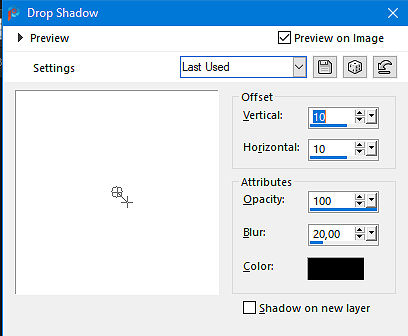
13 - Effects/
3D Effects/ Drop Shadow/ 10/ 10/ 100/ 20,00. Preto
14 - Layers/
New Raster Layer
Pinte com o mesmo gradiente anterior
15 - Layers/
New Mask Layer/ From Image
Escolha a mask NarahsMask_1738
16 - Layers/
Delete. Layers/ Merge/ Merge Group
Layers/ arrange/ Move Down
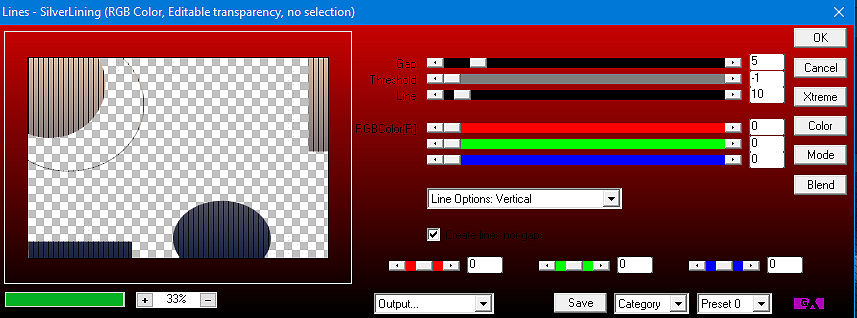
17 - Effects/
Plugins/ AP01[Innovations]/ Lines-Silverlining
Escolha a opção Line Options: Vertical/ 5/ -1/
10/ 0/ 0/ 0
18 - Effects/
3D Effects/ Drop Shadow/ 10/ 10/ 100/ 20,00. Preto
19 - Edit/
Copy no tube
Edit/ Paste as New Layer
20 - Layers/
Arrange/ Bring to Top. Redimensione, se necessário
Aplique uma sombra a gosto
21 - Edit/
Copy no deco nrb_art_deco_59
Edit/ Paste as New Layer. Posicione como no
modelo
22 - Faça o
mesmo com os decos: nrb_art_deco_60, 61 e 62
23 - Edit/
Copy no deco nrb_art_texto_11
Edit/ Paste as New Layer. Posicione como no
modelo
24 - Image/
Add Borders/ Symmetric marcado/ 2/ Preto
Edit/ Copy
25 -
Selections/ Select All
Image/ Add Borders/ Symmetric marcado/ 25/
Preto
26 -
Selections/ Invert
Edit/ Paste Into Selection
27 - Adjust/
Blur/ Gaussian Blur/ 20
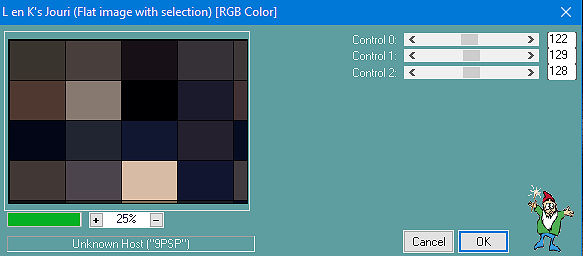
28 - Effects/
Plugins/ LenK's/ Jouri/ 122/ 129/ 128
29 - Effects/
Plugins/ AP01[Innovations]/ Lines-Silverlining
Escolha a opção Horizontal/ 5/ -1/ 10/ 0/ 0/ 0
30 -
Selections/ Select None
Image/ Add Borders/ Symmetric marcado/ 2/ Preto
31 - Image/
Add Borders/ Symmetric marcado/ 50/ cor do
background
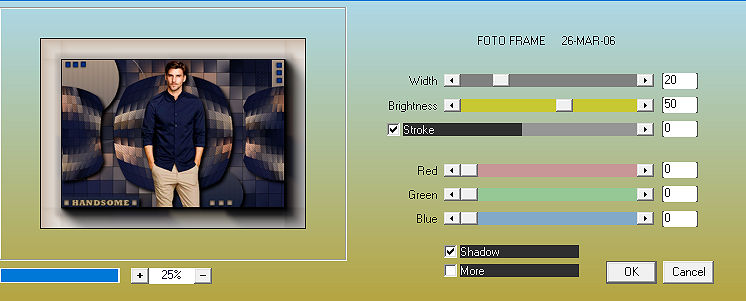
32 - Effects/
Plugins/ AAA Filters/ Foto Frame/ 20/ 50/ 0/ 0/ 0/ 0
33 - Image/
Resize/ By Pixels/ Width/ 900. Resize All Layers
marcado
Adjust/ Sharpness/ Sharpen
34 - Assine e salve em jpeg
Outro
Modelo:
Créditos:
Tube1: SuizaBella
Tube2: LB
Tubes
Mask: Narah'sMask_1738
Decos:
NRB_Art_Decos
Tutorial
criado Natália Raposo em 2023