Roteiro:
1 - Abra o tube no PSP
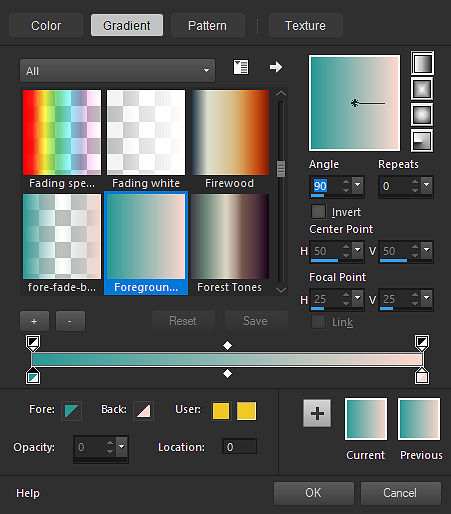
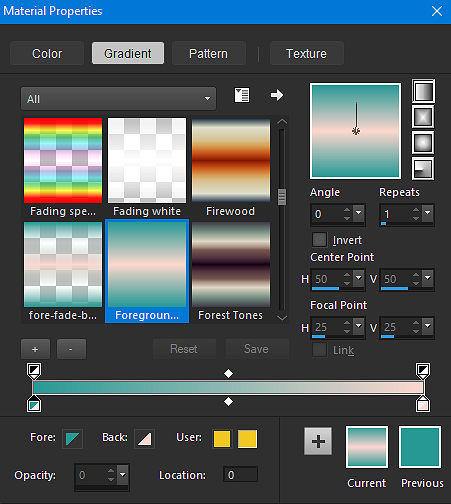
2 - Escolha duas cores para fazer um gradiente Linear/ Angle/ 90/ Repeats/ 0/ Invert desmarcado
Cor escura no Foreground, cor clara no Background
3 - Abra uma imagem transparente 900X600 e pinte com o gradiente
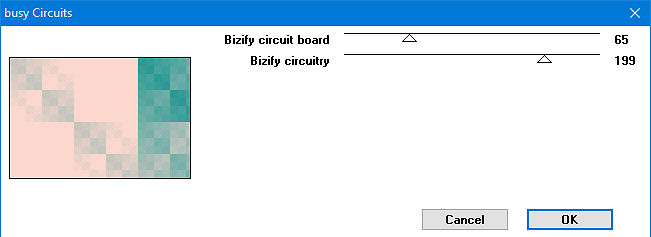
4 - Effects/ Plugins/ Kang 1/ Busy Circuits/ 65/ 199
5 - Effects/ Edge Effects/ Enhance More
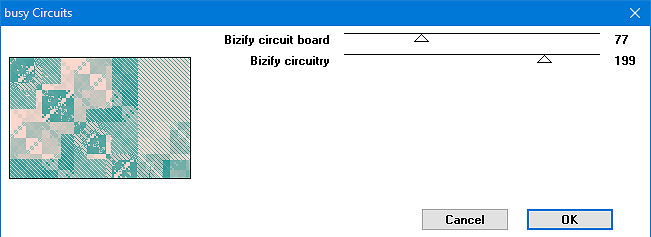
6 - Effects/ Plugins/ Kang 1/ Busy Circuits/ 77/ 199
7 - Effects/ Plugins/ Simple/ Top Left Mirror
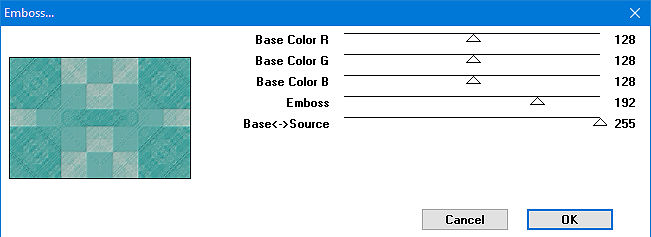
8 - Effects/ Plugins/ MuRa's Seamless/ Emboss/ Default
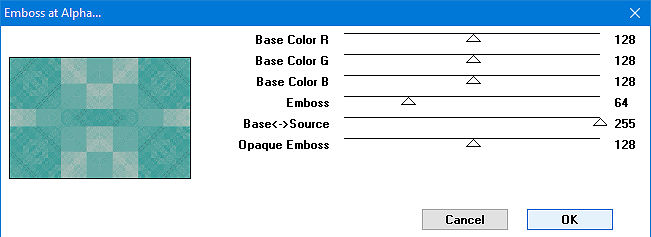
9 - Plugin MuRa's Seamless/ Emboss at Alpha/ Default
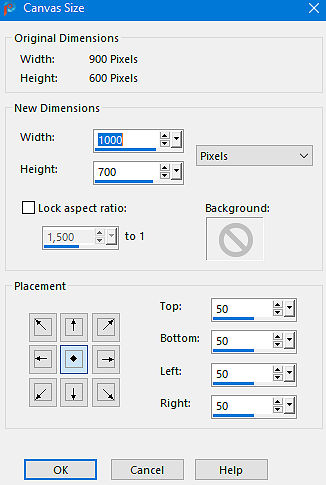
10 - Image / Canvas Size / 1000X700 / Top /50 / Bottom/ 50/ Left/ 50/ Right/ 50
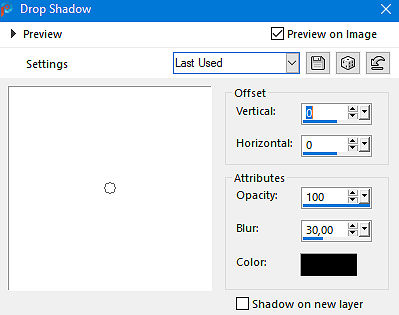
11 - Effects/ 3D Effects/ Drop Shadow/ 0/ 0/ 100/ 30,00/ Preto
12 - Layers/ New Raster Layer
Pinte com a cor do foreground
13 - Layers/ Arrange/ Send to Bottom
Aplique a mask/ Delete/ Merge Group
14 - Layers/ New Raster Layer
Pinte com a cor do background
15 - Layers/ Arrange/ Send to Bottom
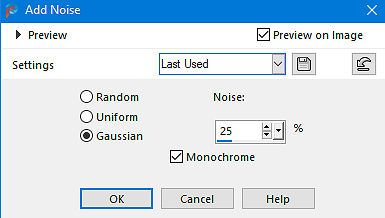
Adjust/ Add/ Remove Noise/ Add Noise/ Gaussian/ 25/ monochrome marcado
16 - Edit/ Copy no tube
Edit/ Paste as New Layer
17 - Layers/ Arrange/ Bring to Top
Posicione e aplique uma sombra a gosto
18 - Edit/ Copy no tube decorativo
Edit/ Paste as New Layer
19 - Posicione e aplique uma sombra a gosto
20 - Selections/ Select All
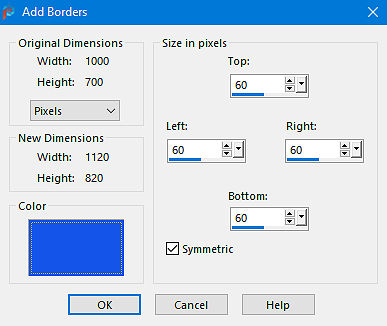
Image/ Add Borders/ Symmetric marcado/ 60/ qualquer cor
21- Selections/ Invert
Pinte com um gradiente linear/ 0/ 1/ Invert desmarcado/ mesmas cores do item 2
22 - Effects/ Plugins/ Cybia/ Screenworks/ Fine Rule/ 0
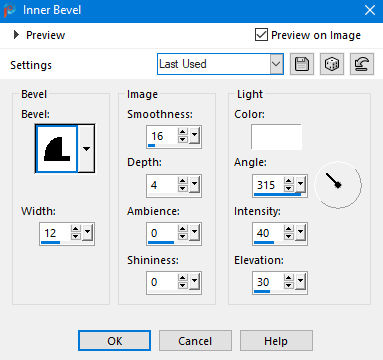
23 - Effects/ 3D Effects/ Inner Bevel/ Settings/ Frame
Selections/ Select None
24 - Edit/ Copy no deco
Edit/ Paste as New Layer
25 - Com a ferramenta Pick, posicione: Position X/ 20,00/ Position Y/ 20,00
Layers/ Duplicate
26 - Image/ Mirror/ Mirror Horizontal
Image/ Mirror/ Mirror Vertical
27 - Layers/ Merge/ Merge All
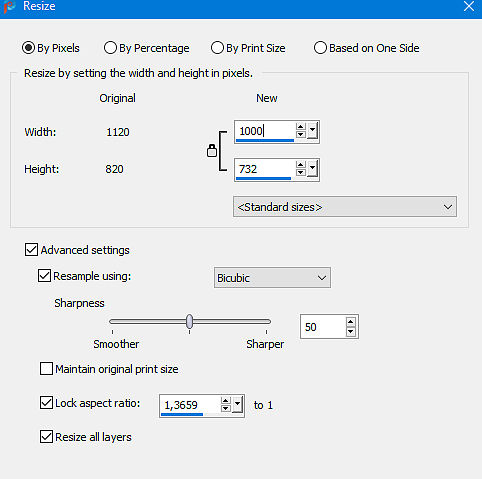
Image/ Resize/ By Pixels/ Width/ 1000/ Resize All Layers marcado
28 - Adjust/ Sharpness/ Sharpen
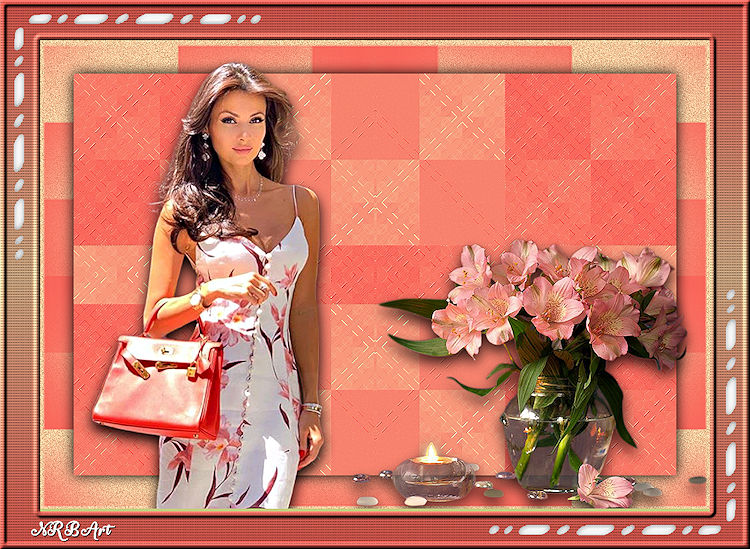
Assine e salve em Jpeg
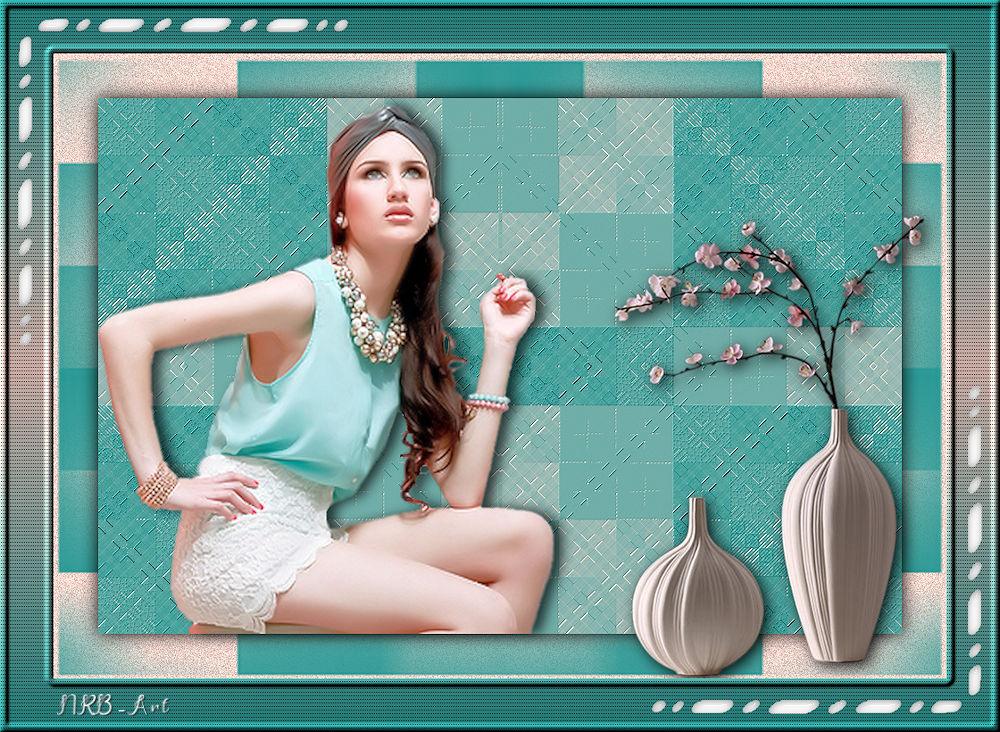
Outro modelo:
Créditos:
Tube1: Ana Ridzi
Tube2: Edith Spigai
Tube decorativo1: LB Tubes
Tube decorativo2: LB Tubes
Deco: NRB_Art
Mask 174 (desconheço autoria)
Tutorial criado por Natália Raposo em janeiro de 2024