7 - Effects/ User Defined Filter/ presets/ Emboss 3
8 - Effects/ Geometric Effects/ Circle/ Repeat
9 - Com a ferramenta Magic Wand, Tolerance/ 0/
Feather/ 0, selecione o fundo liso e delete
Selections/ Select none
10 - Effects/ Geometric Effects/ Skew/ Horizontal/
45/ wrap
11 - Layers/ Duplicate. Image/ Mirror/Mirror
Horizontal
Mude o Blend Mode para Multiply e a opacidade
para 75%
12 - Layers/ Merge/ Merge down
13 - Layers/ Duplicate
Image/ Free Rotate/ Left/ 90 degrees. All
Layers desmarcado
14 - Image/ Resize/ By Percentage marcado/ 72/
Resize all layers desmarcado
15 - Layers/ Merge/ Merge Down
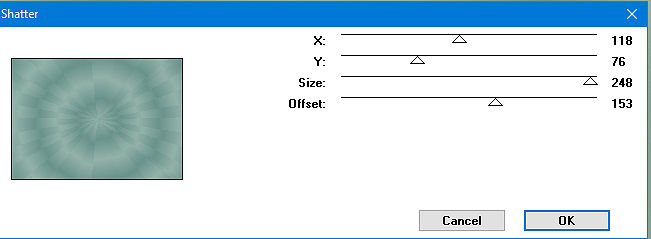
16 - Effects/ Image Effects/ Seamless Tiling/
Default
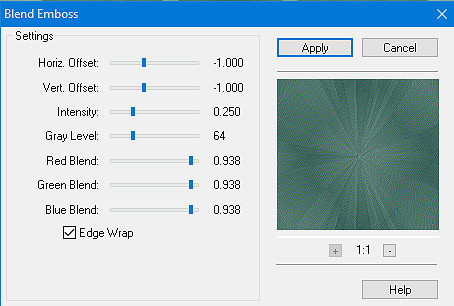
17 - Effects/ Plugins/ FM Tile Tools/ Blend Emboss/
Default
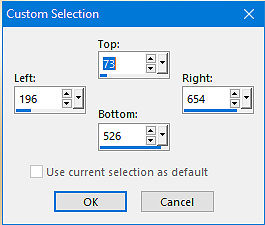
18 - Selecione a ferramenta Selection Tool
Clique em Custom Selection e coloque os
valores: top 73/ Left 196/ Right/ 654/ Bottom/ 526
19 - Layers/ New Raster Layer
Pinte com mesmo gradiente do item 2
20 - Effects/ Artistic
Effects/ Enamel/ 0/ 100/ 128/ Angle 36/ Color/ a cor
do Background
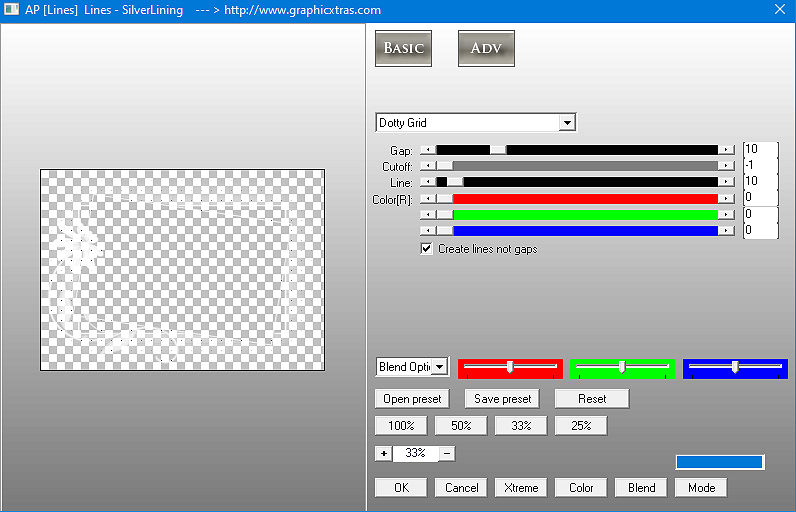
21 - Effects/ Plugins/ AP[Lines]/
Lines-Silverlining/ Dotty Grid
22 - Effects/ Plugins/ Filters Unlimited 2.0/
Buttons & Frames/ 3D Glass Frame 2/ 30/ 128
Selections/ Select None
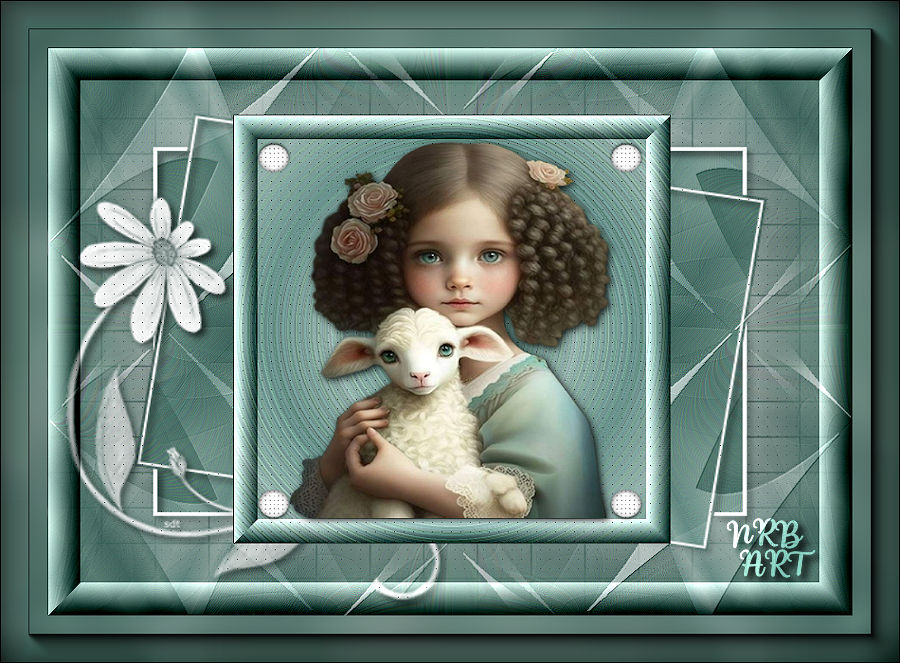
23 - Edit/ Copy no tube. Edit/ Paste as New Layer
Redimencione e use a ferramenta Pick, se
necessário, para encaixar o tube no retângulo
central
24 - Aplique uma sombra a gosto
25 - Edit/ Copy no NRB_Deco_43. Edit/ Paste as New
Layer
Layers/ Merge/ Merge Down, duas vezes
26 - Layers/ New Raster Layer
Pinte de branco
27 - Aplique a mask. Layers/ Delete/Layers/ Merge/
Merge Group
Layers/ Arrange/ Move Down
28 - Effects/ Plugins/ AP[Lines]/
Lines-Silverlining/ Dotty Grid
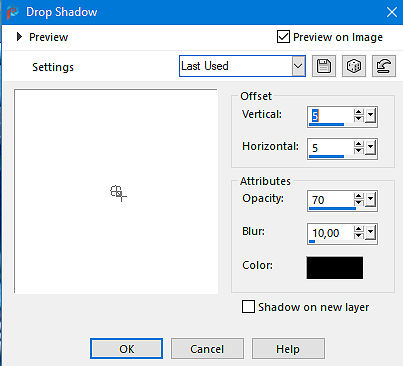
Effects/ 3D Effects/ Drop Shadow/ 5/5/ 70/
10,00. Preto
29 - Layers/ Arrange/ Move
Down
Layers/ Merge/ Merge Visible
30 - Effects/ Plugins/
Filters Unlimited 2.0/ Buttons & Frames/ 3D Glass
Frame 2/ 30/ 128.
Edit/ Copy
31 - Image/ Add Borders/ cor
contrastante/ Symmetric/ 50
Selecione com a ferramenta Magic Wand.
32 - Edit/ Paste into
Selection
Adjust/ Blur/ Gaussian Blur/ 20,00
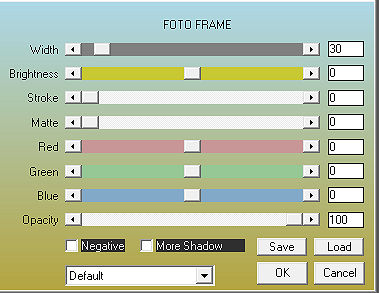
33 - Effects/ Plugins/ AAA
Frames/ Foto Frame/ Width 30
Selections/ Select None
34 - Image/ Resize/ By Pixels
marcado/ altere Width para 900/ Resize All Layers
marcado
Adjust/ Sharpness/ Sharpen
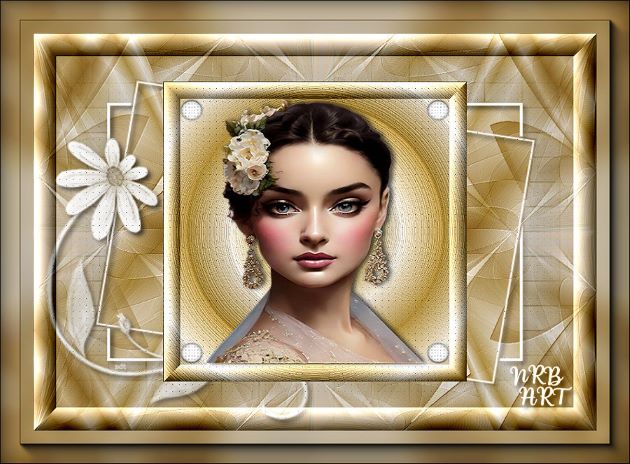
35 - Assine e salve em jpeg.
Outro Modelo: