Material:
Tube de
personagem
Tube floral
Efeitos do PSP (Foi usado o PSP 2020)
Plugin Tramages/ legolator
Plugin Tramages/ Tow the Line
NRB_Art_Textos (anexado)
Roteiro:
1 - Abra os materiais
no PSP
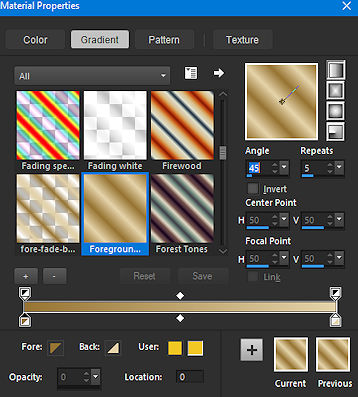
Escolha duas cores e coloque a cor mais escura no
foreground e a mais clara no background
2 - Faça um
gradiente Linear/ 45/5/ Invert desmarcado
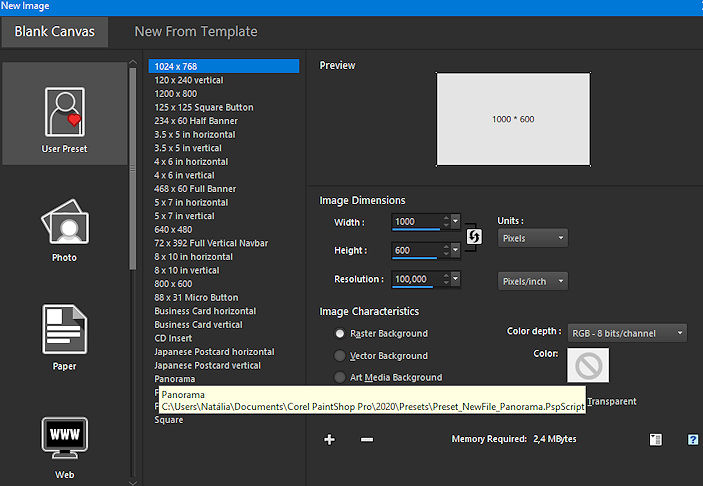
3 - Abra uma
imagem 1000X600 e pinte com o gradiente
Selections/ Select All
4 - Edit/ Copy
no tube de personagem
Edit/ Paste Into Selection. Selections/ Select None
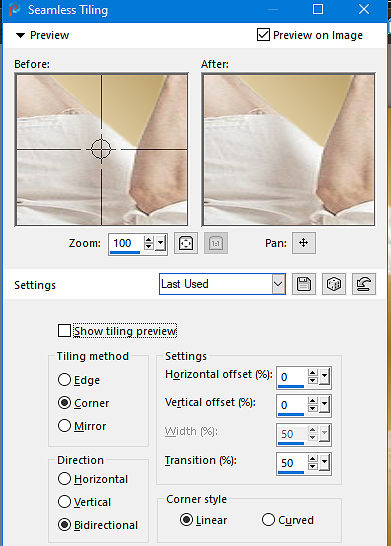
5 - Effects/ Image Effects/ Seamless Tiling/ Default
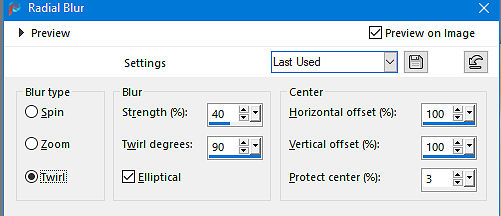
6 - Adjust/ Blur/
Radial Blur/ Twirl/ 40/ 90/ Elliptical marcado/ 100/ 100/ 3
7 - Effects/
Plugins/ Tramages/ Legolator/ 42/ 255/ 183/ 128/ 245
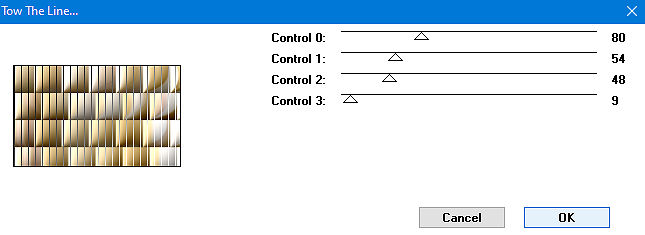
8 - Effects/
Plugins/ Tramages/ Tow the Line/ 80/ 54/ 48/ 9
9 - Layers/
Duplicate
Image/ Mirror/ Mirror Horizontal
10 - Reduza a
opacidade em 50%
Layers/ Merge/ Merge Visible
11 - Effects/ Distortion Effects/ Polar Coordinates/
Rectangular to polar/ Repeat
Layers/ Duplicate
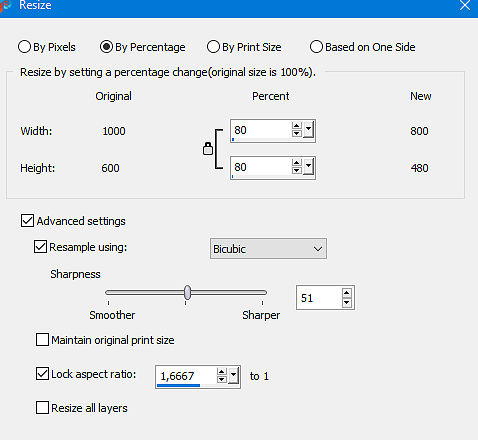
12 - Image/
Resize/ By Percentage marcado/ 80/ percent/ Resize All
Layers desmarcado
13 - Effects/
Texture Effects/ Mosaic-Glass/ 25/ 25/ Symmetric marcado/
100/ 100/ 1/ 4
14 - Edit/
Copy no tube principal
Edit/ Paste as New Layer
15 - Posicione
e aplique uma sombra a gosto
16 - Edit/
Copy no tube floral
Edit/ Paste as New Layer
17 - Posicione
e aplique uma sombra a gosto
18 - Edit/
Copy no texto
Edit/ Paste as New Layer. Posicione a gosto
19 - Image/
Add Borders/ Symmetric marcado/ 2/ cor branca
Edit/ Copy
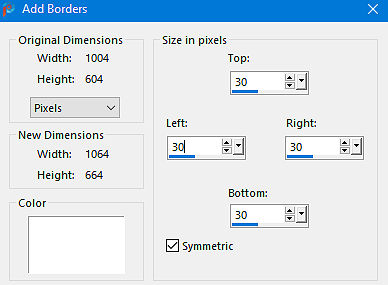
20 -
Selections/ Select All
Image/ Add Borders/ Symmetric marcado/ 30/ cor branca
21 -
Selections/ Invert
Pinte com o gradiente anterior
22 -
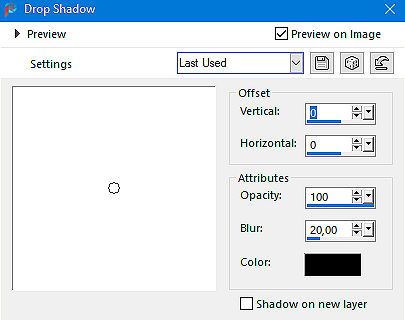
Selections/ Invert
Effects/ 3D Effects/ Drop Shadow/ 0/ 0/ 100/ 20,00/
Preto
23 -
Selections/ Select None
24 - Image/
Add Borders/ symmetric marcado/ 2/ cor branca
25 -
Selections/ Select All
Image/ Add Borders/ Symmetric marcado/ 60/ cor branca
26 -
Selections/ Invert
Edit/ Paste Into Selection (A imagem copiada no item
18)
27 - Effects/
Texture Effects/ Mosaic-Glass/ 50/ 50/ Symmetric marcado/
50/ 0/ 2/ 50
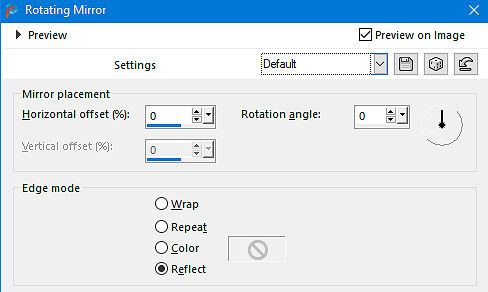
28 - Effects/
Reflections Effects/ Rotation Mirror/ Default
Selections/
Select None
29 - Image/
Add Borders/ symmetric marcado/ 2/ cor branca
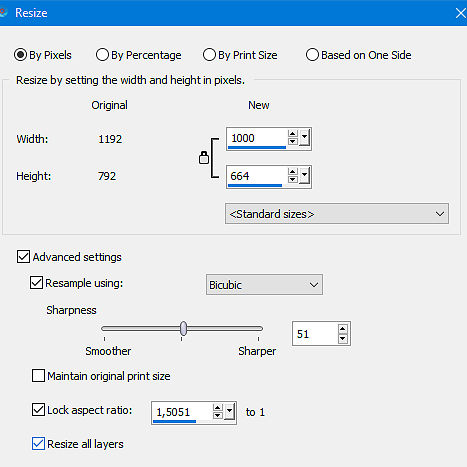
30 - Image/
Resize/ By Pixels marcado/ Width/ 1000
Resize All Layers marcado
31 - Adjust/
Sharpness/ Sharpen
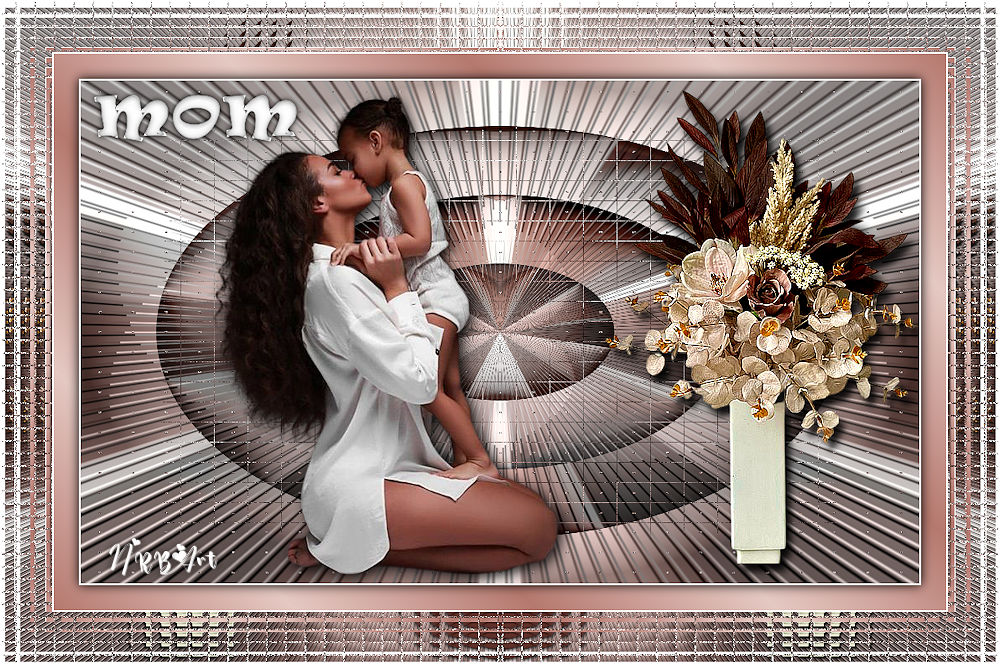
32 - Assine e
salve em Jpeg
Outro Modelo:
Créditos:
Tube de personagem1: LB Tubes
Tube floral1:
Calligraphy
Tube de personagem2:
Calligraphy
Tube
floral2: Calligraphy
Tutorial
criado por Natália Raposo em abril de 2024