Material
*Um tube
*Plugin Motifs/Motifs par
duplication(mu) (na caixinha)
*Plugin Flaming Pear/Flexify
*Efeitos do PSPX
Plugin
Tutorial
01- Abra o PSP e um tube.
Resize para 480 de altura.
02- Edit/ Copy. Feche o original.
03- Edit/ Paste/ As New Image.
04- Escolha duas cores
contrastantes do seu tube para fazer um gradiente.
Cor escura colocada no Foreground e cor clara no Background.
Configuração : Gradiente Radial com Angle:0 e Repeat:70
Invert e Link center and focal point
desmarcados.
Center point:Horizontal e Vertical:0
05- Abra uma imagem transparente de
1024x500pxs e pinte-a com o gradiente.
06- Effects/ Geometric Effects/Perspective
Vertical na configuração:
Distortion:(-100) / Edge mode:Transparent.
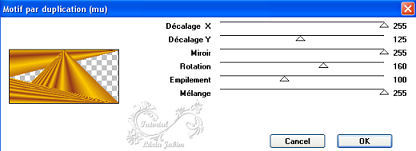
07- Effects/Plugin Motifs/Motif par
duplication (mu) como indica o print:
08- Layers/Duplicate.
09- Image/Mirror.
10- Layers/Properties/Blend Mode:Darken.
11- Layers/Merge/Merge Visible.
12- Effects/ Geometric Effects/Circle
/ Edge mode:Wrap.
13- Effects/3D Effects/Drop Shadow:
Offset:Vertical: 2 / Horizontal: 2
/ Opacity:60 / Blur:2/ Color:preto.
Offset:Vertical: (-2) / Horizontal:
(-2) / Opacity:60 / Blur:2/ Color:preto.
14- Effects/ Geometric Effects/Pentagon/Edge
mode:Wrap.
15- Layers/New Raster Layer.
16- Pinte essa Layer com a cor
clara do gradiente.
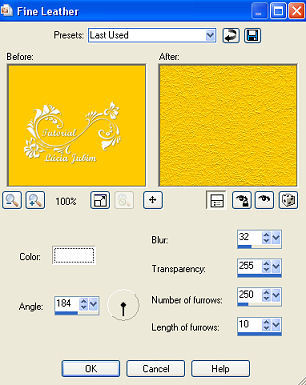
17- Effects/Texture Effects/Fine
Leather conforme o print:
18- Layers/Arrange/Send to Bottom.
19- Layers/Merge/Merge Visible.
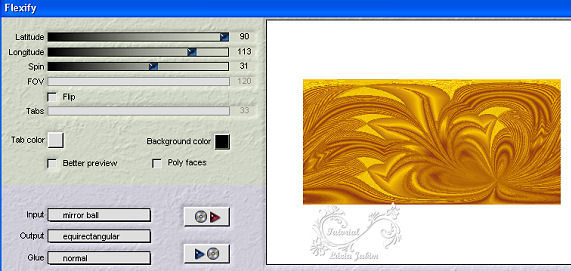
20- Effects/Plugin Flaming
Pear/Flexify199 conforme o print:
21- Effects/Reflection Effects/Rotating
Mirror na configuração:
Mirror placement: Horizontal
offset:0
Rotation angle: 0
Edge mode: Repeat
22- Effects/User Defined Filter/Emboss
3.
23- Image/Canvas Size:1024x520pxls
com Bottom em 20 e o restante em zero.
24- Com a ferramenta Magic Wand
Tool selecione a parte transparente.
25- Layers/New Raster Layer.
26- Pinte essa Layer com o
Gradiente Linear:Angle:0 / Repeat: 3,nas mesmas cores usadas
no gradiente do item 04 e com
Invert desmarcado.27- Selections/Select None.
28- Image/Canvas Size:1024x550pxls
com Bottom em 30 e o restante em zero.
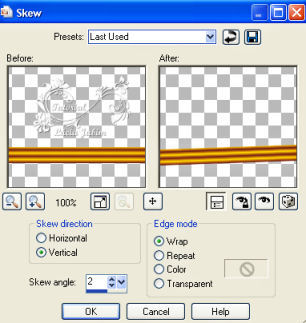
29- Effects/Geometric Effects/Skew,como
indica o print:
30- Layers/Duplicate.
31- Image/Mirror.
32- Layers/Merge/Merge Down.
33- Effects/3D Effects/Drop Shadow:
Offset:Vertical: 2 / Horizontal: 2
/ Opacity:60 / Blur:2/ Color:preto.
Offset:Vertical: (-2) / Horizontal:
(-2) / Opacity:60 / Blur:2/ Color:preto.
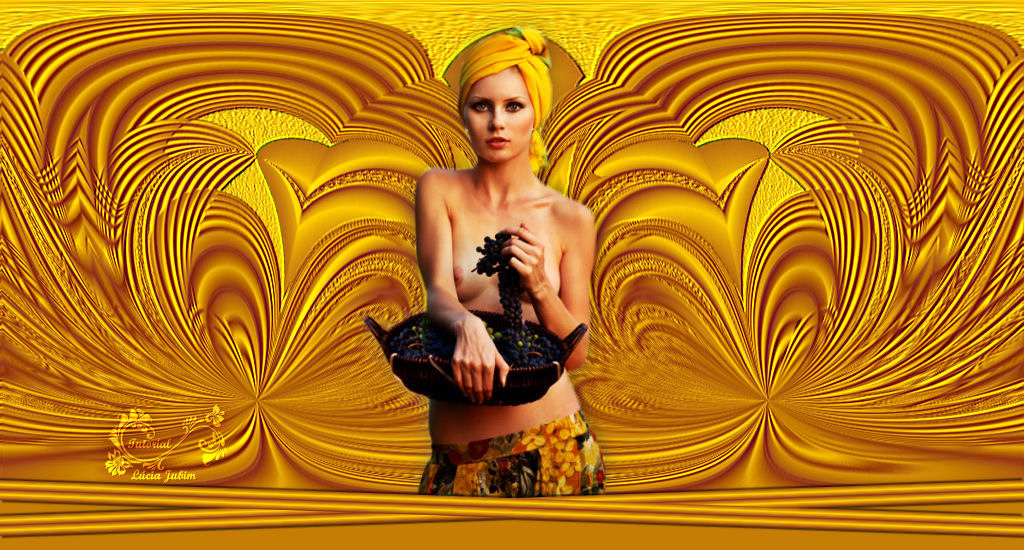
35- Edit/Past As New Layer no top.Aplique o tube entre a barrinha e o
top.(opcional)
36 -Dê um Drop Shadow suave no
tube.
37- Layers/New Raster Layer.
38- Pinte essa Layer com uma cor
que combine com o top.
39 - Layer/Arrange /Send to Bottom.
40 - Layer/Merge / Merge All(Flaten).
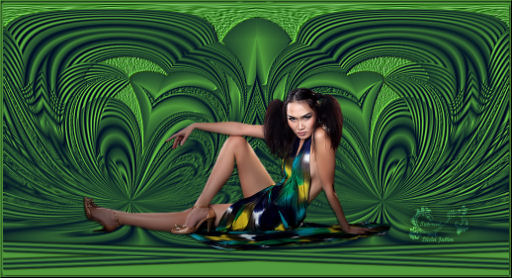
41 - Assine e salve o seu trabalho
em jpg.
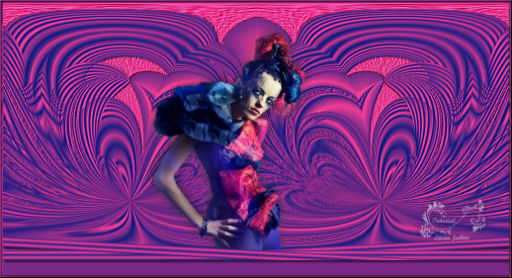
Modelo 02:
Crédito:
Top Motifs
Tubes usados no top principal
e modelos:Ana Ridzi.
Criação,arte e
formatação:Lúcia Maria Jubim.
Niterói/RJ.
Tutorial criado e elaborado
por Lúcia Maria Jubim T. de Miranda, em 22/04/12,
sendo proibida sua divulgação
sem o prévio consentimento da autora.