08- Selection/Select All
09- Edit Paste/Paste Into
Selection
10- Selection/Select None
11- Effects/Image
Effects/Seamless Tiling/Default
12- Adjust/Blur/Gaussiam Blur:
Radius 20
13- Plug-in Enki's/Jon Mullen's
Japanese Fan: 80
14- Layer Duplicate/Image Mirror
15- Mude o Blend Mode para
Darken
16-Layer/Merge/Merge Visible
17- Layers/New Raster Layer
18- Selections/Load/Save
Selections/Load Selection From Disk
Procure a seleção
aconforti190212 e deixe marcado Source luminance ,
Replace Selection e Move to upper left. Clique em Load.
19- Pinte com
uma cor clara do seu trabalho
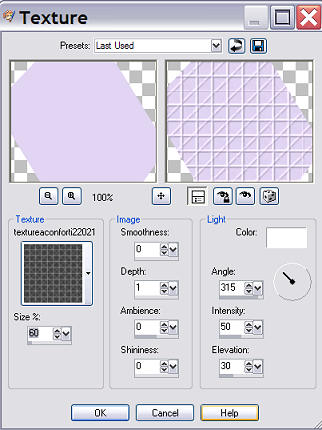
20-
Effects/Texture Effects/Texture como no Print:
21-
Selections/Select None
22-
Effects/Distortion Effects/Twirl:400
23- Layer
Duplicate/Image Mirror
24-
Layer/Merge/Merge Down
25- Mude o
Blend Mode para Overlay
26-
Effects/User Defined Filter/Emboss 3
27-
Effects/3D Effects/Drop Shadow:4/4/60/4/Cor Branca/Repetir com negativo (-4)
28-
Layer/Merge/Merge Visible
29- Aplique a
mask aconforti100911B
30-
Delete/Layer/Merge/Merge Group
31-
Effects/3D Effects/Drop Shadow:4/4/60/4/Cor Preta
32- Layer/New
Raster Layer
33- Layer/Arrange/Send To
Bottom
34- Pinte com uma cor que
combine
35- Maximize
seu Tube
36- Edit
Copy/Edit /Paste/Paste as New layer e posicione no Top(Drop Shadow opcional)
37- Aplique o Brushe
aconforti160211 usando uma cor que combine e aplique a textura como no
ítem 20/posicione como preferir
38- Effects/3D Effects/Drop
Shadow:4/4/60/4/Cor Preta
39- Layer Duplicate/Image Mirror
40- Assine
41- Layer Merge/Merge All e
salve como jpg
Outros Modelos:
Créditos:
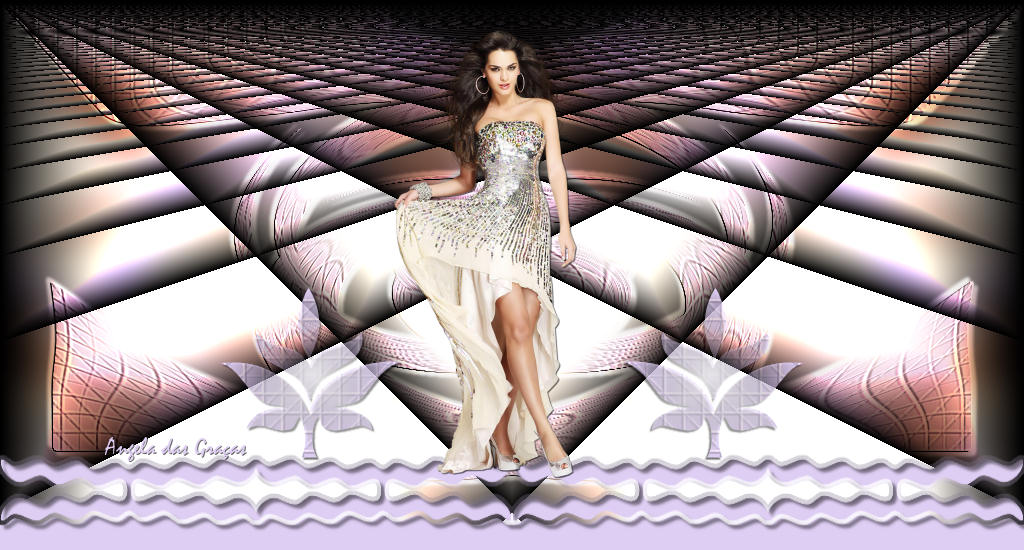
Tube do Top Principal: Grisi
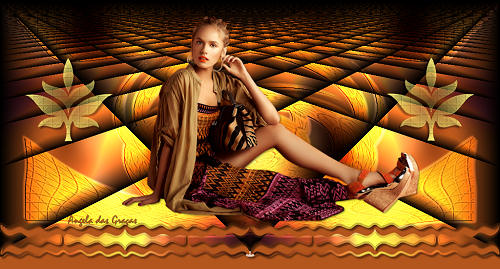
Tube do 1º modelo:Mary
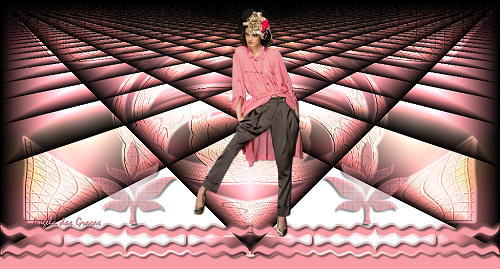
Tube do 2º modelo: anna.br
Mask: aconforti100911B
Tutorial
elaborado por Angela das Graças, em 04/04/12, sendo proibida sua divulgação
sem o prévio consentimento da autora.