01- Abra o PSP, os tubes, o Alpha Channel e as Masks
02- Edit / Copy. Feche os originais
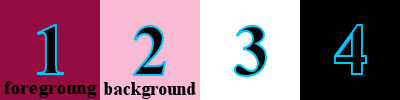
03- Cores usadas na Tag principal
04- Abra a cópia do Alpha Channel
Cor 1 no Foreground e cor 2 no background
05- Forme um gradiente com essas cores:
Linear / Angle: 45 / Repeats: 0
Invert desmarcado
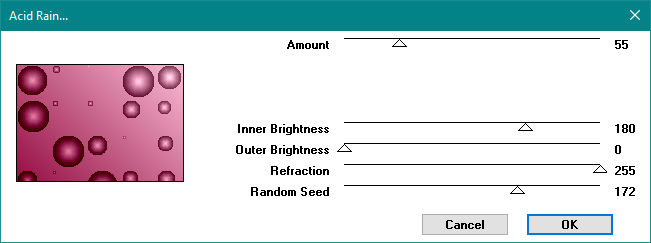
06- Effects / Plug-ins / VM Natural / Acid Rain:
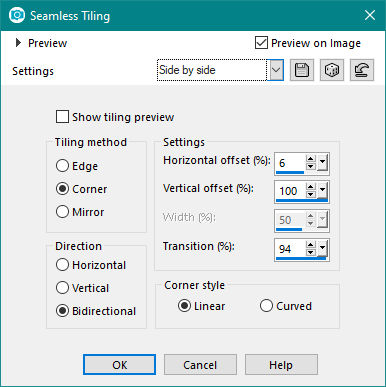
07- Effects / Image Effects / Seamless Tiling: Side by side
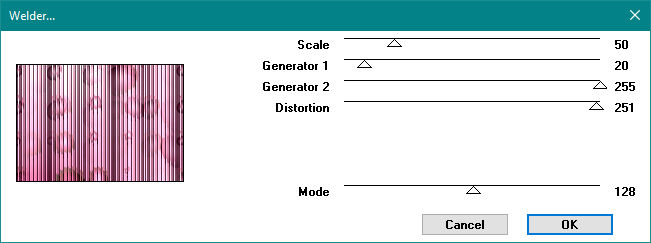
08- Effects / Plug-ins / VM Natural / Welder:
09- Layers / New Raster Layer
Selections / Select All
10- Edit / Copy na imagem background
Aqui você vai usar somente a Layer Background
11- Volte a Tag
12- Edit / Paste Into Selection
13- Effects / Edge Effects / Enhance More
Blend Mode: Multiply
14- Selections / Select none
15- Layers / Merge / Merge Down
16- Layers / New Raster Layer
Pinte com a cor 3 (#ffffff)
17- Layers / New Mask Layer / From Image: Narah_mask_0196
Invert desmarcado
18- Effects / Edge Effects / Enhance More
19- Layers / Merge / Merge Group
20- Effects / 3D Effects / Drop Shadow:
10 / 10 / 100 / 20 / #000000
21- Layers / New Raster Layer
Pinte com a cor 4 (#000000)
22- Layers / New Mask Layer / From Image: Narah_mask_1743
Invert desmarcado
23- Effects / Edge Effects / Enhance More
24- Layers / Merge / Merge Group
25- Effects / 3D Effects / Drop Shadow:
10 / 10 / 100 / 20 / #ffffff
26- Layers / New Raster Layer
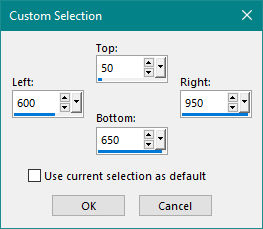
27- Selection Tool / Custom Selection:
28- Volte a imagem background
Na Layer Background de um colorize de acordo com seu trabalho
Tire a visibilidade da Layer Burn
De um Merge Visible
Edit / Copy
29- Edit / Paste Into Selection
30- Selections / Load/Save Selection / Load Selection From Alpha Channel
Selection #1
31- Effects / 3D Effects / Drop Shadow:
0
/ 0 / 100 / 20 / #000000
32- Selections / Load/Save Selection / Load Selection From Alpha Channel
Selection #2
33- Effects / 3D Effects / Drop Shadow:
0
/ 0 / 100 / 20 / #000000
34- Selections / Load/Save Selection / Load Selection From Alpha Channel
Selection #3
35- Effects / 3D Effects / Drop Shadow:
0
/ 0 / 100 / 20 / #000000
36- Selections / Invert
Mantenha a seleção
37- Layers / New Raster Layer
38- Edit / Copy no tube principal
39- Edit / Paste Into Selection
Diminua a Opacity para 60%
40- Selections / Select none
41- Edit / Copy no tube de arranjos
Resize e Sharpness se necessário
42- Effects / 3D Effects / Drop Shadow:
0
/ 0 / 100 / 20 / #000000
43- Selecione a Raster 1
44- Edit / Copy
45- Image / Add Borders: 5 pxl / Symmetric marcado / #000000
Selections / Select All
46- Image / Add Borders: 50 pxl / Symmetric marcado / #ffffff
47- Selections / Invert
48- Edit / Paste Into Selection
49- Adjust / Blur / Gausssian Blur: 15
50- Selections / Select None
51- Image / Add Borders: 5 pxl / Symmetric marcado / #000000
52- Image / Resize: Width: 1000 pxl / Resize All Layers marcado
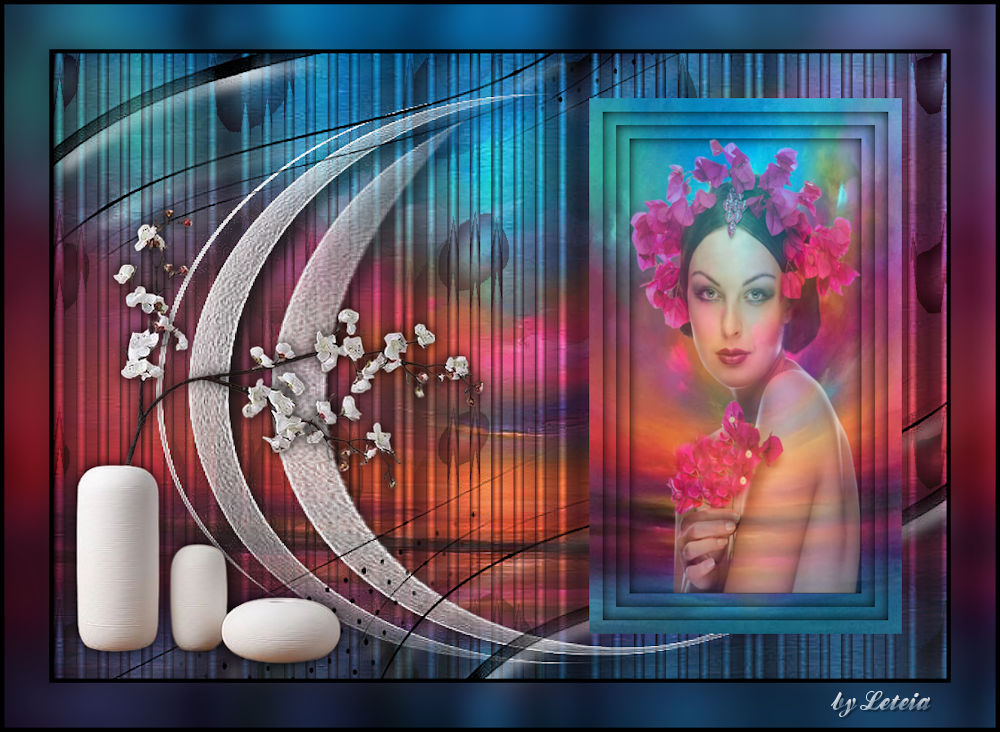
53- Assinar e salvar como jpeg
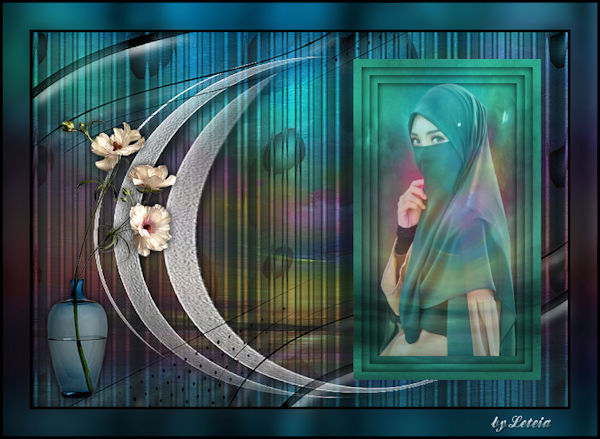
Outros Exemplos

Créditos
Tube feminino principal: Woman1680_byClo
Tube de arranjo principal: 3672 - still life - LB TUBES
Tube 1º exemplo: Woman1672_byClo
Tube de arranjo 1º exemplo: TUBE_NAISEM_FLORES_154
Tube 2º exemplo: jeanne_woman~_06_03_2021
Tube de arranjo 2º exemplo: Deco 57-Luz Cristina
Tutorial elaborado por Alessandra (Letéia), em 06 de dezembro de 2022,
sendo proibida sua divulgação sem o prévio consentimento da autora