|
Link tutorial original:
sophie |
| Tubes Principais:
VM Tubes
|
| Link material:

|
| Plugins: Filters Unlimited
2.0 / &<Bkg Designer sf10 III> / Superchecker3D
Filters Unlimited 2.0 / Render / Wood (scaled, fore-/background)
MuRa’s Meister / Perspective Tiling
Filters Unlimited 2.0 / &<Bkg Designer sf10 III> / SE
Shiver |
SCRIPT
1. Open PSP, Mask and Tube
2. Edit/Copy
Close the originals
3. Edit/Paste as New Image
4. Choose two tube colors: a dark one for the foreground and a light
one for the background
5. Open a new transparent image measuring 900 x 600px
Paint with light color
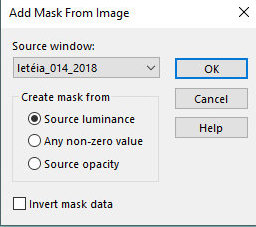
6. Layers / New Mask Layer / from Image: leteia_014_2018
7. Merge Group
8. Layers/New Raster Layer
Paint with dark color
9. Layers/Arrange/Move Down
10. Merge Visible
11. Layers / New Raster Layer
Paint with dark color
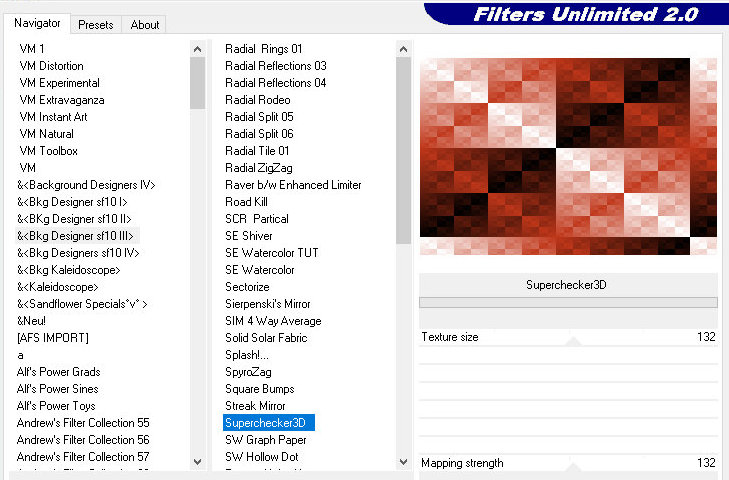
12. Effects / Plugins / Unlimited 2 / BKG Designer sf10 III /
Superchecker3D
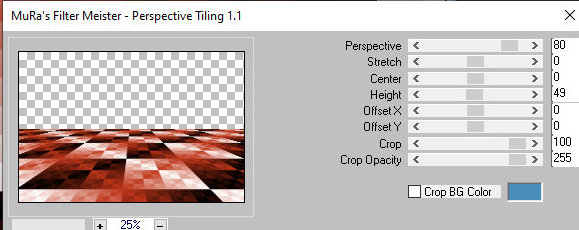
13. Effects / Plugins / Mura's Meister / Perspective Tiling
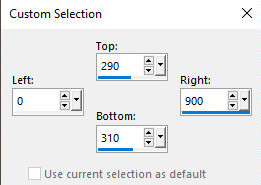
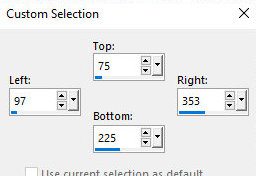
14. Activate the Selection Tool/Custom and configure:
15. Layers / New Raster Layer
Paint with dark color
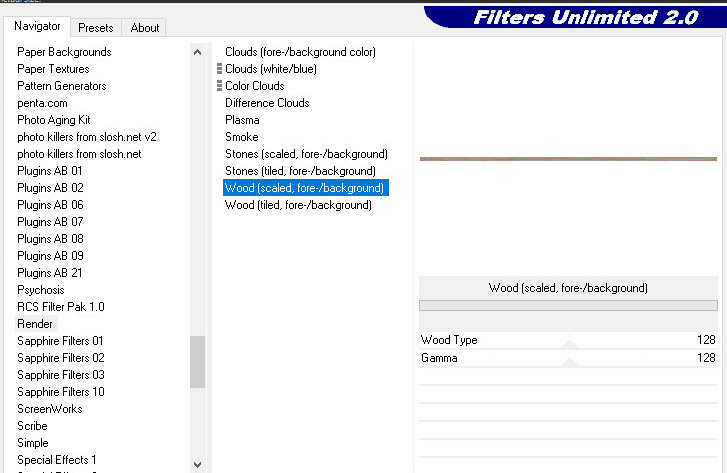
16. Effects / Plugins / Unlimited 2 / Render / Wood (scaled, fore-/background)
17. Effects / Edge Effects / Enhance More
18. Layers / New Raster Layer
Paint with a dark color with Flood Fill (bucket) with opacity=60
19. Merge Down
Select none
20. Activate the Merged layer
Selections Tool / custom Selection
21. Selections / Promote selection to layer
Select none
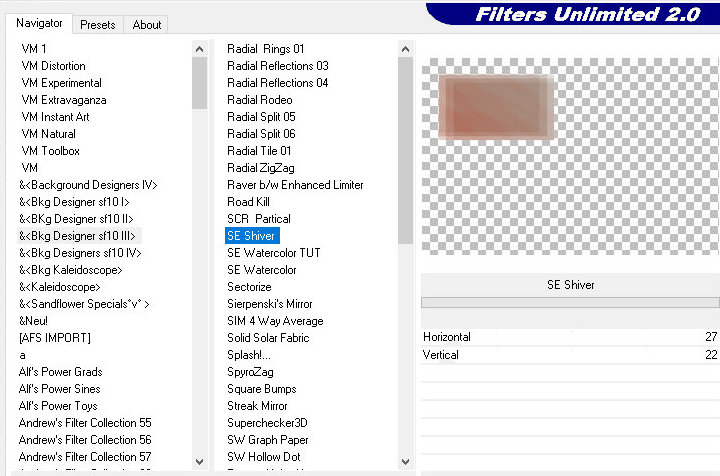
22. Effects / Plugins / Unlimited 2 / BKG Designer sf10 III / SE
Shiver
23. Adjust / Sharpness / Sharpen More
24. Layers/Duplicate
Image / Mirror / Mirror Horizontal(Mirror)
25. Merge Down
26. Copy the Misted Landscape tube
Paste as new layer
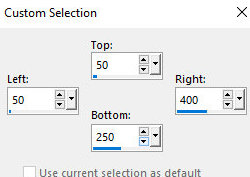
27. Activate the Selection Tool / Custom and configure:
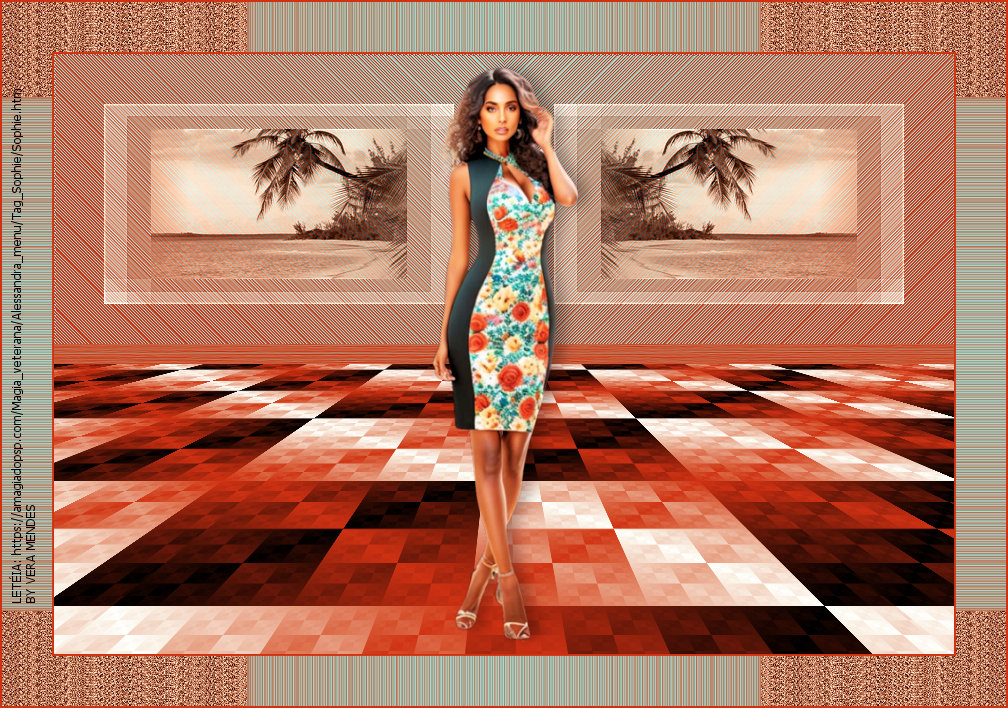
28. Position the image nicely in the selection
Resize the landscape to fit the selection
29. Selections/Invert
Press Delete on the keyboard
30. Select none
31. Layers/Duplicate
Image / Mirror / Mirror Horizontal (Mirror)
32. Merge down
33. Layers / Properties / blend Mode: Luminance or Luminance (L)
34. Copy the main tube
Paste into the image as a new layer
35. Layers / Arrange / Bring to top
36. Resize the tube if necessary
Adjust/sharpness/Sharpen if desired
37. Drop shadow: 0 10 30 20 black
38. Image / Add borders / symmetric marked / 2px / dark color
39. Image / Add borders / symmetric marked / 50px / light color
40. Layers / Promote Background layer
41. Select the 50 px layer with the Magic Wand
42. selections / Promote selection to layer
43. Layers / New Mask Layer / From Image / Mask: leteia_014_2018
same as above
44. Merge Group
45. Activate the Raster 1 layer
Paint with dark color
Merge visible
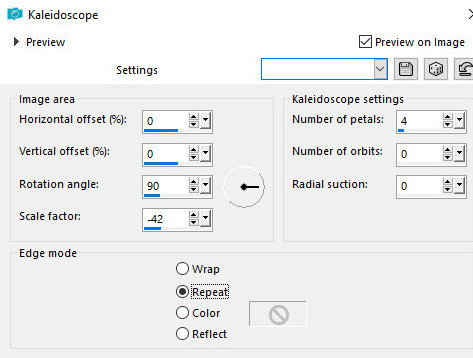
46. Effects / Reflection Effects / kaleidoscope
47. Select none
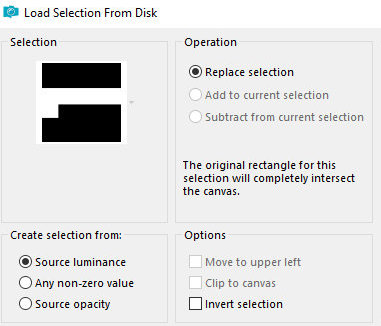
48. Selections / Load selection from disk / Selection: leteia-sophie
49. Selections / Promote selection to layer
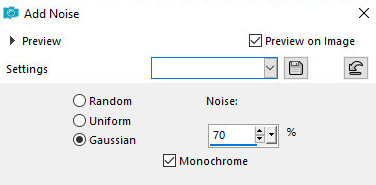
50. Adjust / Add / Remove Noise / Add Noise
51.select none
52. Layers/Duplicate
Image / Mirror / Mirror Horizontal (Mirror)
53. Merge down
54. Image / Mirror / Mirror Vertical (Flip)
Layers/Duplicate
Image/ Mirror / Mirror Vertical (Flip)
55. Image / Add borders / 2px / symmetric marked / dark color
56. Sign and save as jpeg