|
|

Material
Tube principal
Tube paisagem
Efeitos do PSP X5

Roteiro
01
- Abra os tubes.
Do tube principal retire duas cores (uma escura e outra clara).
Reserve-os.
Abra uma imagem transparente 700x550.
02
- Selections / Selection All.
03
- Selections / Modify / Contract: 50.
04
- Selections / Invert.
05
- Effects / 3D Effects / Chisel: 10 / Transparent / Color=branco.
Selections / Select None.
06
- Clique no centro de sua imagem com a Magic Wand.
Selections/
Invert.
07
- Effects / 3D Effects / Chisel: 10 / Transparent / Color=branco.
Selections/ Select None.
08
- Repita os passos 6 e 7, por mais duas vezes.
9 - Selecione o centro da frame e pinte com a cor escura
escolhida no passo 1.
10
- Layers / New Raster Layer.
11
- Edit / Copy no tube paisagem.
Edit
/ Paste into Selection.
Selections / Select None.
12
- Adjust / Sharpness / Sharpen.
13
- Ative a layer Raster 1.
Selecione a borda de fora com a Magic Wand.
14
- Layers / New Raster Layer e pinte com um gradiente Linear / 45
/ 3 / formado pelas cores escolhidas no inicio do trabalho / cor
escura no Foreground / cor clara no Background / Invert
desmarcado.
15
- Adjust / Add Noise/RemoveNoise / Add Noise / Uniform / 7 /
Monochrome marcado.
Effects / 3D Effects / Inner Bevel / preset almofada.
Selections / Select None.
16
- Layers / Arrange / Bring to Top.
17. Layers / New Raster Layer.
Layers / Arrange / Send to Bottom e pinte com a cor escura.
Layers / Merge / Merge Visible.
18. Layers / New Raster Layer.
19. Image / Canvas Size / 850x700 / todos em 75.
20. Selections / Select All.
21. Selections / Modify / Contract / 75.
22. Selections / Invert.
Pinte com o mesmo gradiente / Invert marcado.
23. Effects / Artistic Effects / Topography / preset Color
Emboss.
24. Adjust / Sharpness / Sharpen.
25. Selections / Invert.
26. Effects / 3D Effects / Drop Shadow: 0 / 0 / 80 / 40 / preto.
Selections / Selection None.
27. Edit / Copy no tube principal.
Edit / Paste As New Layer.
Effects / 3D Effects / Drop Shadow a gosto.
28. Layers / New Raster Layer.
29. Selections / Select All.
30. Selections / Modify / Contract / 20.
31. Selections / Invert.
Pinte com o mesmo gradiente / Invert desmarcado.
Effects / 3D Effects / Drop Shadow: 10 / 10 / 50 / 20 / preto.
Repita com valores negativos em V e H.
32. Effects / 3D Effects / Chisel / 8 / Solid color marcado /
cor clara.
33. Selections / Select All.
34. Selections / Modify / Contract / 1.
35. Selections / Invert.
36. Effects / 3D Effects / Chisel / 8 / Solid color
marcado / cor clara.
Selections / Select None.
37. Layers / New Raster Layer e assine.
38. Layers / Merge / Merge All(Flatten).
OPC: Image / Resize / 700x550 / Lock aspect ratio desmarcado /
Resize all layers marcado.
39. Salve.
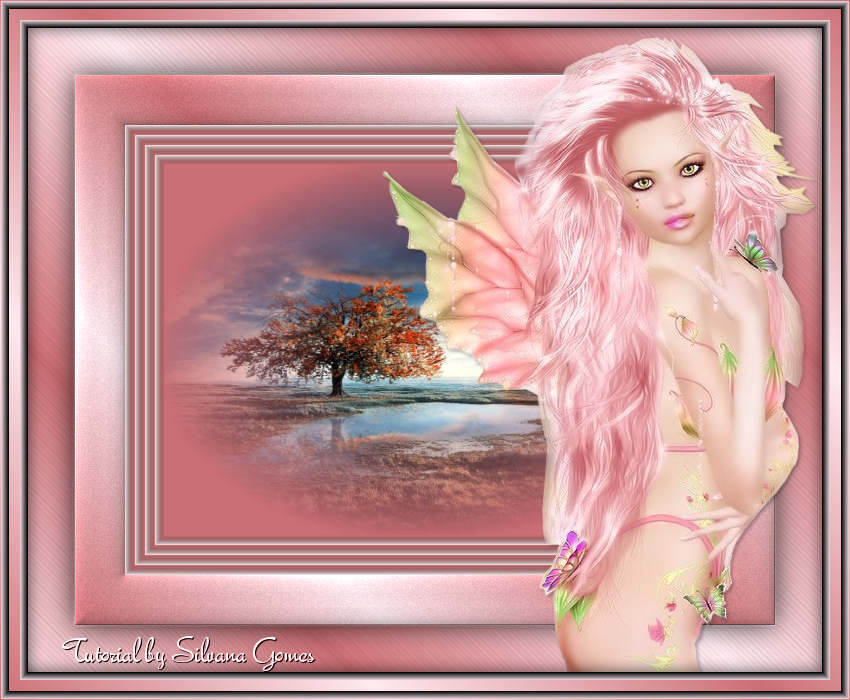
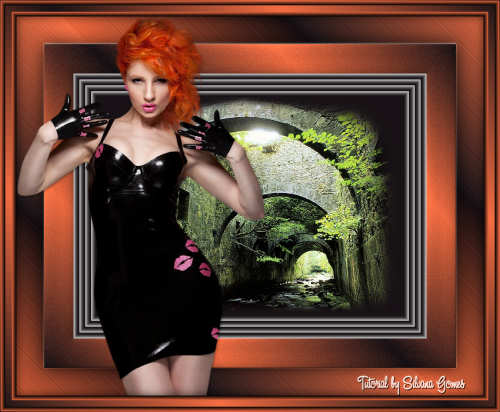
Modelo:
Créditos
Tutorial Silvana Gomes em 10/09/2014.
Athe-PY14
castorke_eng_1_brigitte
Alies1VR405-woman-01042013
anna.br_spain
Tutorial Silvana Gomes em 10/09/2014, sendo proibido
copiar sem autorização da autora
|