Material
Tube
Mask gradiente aconforti03
Efeitos do PSP X
Plugim VM Toolbox/ radial mosaic
Plugin VM Toolbox/ zoom blur
Roteiro
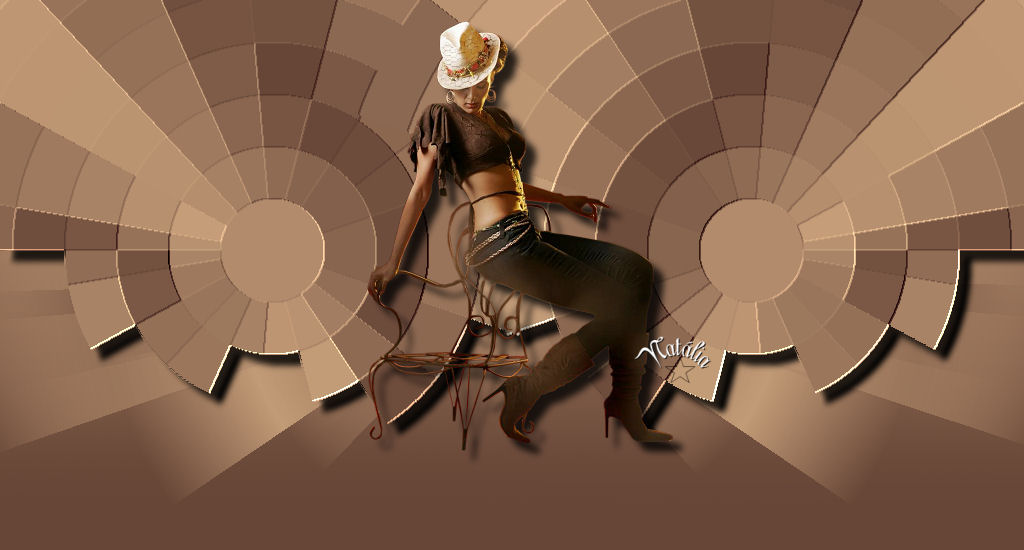
01. Abra um tube no PSP.
02. Retire duas cores do tube e faça um gradiente linear: angle/ 45, repeats/ 5.
Invert desmarcado.
Cor escura no foreground, cor clara no background.
03. Abra uma imagem transparente 1024X500 e pinte com o gradiente.
04. Effects/ edge effects/ enhance more.
05. Effects/ geometric effects/ perspective vertical: distortion/ 75, transparent
marcado.
06. View rulers. Com a ferramenta pick, suba a imagem até a marca 350.
07. Effects/ plugins/ VM Toolbox/ radial mosaic/ 93/ 94/ 128.
08. Effects/ image effects/ offset/ horizontal: -240/ vertical: 0/ transparent
marcado, custom marcado
09. Layers/ duplicate. Image/ mirror.
10. Layers/ merge/ merge down.
11. Image/ canvas size 1024X550/ bottom: 50, demais valores: 0.
12. Layers/
duplicate.
13. Effects/ plugins/ VM Toolbox/ zoom blur: 60/ 60.
14. Layers/ arrange/ send to bottom.
15. Na raster 1, aplique effects/ user defined filter/ preset: emboss 3.
16. Ainda na raster1, aplique effects/ 3D effects/ drop shadow/ 10/ 10/ 80/ 10,00/
preto.
17. Layers/ new raster layer. Pinte com o gradiente, mudando para linear/ 0/0/
invert desmarcado.
18. Layers/ arrange/ send to bottom.
19. Layers/
merge/ merge visible.
20. Aplique a mask gradiente.
21. Layers/
delete. Layers/ merge/ merge group.
22. Layers/ new raster layer.
23. Layers/
arrange/ send to botton.
24. Pinte
com a cor escura do gradiente.
25. Edit/copy
no tube e Edit/Paste as new layer no top
26. Aplique
Effects/ 3D effects/ drop shadow/ 10/ 10/ 80/ 10,00/ preto.
27. Layers/ merge/ merge all.
28. Assine
e salve em .jpg
*Créditos:
Tutorial: Natália Raposo
Tube: Guismo
Tube
outro modelo: Hebe
Tutorial
criado por Natália Raposo sendo proibida sua divulgação sem o
prévio
consentimento da autora