|
|

Material
Tube
Mask ao1mask9
Pattern: 2-cmlstgold005
Efeitos do PSP X5 
Roteiro
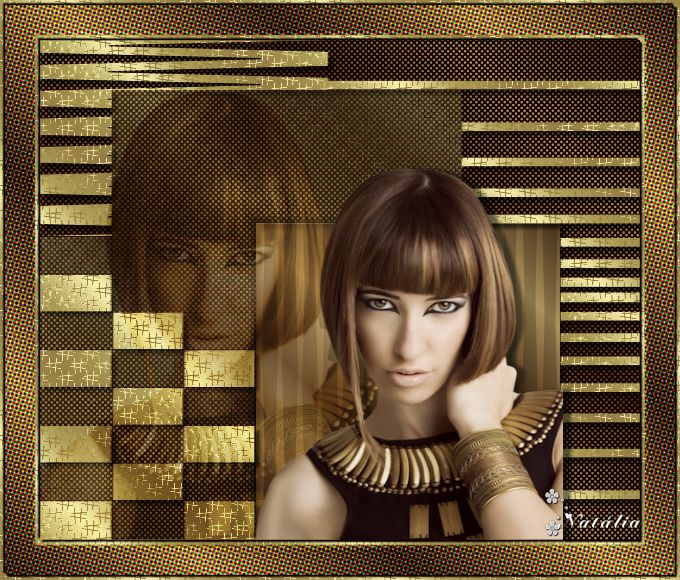
1 - Abra o tube, a pattern dourada e a mask no PSP.
2 - Abra uma imagem transparente 600X500 e pinte com a pattern. Configuração: angle/0, scale/100.
3 - Aplique a mask. Layers/ invert mask/ adjustment.
4 - Layers/ delete. Layers/ merge/ merge group.
5 - Effects/ 3D effects/ drop shadow/ 5/ 5/ 50/ 5,00.Preto.
6 - Layers/ new raster layer.
7 - Pinte com um gradiente formado por duas cores do tube:
configuração linear/ angle 45/ repeats 5.
Invert desmarcado.
8 - Layers/ arrange/ send to bottom.
9 - Effects/ artistic effects/ halftone/ settings/ Screendoor.
Configuração: Halftone pattern: square/ size
2/ screen angles 135/ use as overlay marcado/ blend mode burn/
opacity/ 100/ greyscale marcado/ ink:
cor branca/ background: cor preta/ transparente desmarcado.
10 - Layers/ new raster layer/Layers/ arrange/ bring to top
11 - Ferramenta selection tool/ Custom selection/ top 185/ left
213/ bottom 500/ right 521.
12 - Pinte com o gradiente do item 7. Selections/ select none.
13 - Effects/ artistic effects/ halftone/ settings/ vertical
black lines. Configuração: Halftone pattern: line/
size 10/ screen angles 180/ use as overlay marcado/ blend mode
normal/ opacity/ 20/ greyscale
marcado/ ink: cor preta/ background: sem cor/ transparente
marcado.
14 - Effects/ 3D effects/ drop shadow/ 5/ 5/ 50/ 5,00.Preto.
Repita com os valores H e V negativos.
15 - Aplique o tube, ajeitando-o nesse retângulo, de acordo com
o seu gosto. Effects/ 3D effects/ drop
shadow/ 0/ 8/ 50/ 5,00. Preto. Deixe o tube acima de todas as
layers.
16 - Aplique o tube novamente, um pouco maior que o anterior.
Ajeite-o do lado esquerdo. Mude a
blend mode para soft light e a opacidade entre 45% e 75% (vai
depender do tube e das cores usadas, eu usei 75%)/Deixe essa
layer abaixo do Tube já aplicado
17 - Image/ add borders/ 5 / symmetric marcado. Qualquer cor
diferente da imagem.
18 - Selecione com a ferramenta magic wand e pinte com a pattern
dourada, usando a mesma
configuração anterior.
19 - Selections/ invert. Effects/ 3D effects/ drop shadow/ 2/ 2/
100/ 2,00. Preto. Repita com os valores H
e V negativos. Selections/ select none.
20 - Image/ add borders/ 30 / symmetric marcado. Qualquer cor
diferente da imagem.
21 - Selecione com a ferramenta magic wand e pinte com o
gradiente do item 7.
22 - Effects/ artistic effects/ halftone/ settings/ default.
Configuração: Halftone pattern: round/ size 2/
screen angles 108/162/90/ use as overlay desmarcado/ RGB
marcado.
23 - Selections/ select none.
24 - Image/ add borders/ 5 / symmetric marcado. Qualquer cor
diferente da imagem.
25 - Selecione com a ferramenta magic wand e pinte com a pattern
dourada, usando a mesma
configuração anterior.
26 - Selections/ invert. Effects/ 3D effects/ drop shadow/ 2/ 2/
100/ 2,00. Preto. Repita com os valores H
e V negativos. Selections/ select none.
27 - Assine e salve em jpeg.
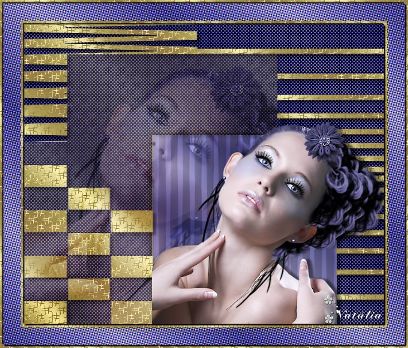
Outro Modelo
Créditos:
Tutorial: Natália Raposo
Tube1: Karine Dreams
Tube2: Papillond Avril
Mask: ao1mask9
Pattern: 2-cmlstgold005
Arte e Formatação: Natália Raposo
Roteiro elaborado por Natália Raposo em maio de 2013 ,
sendo proibida sua divulgação sem o prévio consentimento da autora.
|