
Material
Um tube de pessoa
Plugin
Kiwi' s Oelfilter/Leiwand
Plugin
Filter Factory Galery Q/Mosaic
Plugin
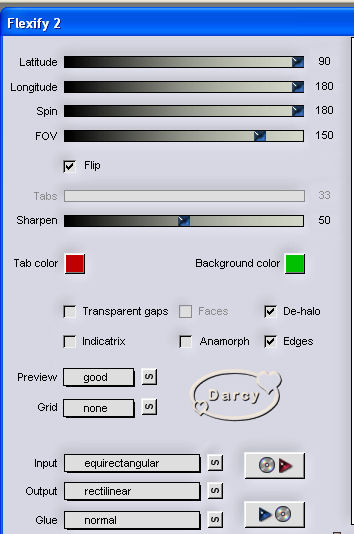
Flaming Pear/Flexify 2
Efeitos
do PSP
Mask: Gradientevertdworisch

Roteiro:
01. Abrir uma Transparência de 1024x500
02. Pintar
com uma cor alegre e diferentente de seu tube.
(Isto é para dar mais vida ao Top)
03. Edit Copy no Tube/ guarde o original
04. Selections/ select All no Top.
05. Edit /Paste Into Selection.
06. Selections/Select none
07. Effects/Image Effects/Seamlles Tiling/Default.
08. Plugin Kiwi’s Oelfiter/Leiwand/133/133/133
09. Plugin Filter Factory Galery Q/Mosaic 18/18
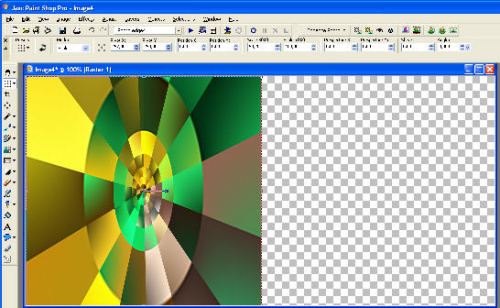
10. Plugin Pear/Flexify 2 (Conforme print abaixo)
11. Com a ferramenta Raster Deform
Tool
(Usar na horizontal, da direita para a esquerda até a metade do centro do Círculo)
Comprimento/512 e altura/500 conforme print abaixo
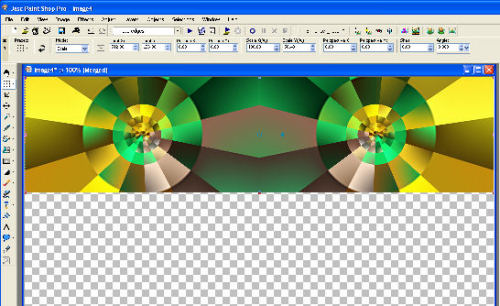
12. Layers /Duplicate
13. Image /Mirror
14. Layer/Merge/Merge visible
15.
Empurre
com a Ferramenta /Raster Deform Tool
(reduzir até a metade do top de baixo para cima
1024x250,
conforme o print abaixo
16. Layer
Duplicate/Image/ Flip
17. Layer/Merge /Merge visible
18. Load save mask/Load mask from disk
19. Aplicar a Mask Gradw
20. Delete/Layers/Merge/Merge Group
21. Image/Canvas Size 1024x 550 bottom 50
22. Layers/ New Raster Layer
23. Pintar com uma cor que combine com seu Top.
24. Layers /Arrange/Send to Botton
25. Layers/Merge/Merge visible
26. Edit Copy no tube
27. No top /Edit /Paste as new Layer
28. E com a ferramenta Move ajeite onde achar melhor.
29. Pode dar um Inner Bever leve ou
Effects/3D effects/Drop shadow suave no tube
30. Assine/Layers/Merge/Merge all
31. Salve em .jpg
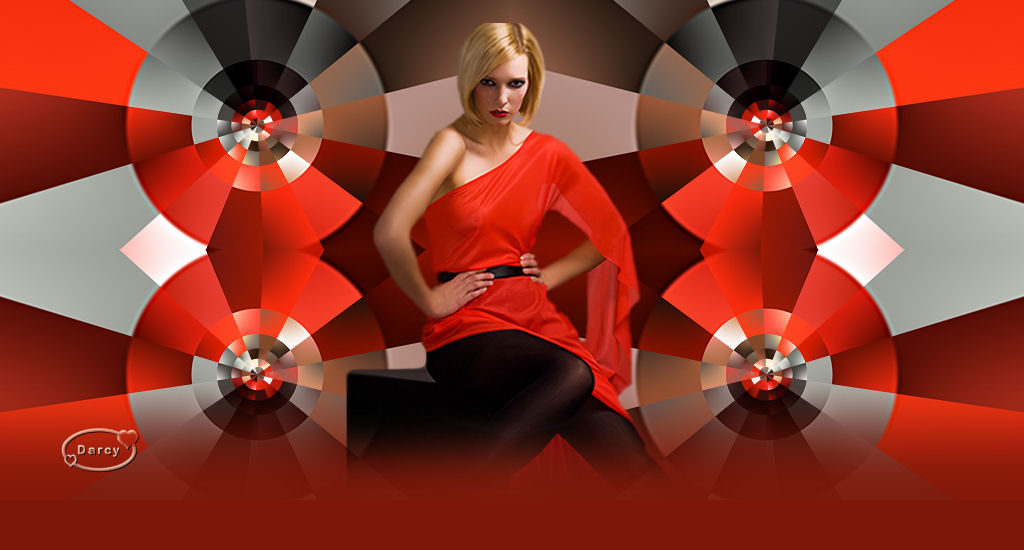
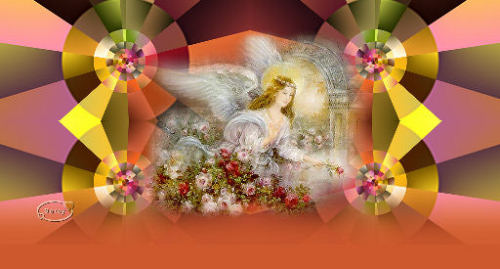
Outro exemplo:
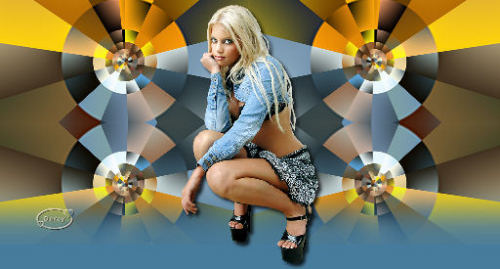
Tube
principal: Luz Cristina
Secundários:
Jun_Blende jeanpackek
Jc-Lenaliu-AngeloLov[1]
Tutorial elaborado por Darcy Maria em 29/04/10 sendo proibida sua divulgação sem
o
prévio consentimento da autora
![]()